The tutorial:
01
Open "419_KaD_Alfakanaal"
This image contains Alpha Selections
Window - Duplicate
(or shift+D) - Close the original and proceed on the copy
Effects - Plugins -
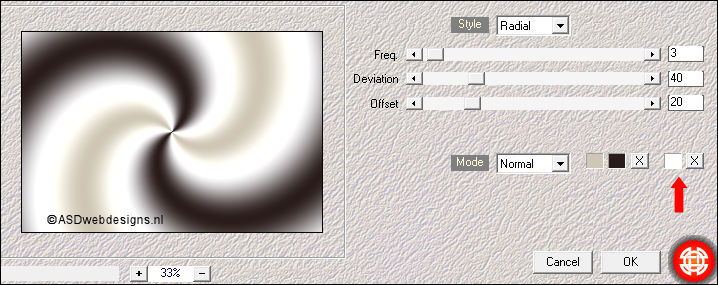
Mehdi - Wavy Lab -
Set the third color
to #ffffff
Adjust - Blur -
Gaussian Blur -
Radius 50
Effects - Plugins -
<I.C.NET Software> -
Filters Unlimited
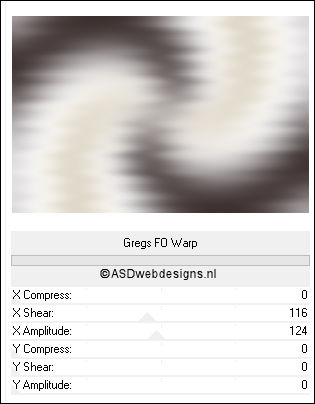
2.0 – &<Bkg Designers sf10 II> – Gregs FO Warp
02
Layers -
Duplicate
Effects - Plugins –
Simple – Pizza Slice Mirror
Effects
- Plugins – Simple – Blintz
Layer Palette -
Double click on this Layer and set the Blend Mode to "Multiply"
03
Layers - Duplicate
Image - Mirror -
Mirror
Horizontal (
Image - Mirror
in previous PSP
Versions)
Image -
Mirror -
Mirror Vertical (
Image - Flip in
previous PSP
Versions)
Layers - Merge -
Merge Down
Effects - Edge
Effects - Enhance
04
Selections - Load/Save
Selection - Load
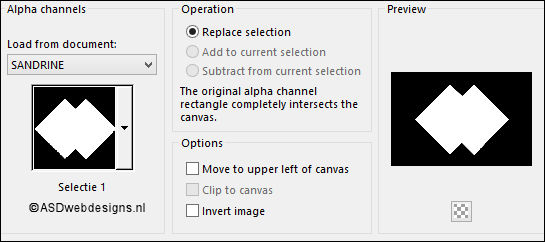
Selection From Alpha
Channel - Selectie 1
Selections - Promote
Selection to Layer
Effects - Plugins -
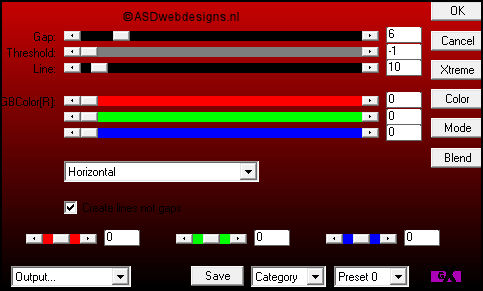
AP 01[Innovations] - Lines - SilverLining
Selections - Select
None
Effects - Image
Effects - Seamless
Tiling
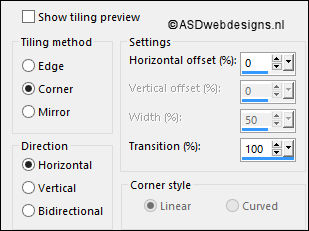
Effects - 3D Effects - Drop
Shadow - Vertical 5 -
Horizontal 5 - Opacity 50
- Blur 10 - Color #000000

Repeat with the Vertical and
Horizontal Offset to
Minus
5
05
Effects - Reflection Effects -
Rotating Mirror
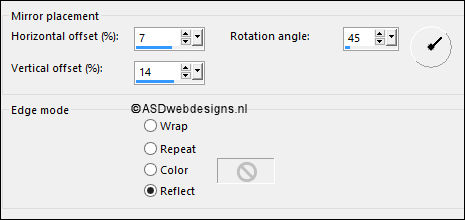
Selections - Load/Save
Selection - Load
Selection From Alpha
Channel - Selectie 2
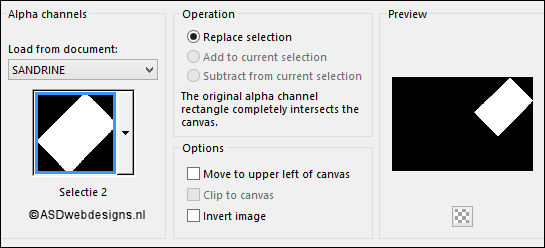
Edit - Cut (Or hit the Delete Key of
your Keyboard)

Selections - Select
None
Layer Palette -
Double click on this Layer and set the Blend Mode to
"Dodge" and the Layer Opacity to 50
Layer
Palette - Click on the Middle Layer
Layers - Merge -
Merge Down
06
Layer Palette: Click
on the Bottom Layer
Layers - New Raster
Layer
Fill with the
Foregroundcolor
Layers - New Mask
Layer - From Image -
MASK-MD-04
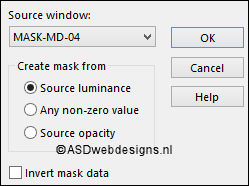
Layers - Merge - Merge Group
Image - Free Rotate - Left checked -
90° -
Both boxes unchecked
Press K
on your
keyboard to
activate the
Pick Tool
Enter these
parameters for the
X and Y
Positions on the
Toolbar
 (59,Minus 5)
Hit any key on
your keyboard to
close the Pick Tool
Selections - Load/Save
Selection - Load
Selection From Alpha
Channel - Selectie 3
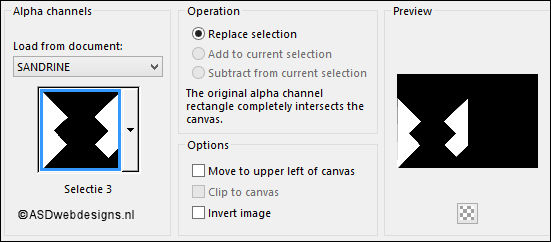
Edit - Cut (Or hit the Delete Key of
your Keyboard)

Selections - Select
None
Layer Palette -
Double click on this Layer and
set
the Opacity of this Layer to
50
Your work and
Layer Palette look
like this now:
07
Layer Palette - Click on the Bottom
Layer
Selections - Load/Save
Selection - Load
Selection From Alpha
Channel - Selectie 4
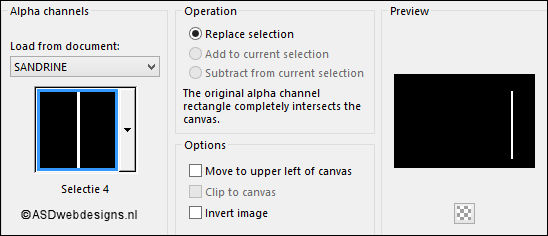
Selections - Promote
Selection to Layer
Layers - Arrange - Bring to Top
Effects - Artistic Effects -
Enamel - Color #ffffff


Effects - Edge
Effects - Enhance
Keep selected
08
Layers - New Raster
Layer
Fill with the
Foregroundcolor

Selections - Modify - Contract - 2 px
Edit - Cut (Or hit the Delete Key of
your Keyboard)

Selections - Select
None
Layers - Merge -
Merge Down
09
Effects - Plugins -
MuRa's Meister -
Copies
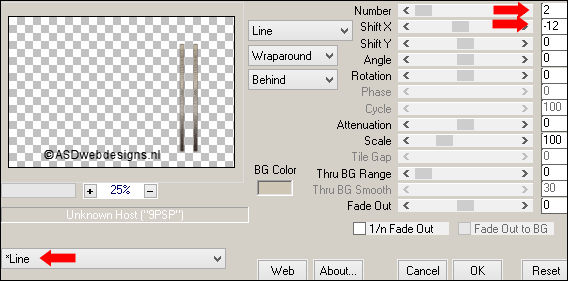
Effects - Distortion Effects - Wind
- From Left checked - Wind Strength:
60
Adjust - Sharpness -
Sharpen More
Image - Roatate Left
Effects - Plugins -
Toadies - Weaver

Effects - Edge
Effects - Enhance
More
Image - Rotate Right
Layer Palette -
Double click on this Layer and set the Blend Mode to
"Overlay"
10
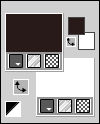
Color Palette:
Change the
Backgroundcolor to
#ffffff

Layer Palette - Click on the Second Layer from
the Bottom
Layers - New Raster
Layer
Fill with the
Backgroundcolor
(Right Mouse Click)
Layers - New Mask
Layer - From Image -
Narah_mask_0428

Layers - Merge - Merge Group
Image - Mirror -
Mirror Horizontal
Layer Palette -
Double click on this Layer and set the Blend Mode to
"Soft Light"
11
Edit - Copy
Special - Copy
Merged
Layer Palette - Click on the Top
Layer
Layers - New Raster
Layer
Selections - Load/Save
Selection - Load
Selection From Alpha
Channel -
Selectie 5
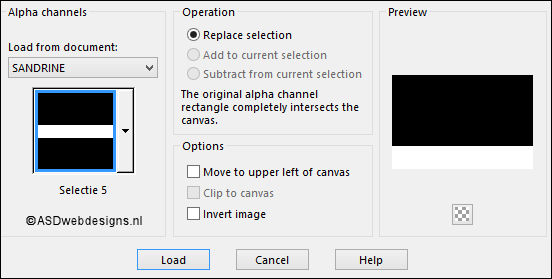
Edit
- Paste
Into Selection
Effects - Plugins -
MuRa's Meister -
Perspective Tiling -
Default settings
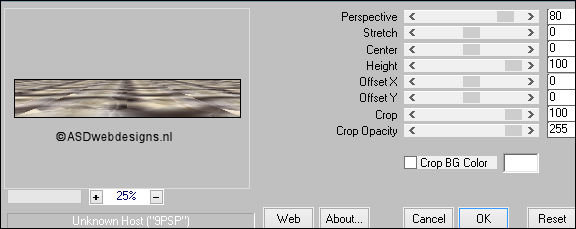
Selections - Select
None
Effects - Geometric Effects -
Cylinder Horizontal - Strength
70 %
Effects - 3D Effects - Drop
Shadow - Vertical 0 -
Horizontal 0 - Opacity 60
- Blur 20 - Color #000000

12
Maximize Tube
"KaD_Woman_110" from
tray
Remove the
Watermark
Edit - Copy
Minimize to
tray, you need it again later
On your work image:
Edit - Paste As New
Layer
Image - Resize - 50% - Resize
all Layers not checked
Move like this:

Adjust - Sharpness -
Sharpen
Adjust - Brightness and Contrast -
Brightness/Contrast
- Brightness 30 - Contrast 0
- Linear Mode
Checked ( this might
not be needed if you
use your own tube)
13
Layers -
Duplicate
Layers - Arrange -
Move Down
Adjust -
Blur - Gaussian Blur - Radius 10
Layer Palette -
Double click on this Layer and set the Blend Mode to
"Multiply" and the Layer Opacity to 60
14
Layer Palette - Click on the Top
Layer
Text Tool
 Font
MorningGloryNF
- Size 110 - Units:
Pixels -
Font Style: Bold -
Stroke
Width 0 - Create
as: Vector
Font
MorningGloryNF
- Size 110 - Units:
Pixels -
Font Style: Bold -
Stroke
Width 0 - Create
as: Vector
Lock the
Foregroundcolor
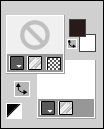
Type: Sandrine or
your own text
Layers - Convert to Raster Layer
Press K
on your
keyboard to
activate the
Pick Tool
Enter these
parameters for the
X and Y
Positions on the
Toolbar
 (118, 37)
Hit any key on
your keyboard to
close the Pick Tool
Effects - 3D Effects - Drop
Shadow - Vertical 2 -
Horizontal 2 - Opacity 50
- Blur 2 - Color #000000

15
Layer Palette: Close
the 4 Top Layers by
clicking on the
little eyes
Click on the 5th
Layer from the top (Promoted
Selection 1)
Edit - Copy Merged
Edit - Paste as
New Image
On this Image:
Effects - Plugins -
AAA Frames - Texture
Frame
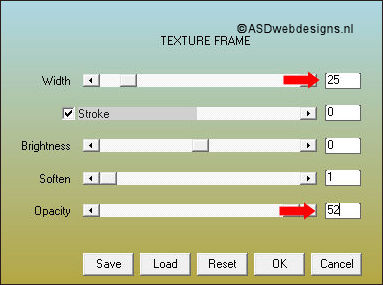
Effects - Plugins -
AAA Frames - Foto
Frame
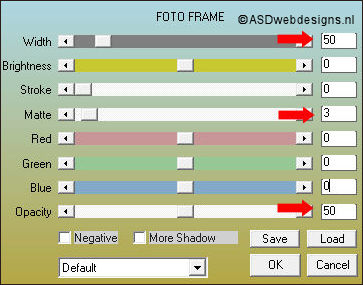
Image - Resize - 20% - Resize all
Layers checked
Maximize Tube
"KaD_Woman_110" from
tray
Edit - Copy
On your work image:
Edit - Paste As New
Layer
Image - Resize - 40% - Resize
all Layers not checked
Image - Mirror -
Mirror Horizontal
Move like this:
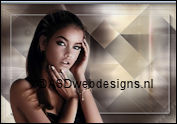
Image - Add Borders - Symmetric
checked - 1 px -
Foregroundcolor

Image - Add Borders - Symmetric
checked - 15 px -
Backgroundcolor

Edit - Copy
16
Go back to your main
work image
Open the 4 layers
again, click on the
Top Layer
Edit - Paste As New
Layer
Image - Resize - 75% - Resize
all Layers not checked
Press K
on your
keyboard to
activate the
Pick Tool
Enter these
parameters for the
X and Y
Positions on the
Toolbar
 (670, 89)
Hit any key on
your keyboard to
close the Pick Tool
Effects - 3D Effects - Drop
Shadow - Vertical 3 -
Horizontal 7 - Opacity 40
- Blur 2 - Color
#2a1c1b

Adjust - Sharpness -
Sharpen
17
Layers - Duplicate
Image - Resize - 75% - Resize
all Layers not checked
Press K
on your
keyboard to
activate the
Pick Tool
Enter these
parameters for the
X and Y
Positions on the
Toolbar
 (576, 224)
Hit any key on
your keyboard to
close the Pick Tool
18
Layer Palette - Click on
the Third Layer from
the Top (Raster 4 ,
the text Layer)
Layers - Duplicate
Image - Resize - 75% - Resize
all Layers not checked
Press K
on your
keyboard to
activate the
Pick Tool
Enter these
parameters for the
X and Y
Positions on the
Toolbar
 (734, 231)
Hit any key on
your keyboard to
close the Pick Tool
19
Color Palette: Unlock the Foregroundcolor
Color Changer Tool


Click with the
Foregroundcolor
 in the text,
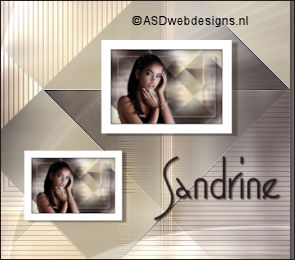
Result:
20
Color Palette:
Change the
Backgroundcolor to
#d0c6b5

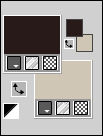
Image - Add Borders - Symmetric
checked - 1 px -
Foregroundcolor

Image - Add Borders - Symmetric
checked - 3 px -
Backgroundcolor

Image - Add Borders - Symmetric
checked - 1 px -
Foregroundcolor

Selections - Select
All
Image - Add Borders - Symmetric
checked - 25 px - #ffffff

Effects - 3D Effects - Drop
Shadow - Vertical 0 -
Horizontal 0 - Opacity 60
- Blur 20 - Color
#2a1c1b

Selections - Select
None
Image - Add Borders - Symmetric
checked - 2 px -
Foregroundcolor

Image - Add Borders - Symmetric
checked - 35 px - #ffffff

21
Maximize Tube
"419_KaD_Deco1" from
tray
Edit - Copy
On your work image:
Edit - Paste As New
Layer
No need to move
If you use your own
colors you can
change it with the Color Changer Tool
 or colorize
Layers - Merge -
Merge All (Flatten)
22
Image - Resize - Width 900 Pixels - Resize all Layers checked
Adjust - Sharpness - Unsharp Mask -
Radius
2 - Strength
30 - Clipping
2 - Luminance Only
not Checked
Optional:
Image - Add Borders - Symmetric
checked - 1 px -
Foregroundcolor

Add your name or watermark, save as JPG
file and you're done!