The tutorial:
01
Open "414_KaD_Alfakanaal"
This image contains Alpha Selections
Window - Duplicate
(or shift+D) - Close the original and proceed on the copy
Effects - Plugins -
Mehdi - Wavy Lab 1.1
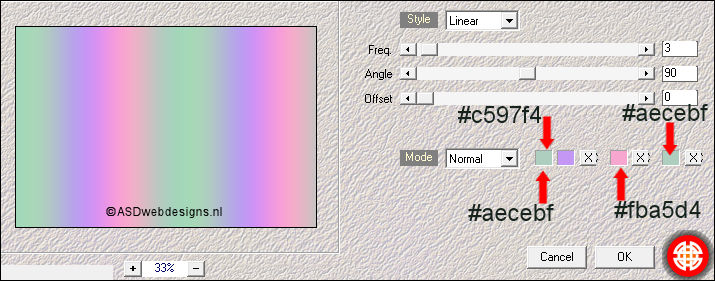
Adjust - Blur - Gassian
Blur - Radius 50
Effects - Plugins -
<I.C.NET Software> -
Filters Unlimited
2.0 - VM Distortion
- Vision Impossible
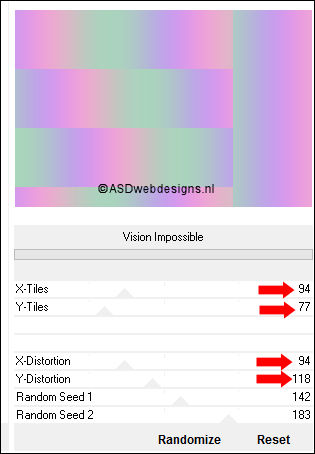
Effects - Plugins -
<I.C.NET
Software>
- Filters
Unlimited 2.0 - &<BKg
Designer sf10 IV> &<Bkg Designers sf IV>
- Easy Corner Upper Left
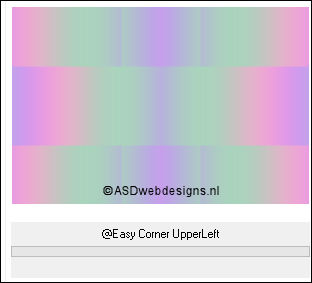
02
Layers - Duplicate
Effects - Edge
Effects- Enhance
More
Effects - Plugins - MuRa's Meister -
Perspective Tiling
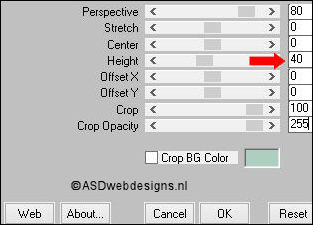
Effects - 3D Effects - Drop
Shadow - Vertical 0 -
Horizontal 0 - Opacity 40
- Blur 20 - Color #000000

03
Layer Palette -
Click on the Bottom
Layer
Selections - Load/Save
Selection - Load
Selection From Alpha
Channel - Selectie 1
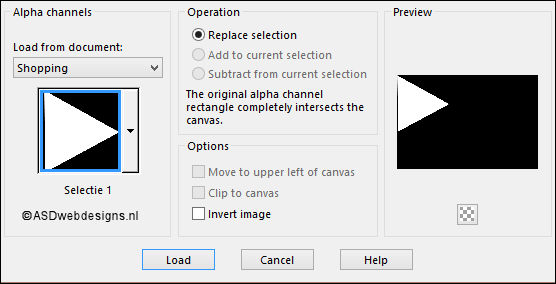
Selections - Promote Selection to Layer
Effects - Texture Effects - Weave -
Weave Color #000000
 - Gap Color
#fffff


Selections - Select
None
Effects - 3D Effects - Drop
Shadow - Vertical 0 -
Horizontal 0 - Opacity 60
- Blur 30 - Color
#16231c

Effects - Distortion
Effects - Wave

Layers - Duplicate
Image - Mirror -
Mirror Horizontal
Layers - Merge -
Merge Down
04
Layers - Duplicate
Image - Resize -
85% - Resize
all Layers not checked
Press K
on your
keyboard to
activate the
Pick Tool
Enter these
parameters for the
X and Y
Positions on the
Toolbar
 (106,Minus 105)
Hit any key on
your keyboard to
close the Pick Tool
Layers - Arrange -
Move Down
Layer Palette -
Double click on this Layer and
set
the Opacity of this Layer to
60
05
Layer
Palette - Click on the Bottom Layer
Layers - New Raster
Layer
Selections - Load/Save
Selection - Load
Selection From Alpha
Channel - Selectie 2
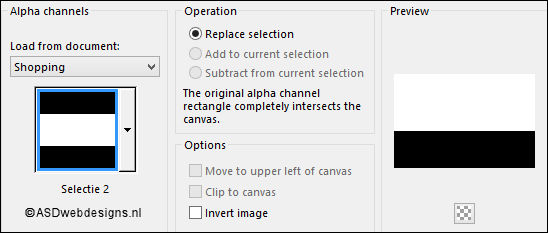
Fill the Selection
with the
Foregroundcolor

Layers - New Mask
Layer - From Image -
2jg046h
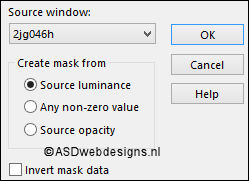
Layers - Merge - Merge Group
Selections - Select
None
06
Layers - Duplicate
Image - Mirror -
Mirror Horizontal
Layers - Merge -
Merge Down
Layer Palette -
Double click on this Layer and set the Blend Mode to
"Burn" and the Layer Opacity to 85
Your work and Layer
Palette look like
this now:
Layer Palette - Click on the Top
Layer
Effects - Plugins - Tramages - Pool
Shadow

08
Layers - Duplicate
Effects - Texture Effects - Texture
- Bricks
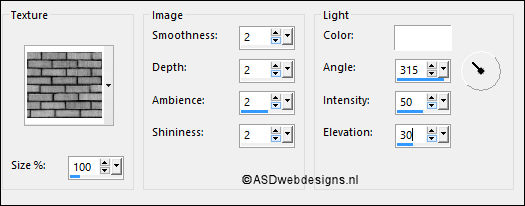
Effects - Plugins - MuRa's Meister -
Perspective Tiling

Layer Palette -
Double click on this Layer and set the Blend Mode to
"Multiply" and the Layer Opacity to 60
09
Maximize Tube
"Shopping" from
tray
Edit - Copy
On your work image: Edit - Paste
As New Layer
Image - Resize - 60% - Resize
all Layers not checked
Move like this:
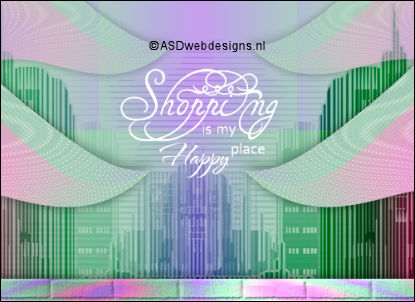
Selections - Select All
Selections - Float
Selections - Defloat
Effects - Plugins - Mehdi - Wavy Lab 1.1
- Same settings

Selections - Select
None
Effects - 3D Effects - Drop
Shadow - Vertical 1 -
Horizontal 1 - Opacity 45
- Blur 1 - Color
#000000

10
Maximize Tube
"KaD_MiscDeco3" from
tray
Selection Tool
- Rectangle - Select the Shopping
bags
Edit - Copy
On your work image: Edit - Paste
As New Layer
Image - Resize - 70% - Resize
all Layers not checked
Layers -
Duplicate
Image - Mirror -
Mirror Vertical
Move against each
other like this:
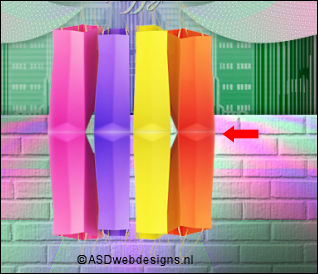
Layers - Arrange - Move Down
Layer Palette -
Double click on this Layer and
set
the Opacity of this Layer to
34
Layer Palette - Click on the Top
Layer
Effects - 3D Effects - Drop
Shadow - Vertical 0 -
Horizontal 7 - Opacity 50
- Blur 34 - Color
#000000

Layers - Merge -
Merge Down
Press K
on your
keyboard to
activate the
Pick Tool
Enter these
parameters for the
X and Y
Positions on the
Toolbar
 (586,304)
Hit any key on
your keyboard to
close the Pick Tool
11
Layers - Duplicate
Image - Resize - 60% - Resize
all Layers not checked
Image - Mirror -
Mirror Horizontal
Press K
on your
keyboard to
activate the
Pick Tool
Enter these
parameters for the
X and Y
Positions on the
Toolbar
 (40,280)
Hit any key on
your keyboard to
close the Pick Tool
Adjust - Sharpness - Unsharp Mask -
Radius
2 - Strength
30 - Clipping
2 - Luminance Only
NOT Checked
12
Maximize Tube
"KaD_Woman_117" from
tray
Selection Tool
- Rectangle - Select the woman
Edit - Copy
On your work image: Edit - Paste
As New Layer
Image - Mirror -
Mirror Horizontal
Image - Resize - 73% - Resize
all Layers not checked
Move like this:
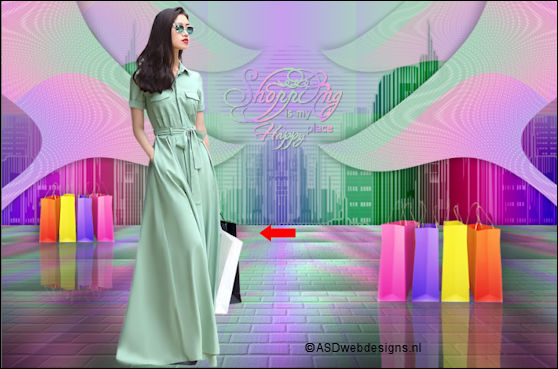
Effects - 3D Effects - Drop
Shadow - Vertical 0 -
Horizontal 7 - Opacity 50
- Blur 34 - Color
#000000

Adjust - Sharpness - Unsharp Mask -
Radius
2 - Strength
30 - Clipping
2 - Luminance Only
NOT Checked
13
Layer Palette - Click on the Bottom Layer
Maximize Tube
"414_Element1" from
tray
Edit - Copy
On your work image: Edit - Paste
As New Layer
Press K
on your
keyboard to
activate the
Pick Tool
Enter these
parameters for the
X and Y
Positions on the
Toolbar
 (5,13)
Hit any key on
your keyboard to
close the Pick Tool
Layer Palette -
Double click on this Layer and
set
the Opacity of this Layer to
50
14
Image - Add Borders - Symmetric
checked - 1 px -
#15231c 
Selections - Select
All
Image - Add Borders - Symmetric
checked - 45 px -
#ffffff

Selections - Invert
Effects - Plugins -
Mehdi - Wavy Lab 1.1
- Same settings

Adjust - Blur - Gassian Blur - Radius
30
Effects - Texture Effects - Weave -
Weave Color #000000
 - Gap Color
#fffff


Keep Selected
15
Layers - New Raster Layer
Effects 3D Effects - Cutout
Effects 3D Effects - Cutout -
Vertical 5 -
Horizontal 5 - Opacity 60
- Blur - 20 - Fill
interior with color NOT
checked - Color #000000

Repeat with the Vertical and
Horizontal Offset to Minus 5
Selections - Select None
16
Image - Add Borders - Symmetric
checked - 1 px -
#15231c 
Image - Resize - Width 900 Pixels - Resize all Layers checked
Add your name or watermark, save as JPG
file and you're done!
If you wish you can post your result on my Face book Page
