The tutorial:
01
Maximize
"395_KaD_Alfakanaal"
from tray (This
image contains
Alpha
Selections)
Selections -
Select All
Maximize
"KaD_Beach4
from tray
Eraser Tool (X)
Remove watermark
Edit - Copy
Minimize to tray
On your Alpha
image: Edit -
Paste - Paste Into
Selection
Seletions -
Select None
02
Effects - Image
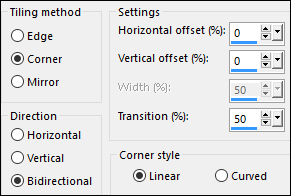
Effects - Seamless
Tiling
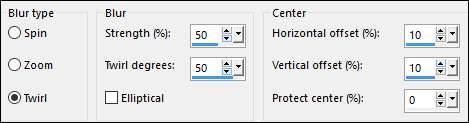
03
Adjust - Blur -
Radial Blur
04
Effects - Plugins
- Toadies - Weaver
Layers - Merge -
Merge All Flatten
Layer Palette:
Right click and
Promote Background
Layer
05
Layers -
Duplicate
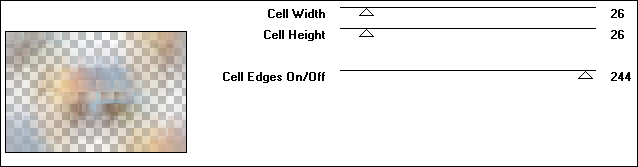
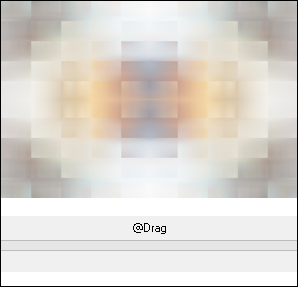
Effects - Plugins
- Filters Unlimited
2.0 - &<Bkg
Designers sf10 IV
-@Drag
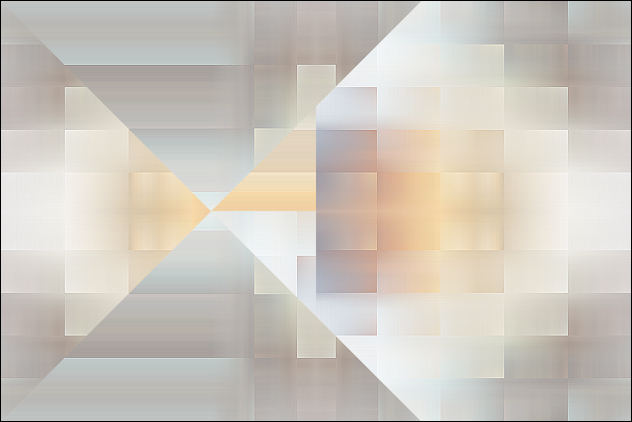
Effects - Edge
Effects - Enhance
06
Effects - Plugins
- Simple - Pizza
Slice Mirror
Layer Palette:
Change the Blend
Mode of this Layer
to Luminance and
lower the Opacity to
50
Adjust -
Sharpness - Sharpen
07
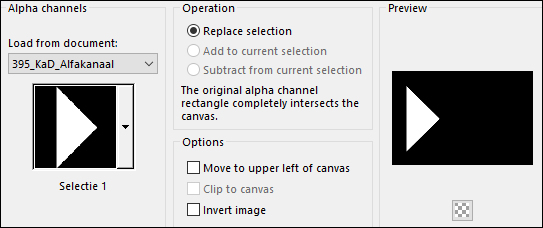
Selections -
Load/Save - Load
Selection From Alpha
Channel - "Selection
1"
Selections -
Promote Selection to
Layer
Selections -
Select None
08
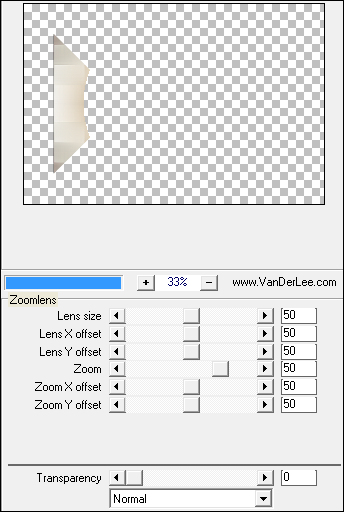
Effects - Plugins
- VanDerLee
Unplugged X -
Zoomlens
09
Effects
Plugins -
It@lian Editors
Effect - Effetto
Fantasma

Image - Mirror -
Mirror Horizontal
(Image - Mirror in
older versions of
PSP)
Adjust -
Sharpness - Sharpen
Effects - 3D
Effects - Drop
Shadow

10
Layers - New
Raster Layer
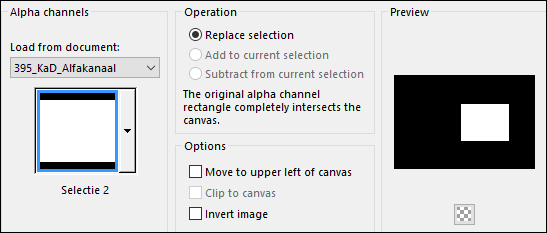
Selections -
Load/Save - Load
Selection From Alpha
Channel - "Selection
2"
11
Flood Fill Tool

Fill the
Selection with the
Backgroundcolor

Selections -
Modify - Contract -
7px
Fill the
Selection with the
Foregroundcolor

Selections -
Modify - Contract -
1px
Edit - Cut
(or hit Delete on
your keyboard)
Keep Selected
Lower the Opacity
of the Flood Fill
Tool to 50

Fill the
Selection with the
Backgroundcolor
Raise the Opacity
of the Flood Fill
Tool back to 100
12
Maximize
"KaD_Beach4
from tray
Edit - Copy
On your work
image: Edit -
Paste - Paste As New
Layer
Layers -
Duplicate
Close the Top
Layer and click on
the original (Layer
below)
Image - Resize -
55% - Resize All
Layers - not
checked
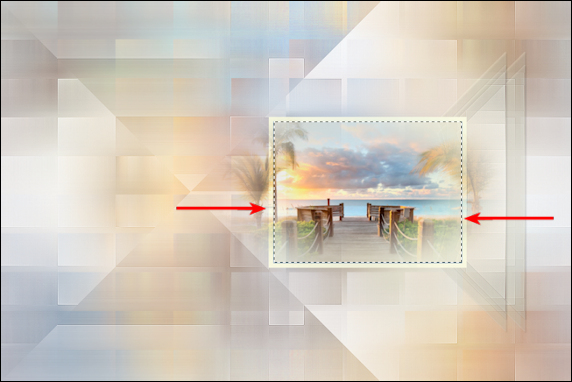
Move the image
into position like
this:
Selections -
Invert
Edit - Cut
(or hit Delete on
your keyboard)
Selections -
Select None
13
Layers - Merge -
Merge Down
Layers - Arrange
- Move Down
Adjust -
Sharpness - Sharpen
14
Layer Palette:
Click on the Layer
just above (Promoted
Selection)
Layers -
Duplicate
Image - Mirror -
Mirror Horizontal
(Image - Mirror in
older versions of
PSP)
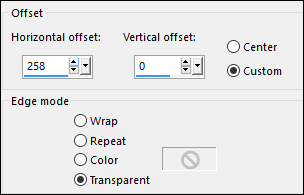
Effects - Image
Effects - Offset
Layer Palette:
Click on the Top
Layer and open it
Layers - Arrange
- Move Down
Edit - Repeat
Layer Move Down
(Twice)
15
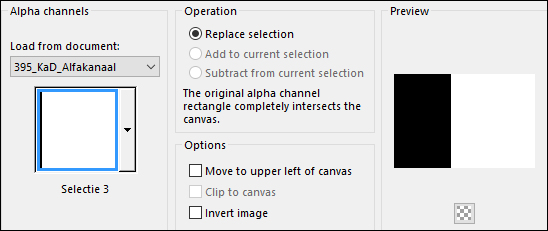
Selections -
Load/Save - Load
Selection From Alpha
Channel - "Selection
3"
Edit - Cut
(or hit Delete on
your keyboard)
Selections -
Select None
Layer Palette:
Change the Blend
Mode of this Layer
to Darken
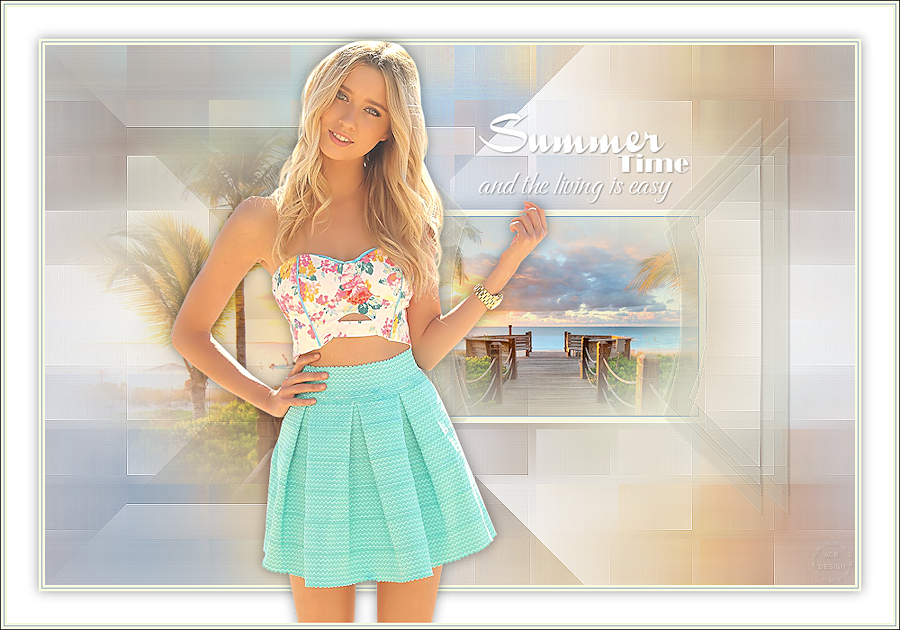
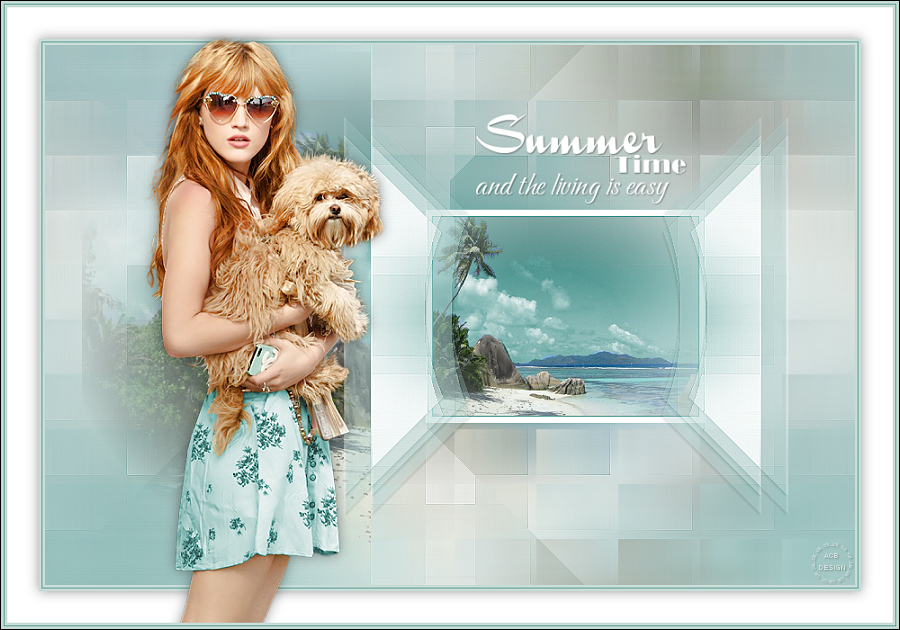
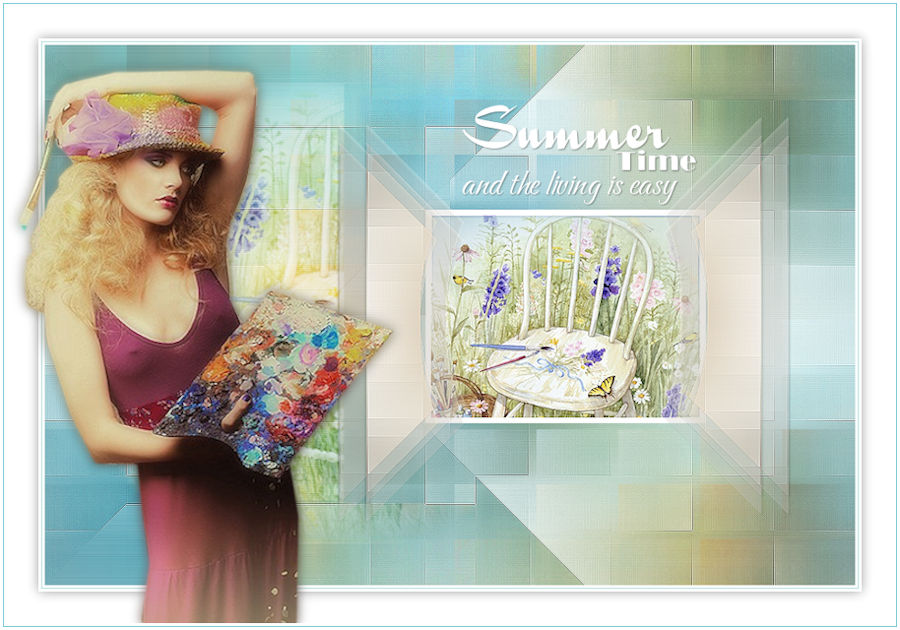
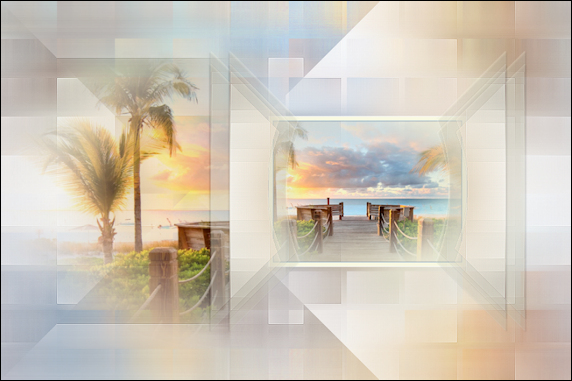
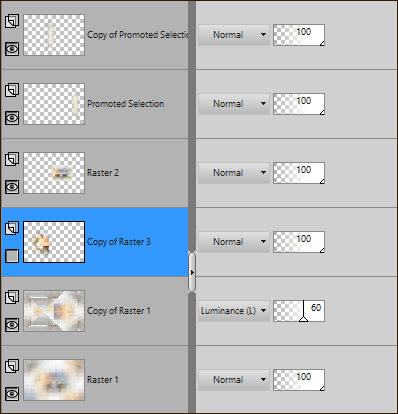
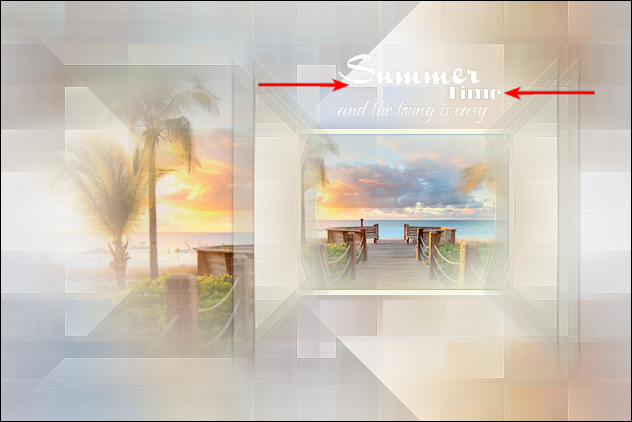
Your work and
Layer Palette should
look like this now:
16
Maximize
"395_KaD_Text
from tray
Edit - Copy
On your work
image: Edit -
Paste - Paste As New
Layer
Layers - Arrange
- Bring to Top
Image - Resize
-90% - Resize All
Layers - not
checked
Move into place
like this:
17
Effects - 3D
Effects - Drop
Shadow
Layers - Merge -
Merge All Flatten
Image - Add
Borders - Symmetric
checked - 3px -
#f7f7fd

Image - Add
Borders - Symmetric
checked - 1px -
#86a8c2
Image - Add
Borders - Symmetric
checked - 3px -
#f7f7fd
Selections -
Select All
Image - Add
Borders - Symmetric
checked - 35px -
#ffffff
Effects - 3D
Effects - Drop
Shadow
Selections -
Select None
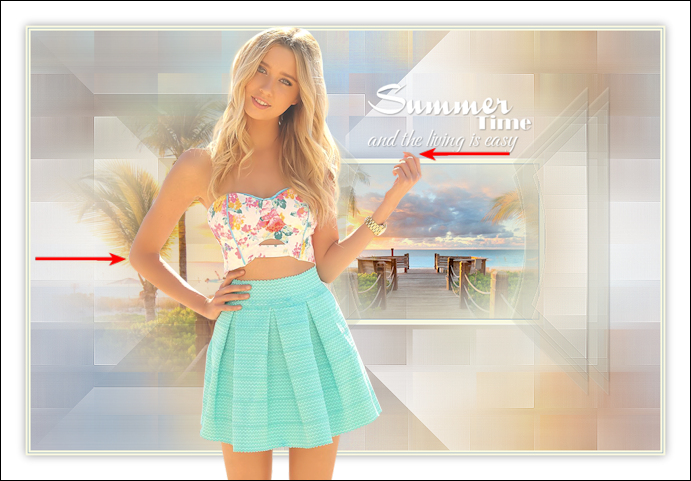
18
Maximize
"KaD_Woman_100"
from tray
Edit - Copy
On your work
image: Edit -
Paste - Paste As New
Layer
Image - Resize -
60% - Resize All
Layers - not
checked
Move slightly
down and to the Left
like this:
Effects - 3D
Effects - Drop
Shadow
Adjust -
Sharpness - Unsharp
Mask

Layers - Merge -
Merge All Flatten
Image - Add
Borders - Symmetric
checked - 3px -
#f7f7fd
Image - Add
Borders - Symmetric
checked - 1px -
#86a8c2
Image - Add
Borders - Symmetric
checked - 3px -
#f7f7fd
19
Optional:
Image - Resize - Width 900 Pixels - Resize all Layers checked
Add your name or watermark, save as JPG
file and you're done!