The tutorial:
01
Maximize "450_KaD_Alfakanaal"
This image contains Alpha Selections
Window - Duplicate
(or Shift+D) - Close the original and proceed on the copy
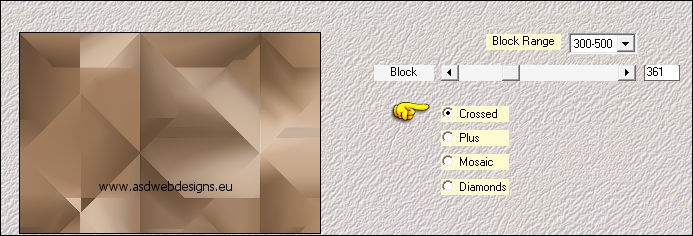
Effects - Plugins -
Mehdi - Wavy Lab 1.1
(The numbers
correspond to the
numbers on the Color
Chart, you can
select them by opening
the Chart in PSP,
double click on
the color in Mehdi
and use the Dropper
Tool on the Color
Chart
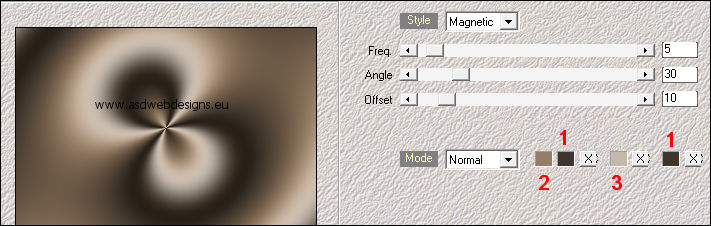
Adjust - Blur -
Gaussian Blur -
Radius 45
02
Layers - Duplicate
Image - Mirror -
Mirror Horizontal
Image - Mirror -
Mirror
Vertical
Layer
Palette - Set the Blend Mode of this Layer to
"Dodge" and the Layer Opacity to 65
03
Layers - Merge -
Merge Down
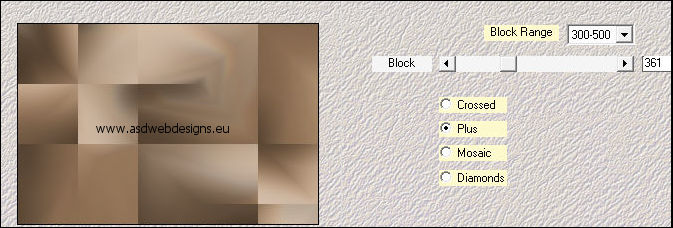
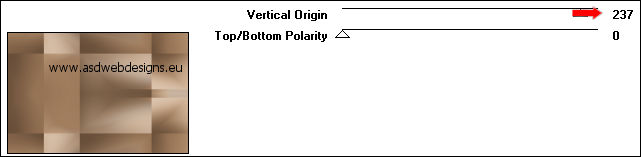
Effects - Plugins -
Mehdi - Sorting
Tiles
Effects - Plugins - Graphics
Plus
- Vertical Mirror
Effects - Edge
Effects - Enhance
04
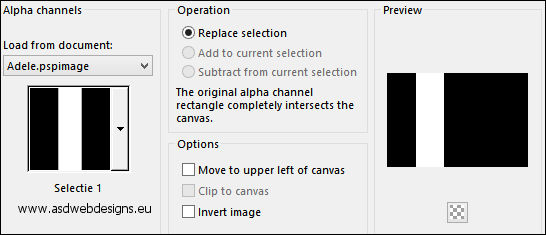
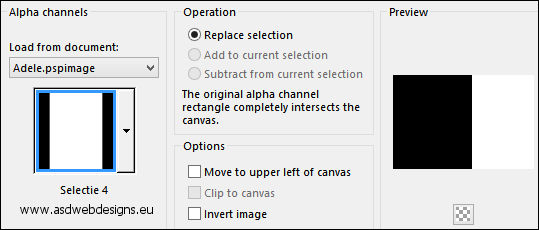
Selections - Load/Save Selection - Load Selection From Alpha Channel
- Selectie 1
Selections - Promote
Selection to Layer
05
Layers - New Raster
Layer
Fill
the Selection with
the Foregroundcolor

Selections - Modify
- Contract - 10 px
Edit - Cut (Or hit
the Delete Key of
your Keyboard)
Layers - Merge -
Merge Down
Effects - Plugins -
Toadies - What Are
You? - X-dose 20 -
Y-dose 20
Selections - Select
None
Effects
- Plugins - Toadies - What Are You? - X-dose 20 - Y-dose 20
Effects - Edge
Effects - Enhance
Image - Mirror -
Mirror Horizontal
Effects 3D Effects -
Drop Shadow - Color: #3f352b
- Shadow on new Layer checked!
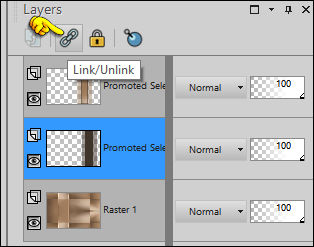
06
On the
same Layer : Click on Unlinck
Effects - Plugins -
Carolaine and
Sensibility -
CS-Linear-H -
Default
Effects - 3D Effects - Drop
Shadow - Vertical 0 -
Horizontal 0 - Opacity 60
- Blur 20 - Color #000000
 - Uncheck Shadow
on New Layer
- Uncheck Shadow
on New Layer
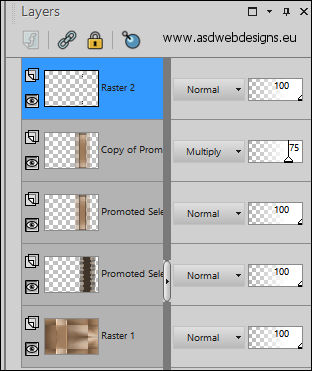
07
Layer Palette - Click on the Top
Layer
Click again on
Unlinck
Layers - Duplicate
Layer
Palette - Set the Blend Mode of this Layer to
"Multiply" and the Layer Opacity to 75
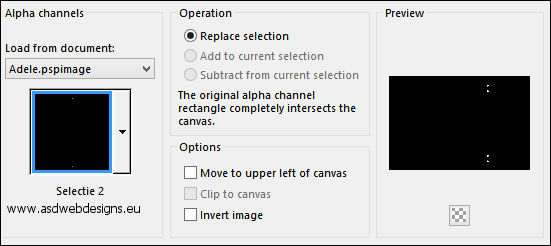
08
Layers - New Raster
Layer
Selections - Load/Save
Selection - Load
Selection From Alpha
Channel - Selectie 2
Fill
with the
Foregroundcolor
Effects - Plugins -
Alien Skin Eye Candy
5 Impact - Glass
- Settings Tab:
Preset
Clear
Selections - Select
None
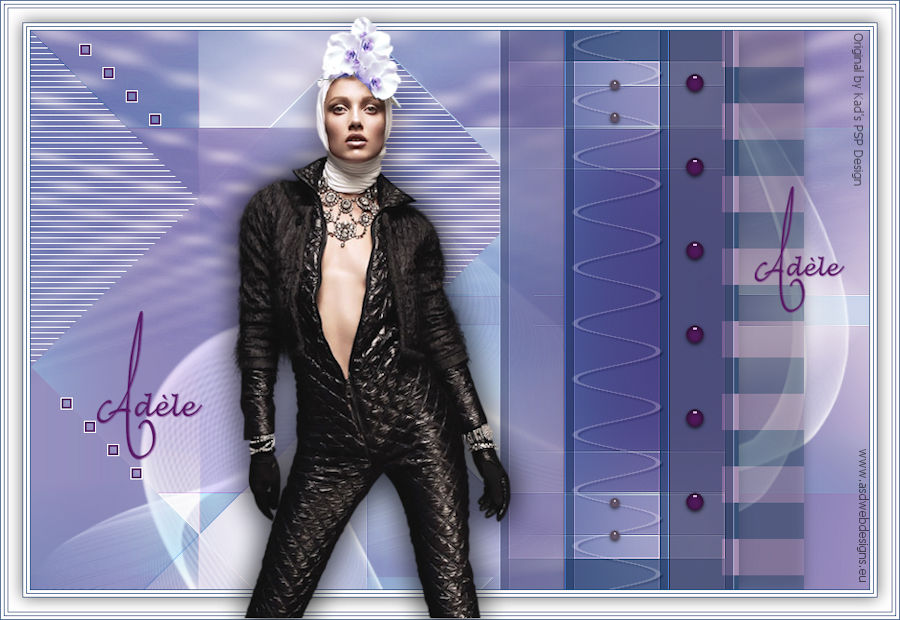
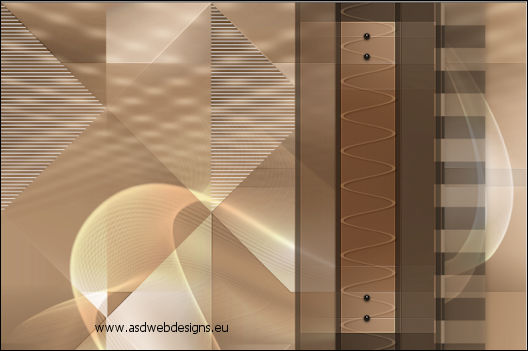
Result:

09
Color Palette:
Change the
Backgroundcolor to
#c6b9ac
Layer Palette - Click on the
Bottom Layer
Layers -
New Raster Layer
Fill
with the
Backgroundcolor

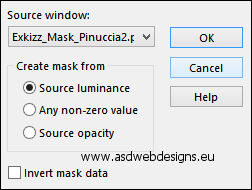
Layers - New Mask
Layer - From Image -
Exkizz_Mask_Pinuccia2
Layers - Merge - Merge Group
Image - Mirror -
Mirror Vertical
Adjust - Sharpness -
Sharpen More
Layer
Palette - Set the Blend Mode of this Layer to
"Hard Light"
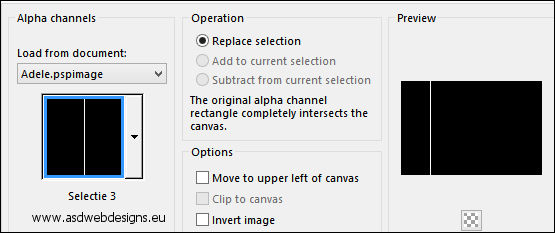
10
Layer Palette - Click on the Top
Layer
Layers - New Raster
Layer
Selections - Load/Save
Selection - Load
Selection From Alpha
Channel - Selectie 3
Fill
with the
Backgroundcolor

Selections - Select
None
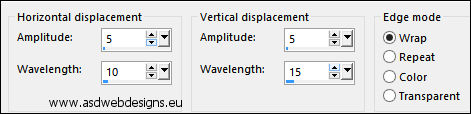
Effects - Distortion
Effects - Wave
Press K
on your
keyboard to
activate the
Pick Tool
Enter these
parameters on the
Toolbar
Position X 581 and Position Y
0
(
If this is new to
you, check my mini
tutorial
HERE)
Hit any key on
your keyboard to
close the Pick Tool
Effects - 3D Effects - Drop
Shadow - Vertical 2 -
Horizontal 2 - Opacity 35
- Blur 2 - Color #000000
Layer
Palette - Set the Blend Mode of this Layer to
"Soft Light"
Layers - Arrange -
Move Down
11
Layer Palette - Click on the
Bottom Layer
Layers - Duplicate
Effects - Plugins -
Mehdi - Sorting
Tiles
Selections - Load/Save
Selection - Load
Selection From Alpha
Channel - Selectie 4
Edit - Cut (Or hit
the Delete Key of
your Keyboard)
Selections - Select
None
12
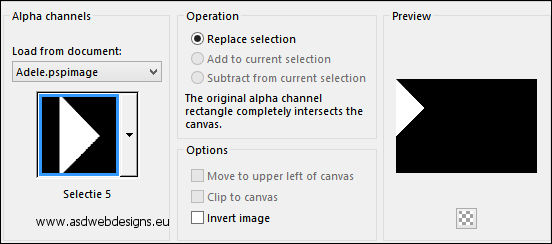
Selections - Load/Save
Selection - Load
Selection From Alpha
Channel - Selectie 5
Selections - Promote
Selection to Layer
Effects - Plugins -
AP 01[Innovations] - Lines - SilverLining

Selections - Select
None
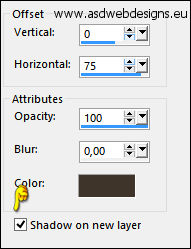
13
Layers -
Duplicate
Effects - Image
Effects - Offset

Layers - Merge -
Merge Down
Selections - Load/Save
Selection - Load
Selection From Alpha
Channel - Selectie 4
Edit - Cut (Or hit
the Delete Key of
your Keyboard)
Selections - Select
None
14
Color Palette:
Change the
Backgroundcolor to #ffffff
Layers - New Raster
Layer
Fill
with the
Backgroundcolor
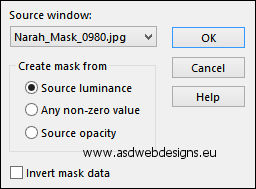
Layers - New Mask
Layer - From Image -
Narah_Mask_0980
Layers - Merge - Merge Group
Image - Mirror -
Mirror Vertical
Layer
Palette - Set the Blend Mode of this Layer to
"Overlay"
Layers - Merge - Merge all (Flatten)
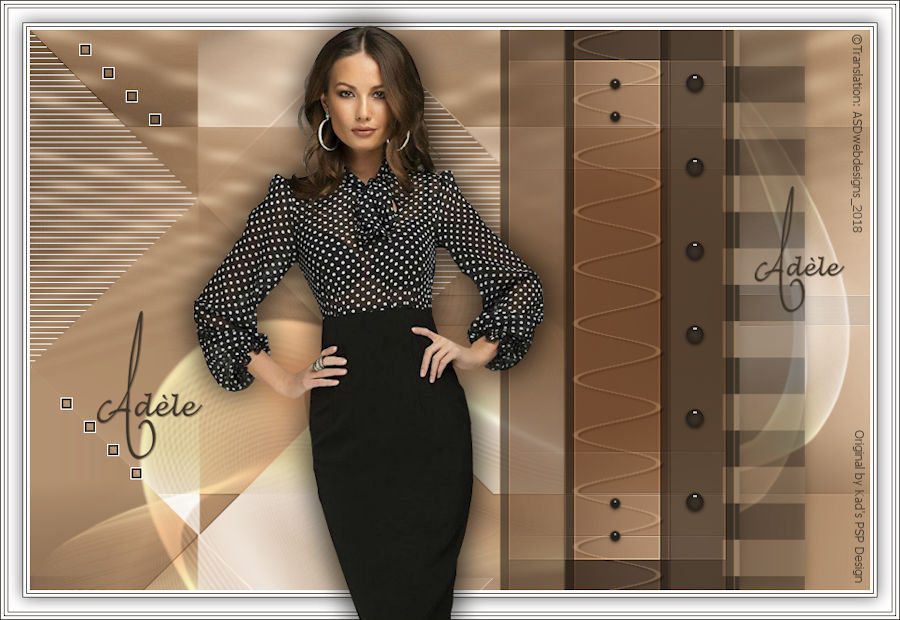
Result:
15
Image - Add Borders - Symmetric
checked - 1 px -
#3f352b
Image - Add Borders - Symmetric
checked - 3 px -
#ffffff

Image - Add Borders - Symmetric
checked - 1 px -
#3f352b
Image - Add Borders - Symmetric
checked - 3 px -
#ffffff
Image - Add Borders - Symmetric
checked - 1 px -
#3f352b
Selections - Select
All
Image - Add Borders - Symmetric
checked - 15 px -
#ffffff
Effects - 3D Effects - Drop
Shadow - Vertical 0 -
Horizontal 0 - Opacity 60
- Blur 25 - Color #000000
Selections - Select
None
16
Image - Add Borders - Symmetric
checked - 1 px -
#3f352b
Image - Add Borders - Symmetric
checked - 3 px -
#ffffff
Image - Add Borders - Symmetric
checked - 1 px -
#3f352b
Image - Add Borders - Symmetric
checked - 3 px -
#ffffff
Image - Add Borders - Symmetric
checked - 1 px -
#3f352b
17
Maximize Tube
"KaD_Woman_17" from
tray
Remove the Watermark
Edit - Copy
On your work image:
Edit - Paste As New
Layer
Image - Resize - 75% - Resize
all Layers not checked
Press K
on your
keyboard to
activate the
Pick Tool
Enter these
parameters on the
Toolbar
Position X 207 and Position Y
27
Hit any key on
your keyboard to
close the Pick Tool
18
Layers - Duplicate
Layer Palette: Click
on the Layer below
Adjust - Blur -
Gaussian Blur -
Radius 15
Layer
Palette - Set the Blend Mode of this Layer to
"Multiply" and the Layer Opacity to 75
19
Maximize Tube
"450_KaD_Deco1" from
tray
Edit - Copy
On your work image:
Edit - Paste As New
Layer
Press K
on your
keyboard to
activate the
Pick Tool
Enter these
parameters on the
Toolbar
Position X 65 and Position Y
47
Hit any key on
your keyboard to
close the Pick Tool
20
Maximize Tube
"450_KaD_Text1" from
tray
Edit - Copy
On your work image:
Edit - Paste As New
Layer
Press K
on your
keyboard to
activate the
Pick Tool
Enter these
parameters on the
Toolbar
Position X 104 and Position Y
200
Hit any key on
your keyboard to
close the Pick Tool
21
Layers - Merge - Merge all (Flatten)
Image - Resize - Width 900 Pixels - Resize all Layers checked
Add your name or watermark, save as JPG
file and you're done!
If you wish you can
post your result on
my Face book Group