The tutorial:
01
Open "437_KaD_Alfakanaal"
This image contains Alpha Selections
Window - Duplicate
(or Shift+D) - Close the original and proceed on the copy
Open the Color chart
from the materials,
leave it open, you
can use it when
changing the colors
in the Plugin
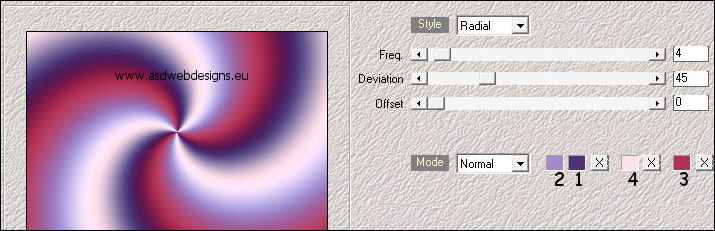
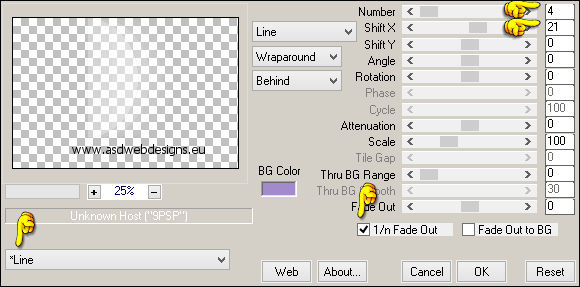
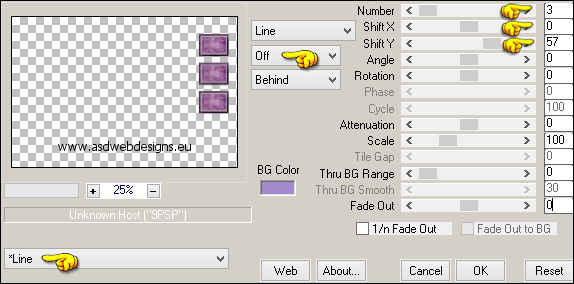
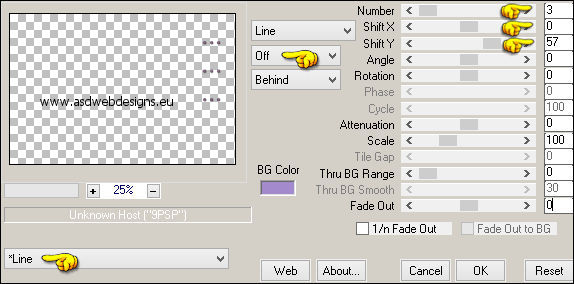
Effects - Plugins -
Mehdi - Wavy Lab 1.1
( The numbers
correspond to the
numbers on the Color
Chart, you can
select them by
double clicking on
the color in Mehdi
and use the Dropper
Tool on the Color
Chart)
Effects - Image Effects - Seamless
Tiling - Default settings
Adjust - Blur - Gaussian Blur -
Radius 45
02
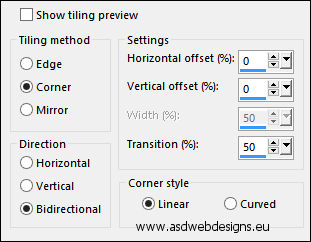
Effects - Plugins -
<I.C.NET
Software>
Filters
Unlimited 2.0 -
&<Bkg Kaleidoscope> -
x Tile Maker 1.0
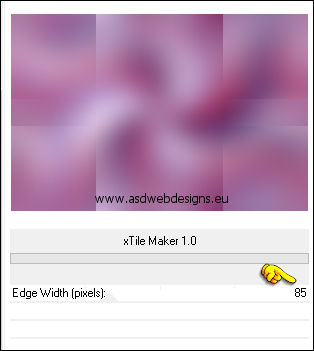
Edit - Repeat Filters Unlimited 2.0 but now
with these settings:
Edge Width: 255
Effects - Edge
Effects - Enhance
Layers - Duplicate
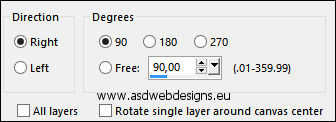
Image - Free Rotate
03
Layer
Palette - Click on the Bottom Layer (Raster 1)
Selections - Select
All
Layer Palette -
Click on the Top
Layer (Copy of
Raster 1)
Image - Crop to
Selection
Adjust - Sharpness -
Sharpen
Layers - Merge -
Merge Down
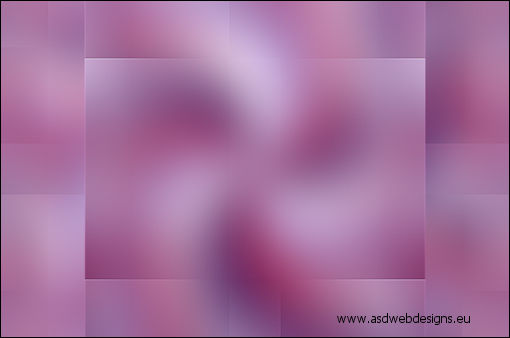
Result:
04
Layers
- Duplicate
Effects - Plugins -
Simple - Pizza Slice
Mirror
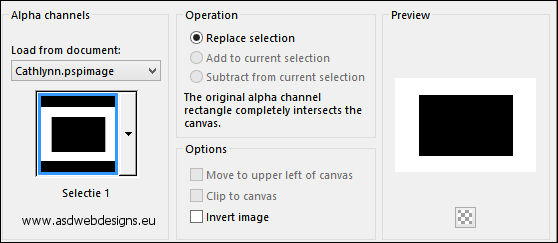
Selections - Load/Save
Selection - Load
Selection From Alpha
Channel - Selectie 1
Edit - Cut (Or hit the Delete Key of
your Keyboard)

Selections - Select
None
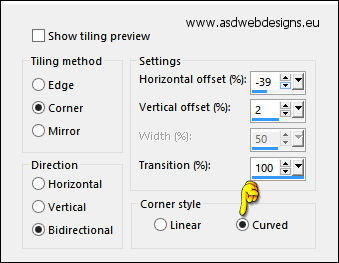
Effects - Image Effects - Seamless
Tiling - Default settings
Effects - 3D Effects - Drop
Shadow - Vertical &
Horizontal 0 - Opacity 80
- Blur 40 - Color #000000

05
Layer Palette - Click on the Bottom Layer
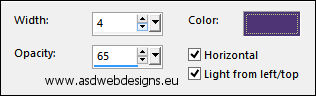
Effects - Texture Effects - Blinds
- Color:
#4e3475

Layers - Duplicate
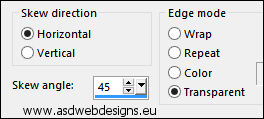
Effects - Geometric
Effects - Skew
Adjust - Sharpness - Sharpen
Layer Palette -
Double click on this Layer and set the Blend Mode to
"Soft Light"
Result:

06
Edit - Copy Special - Copy Merged
Edit - Paste As New
Layer
Layers - Arrange -
Bring to Top
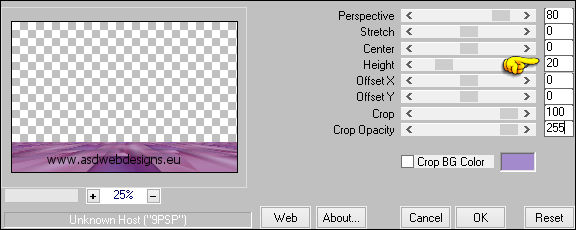
Effects - Plugins - MuRa's Meister -
Perspective Tiling
Effects - 3D Effects - Drop
Shadow - Vertical &
Horizontal 0 - Opacity 40
- Blur 20 - Color #000000
07
Layer Palette: Close
the Top Layer (
Raster 2) by
Clicking on the
little Eye
Click on the Layer
Below (Copy of
Raster 1)
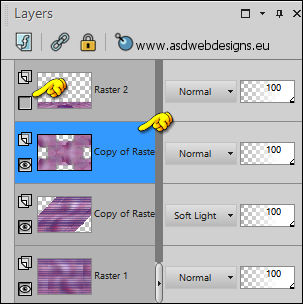
Layers - Merge - Merge Visible
Effects - Image Effects - Seamless
Tiling
08
Layer Palette: Open
the Top Layer
Stay on the Bottom
Layer
Maximize Tube
"437_KaD_Deco1" from
tray
Edit - Copy
On your work image:
Edit - Paste As New
Layer
Press K
on your
keyboard to
activate the
Pick Tool
Enter these
parameters for the
X and Y
Positions on the
Toolbar
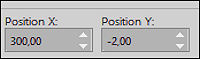 (300,Minus
2)
(300,Minus
2)
Hit any key on
your keyboard to
close the Pick Tool
Effects - Plugins -
MuRa's Meister -
Copies - Click
first on Reset
Adjust - Sharpness -
Sharpen
Layer Palette -
Double click on this Layer and set the Blend Mode to
"Soft Light"
09
Edit - Copy Special - Copy Merged
Edit - Paste As
New Image
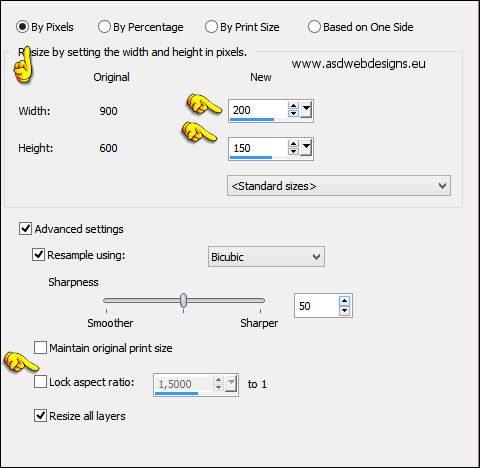
Image - Resize
Adjust - Blur - Gaussian Blur - Radius 5
Window - Duplicate
Minimize the
duplicate to Tray,
you need this later
10
Go back to the other
small Image
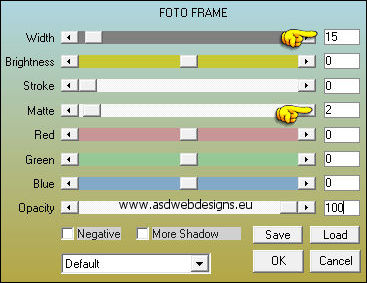
Effects - Plugins -
AAA Frames - Foto
Frame
Edit - Repeat Foto Frame, with
these settings:
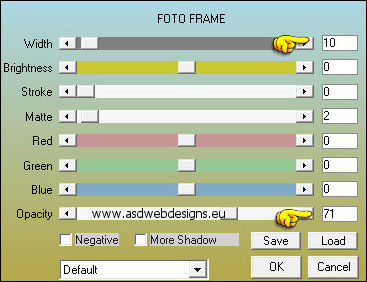
Image - Add Borders - Symmetric
checked - 2 px - #ffffff

Image - Resize - 60% - Resize all
Layers checked - Check Lock
aspect ratio!
Edit -
Copy
11
On your work image:
Edit - Paste As New
Layer
Press K
on your
keyboard to
activate the
Pick Tool
Enter these
parameters for the
X and Y
Positions on the
Toolbar
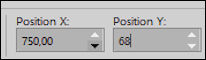 (750,68)
Hit any key on
your keyboard to
close the Pick Tool
Effects - Plugins -
MuRa's Meister -
Copies - Click
first on Reset!!
Effects - 3D Effects - Drop
Shadow - Vertical &
Horizontal 0 - Opacity 40
- Blur 20 - Color #000000
Adjust - Sharpness -
Sharpen
12
Maximize the other
little image from
Tray

Effects - Geometric Effects - Circle
- Transparent checked
Image - Resize - 14% - Resize all
Layers checked
Effects - Plugins -
Alien Skin Eye Candy
5 Impact - Glass
- Settings
Tab:
Preset
Clear
13
Edit - Copy
Minimize to tray you
need it again
later!! ( save as
PSP file to be sure)
Go back to your
original work
Image:
Edit Paste As
New Layer
Image - Resize - 75% - Resize
all Layers not checked
Press K
on your
keyboard to
activate the
Pick Tool
Enter these
parameters for the
X and Y
Positions on the
Toolbar
 (12,125)
Hit any key on
your keyboard to
close the Pick Tool
14
Layers - Duplicate
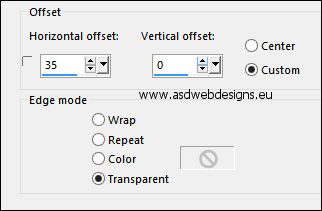
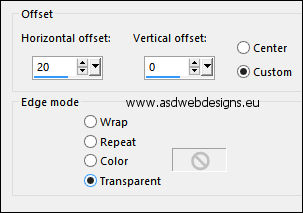
Effects - Image Effects - Offset
Layers - Duplicate
Effects - Image
Effects - Offset -
Same Settings
Layers - Merge -
Merge Down
Edit - Repeat Layer
Merge Down
Effects - 3D Effects - Drop
Shadow - Vertical &
Horizontal 2 - Opacity 35
- Blur 2 - Color #000000
Adjust - Sharpness -
Sharpen
15
Layers -
Duplicate
Press K
on your
keyboard to
activate the
Pick Tool
Enter these
parameters for the
X and Y
Positions on the
Toolbar
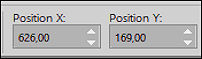 (626,169)
Hit any key on
your keyboard to
close the Pick Tool
16
Layers -
Duplicate
Image - Resize - 80% - Resize
all Layers not checked
Press K
on your
keyboard to
activate the
Pick Tool
Enter these
parameters for the
X and Y
Positions on the
Toolbar
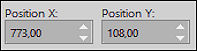 (773,108)
Hit any key on
your keyboard to
close the Pick Tool
Effects - Plugins -
MuRa's Meister -
Copies - Same
settings as before
Adjust - Sharpness -
Sharpen
17
Layer Palette - Click on the Top
Layer
Maximize Tube
"KaD_Woman_151" from
tray
Remove the
Watermark
Edit - Copy
On your work image:
Edit - Paste As New
Layer
Image - Resize - 50% - Resize
all Layers not checked
Press K
on your
keyboard to
activate the
Pick Tool
Enter these
parameters for the
X and Y
Positions on the
Toolbar
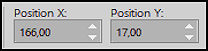 (166,17)
Hit any key on
your keyboard to
close the Pick Tool
Adjust - Sharpness -
Sharpen
Effects - 3D Effects - Drop
Shadow - Vertical 0 -
Horizontal 7 - Opacity 35
- Blur 15 - Color #000000
18
Maximize Tube
"437_KaD_Text1.pspimage" from
tray
Edit - Copy
On your work image:
Edit - Paste As New
Layer
Press K
on your
keyboard to
activate the
Pick Tool
Enter these
parameters for the
X and Y
Positions on the
Toolbar
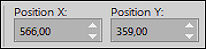 (566,359)
Hit any key on
your keyboard to
close the Pick Tool
Effects - 3D Effects - Drop
Shadow - Vertical &
Horizontal 1 - Opacity 35
- Blur 2 - Color #000000
19
Image - Add Borders
- Symmetric checked
- 1 px -
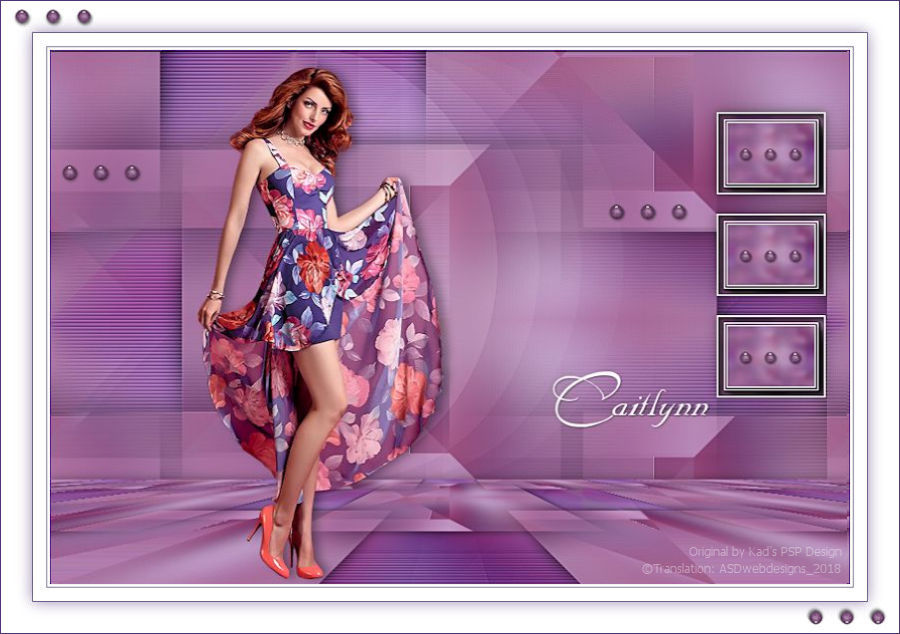
#4e3475
Image - Add Borders - Symmetric
checked - 3 px -
#ffffff
Image - Add Borders - Symmetric
checked - 1 px -
#4e3475
Image - Add Borders - Symmetric
checked - 15 px -
#ffffff
Image - Add Borders - Symmetric
checked - 1 px -
#4e3475
Selections - Select
All
Image - Add Borders - Symmetric
checked - 35 px -
#ffffff
Effects - 3D Effects - Drop
Shadow - Vertical &
Horizontal 0 - Opacity 60
- Blur 25 - Color
#4e3475
Selections - Select
None
20
Maximize the little
ball you have
minimized before
Edit - Copy
On your work image:
Edit - Paste As New
Layer
Image - Resize - 60% - Resize
all Layers not checked
Press K
on your
keyboard to
activate the
Pick Tool
Enter these
parameters for the
X and Y
Positions on the
Toolbar
 (10,10)
Hit any key on
your keyboard to
close the Pick Tool
21
Layers -
Duplicate
Effects - Image
Effects - Offset
Layers - Duplicate
Effects - Image
Effects - Offset -
Same settings
Layers - Merge -
Merge Down
Edit - Repeat Layer
Merge Down
22
Layers - Duplicate
Image - Mirror -
Mirror
Horizontal
Image -
Mirror -
Mirror Vertical
23
Image - Add Borders - Symmetric
checked - 1 px -
#4e3475
Optional:
Image - Resize - Width 900 Pixels - Resize all Layers checked
Add your name or watermark, save as JPG
file and you're done!