The tutorial:
01
Open 376_KaD_Alfakanaal (this image contains Alpha Selections)
Window - Duplicate - Close the original. We continue on the copy
Effects - Plugins - Mehdi - Wavy Lab 1.1

Adjust Blur - Gaussian Blur
02
Layers - Duplicate
Effects - Plugins - VM Natural - Weave No Distortion
03
Layer Palette: Click on the Bottom Layer
Layers - Duplicate
Effects - Image Effects - Seamless Tiling

Effects - Plugins - VM Natural - Weave No Distortion
Image - Mirror - Mirror Horizontal (Image Mirror in earlier versions of PSP)
Image - Mirror - Mirror Vertical (Image Flip in earlier versions of PSP)
Layers - Arrange - Bring to Top
Layer Palette: Set the Blend Mode of this Layer to Multiply
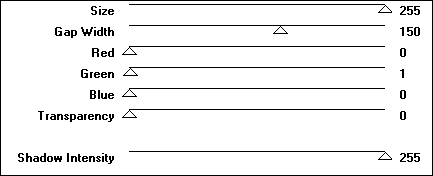
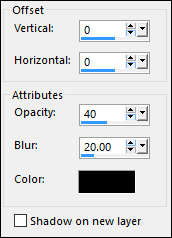
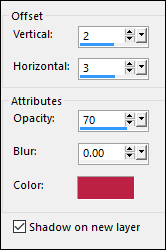
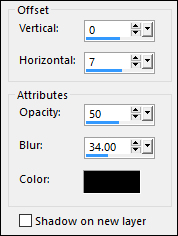
Effects - 3D Effects - Drop Shadow
Layers - Merge - Merge Visible
Effect - Plugins - Simple - 4Way Average
04
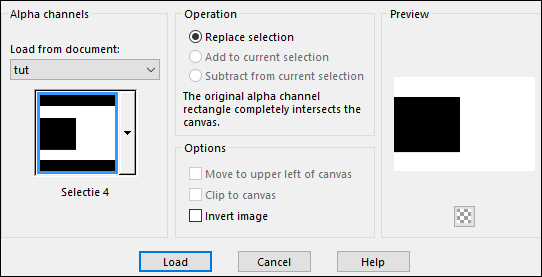
Selections - Load/Save Selection - Load Selection From Alpha Channel Selectie1

Selections - Promote Selection to Layer
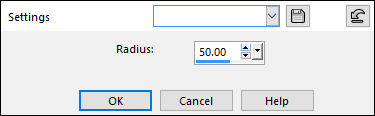
Adjust - Blur - Gaussian Blur 50
Selections - Select None
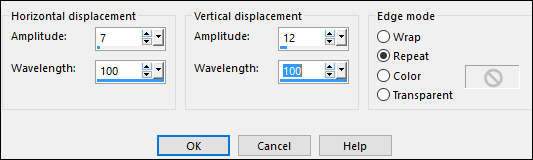
Effects - Distortion Effects - Wave
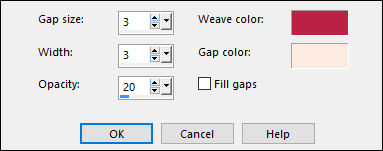
Effects - Texture Effects - Weave
Effects - Edge Effects - Enhance
Layer Palette: Set the Blend Mode of this Layer to Screen
05
Layer Palette: Click on the Bottom Layer
Selections -
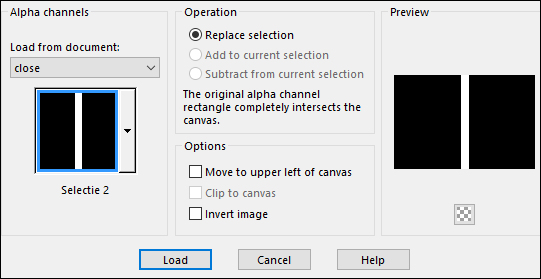
Load/Save Selection - Load Selection From Alpha Channel - Selectie2
Selections - Promote Selection to Layer -
Keep Selected
Layers - Duplicate
Layer Palette: Close this Layer by clicking on the eye
Click on the Layer below
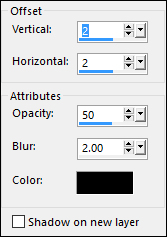
Effects - 3D Effects - Drop Shadow
Edit - Repeat Drop Shadow -
Keep selected
06
Layer Palette: Click on the Layer above and open it (Copy of Promoted selection1)
Keep Selected
Effects Geometric Effects - Circle
Selections - Defloat
Selections - Invert
Press the Delete key on your keyboard
Selections None
07
Layers - Duplicate
Layer Palette: Set the Blend Mode of this Layer to Multiply
Layers - Merge - Merge Down
Image - Resize - 55% - All Layers not checked
Effects - 3D Effects - Drop Shadow
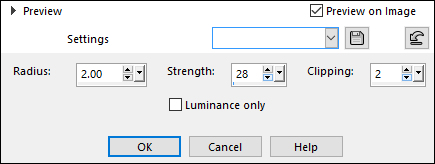
Adjust - Sharpness - Sharpen
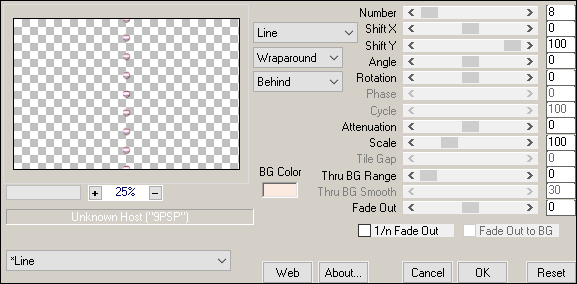
Effects - Plugins - MuRa's Meister - Copies
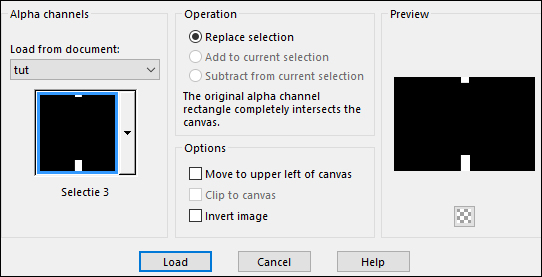
Selections - Load/Save - Load Selection from Alpha Channel - Selectie3
Edit - Cut - or hit Delete on your keyboard
Selections -
Select None
Layers - Arrange - Bring To Top
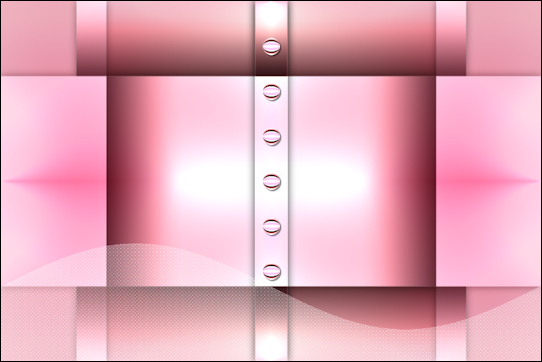
Your work looks like this now:
08
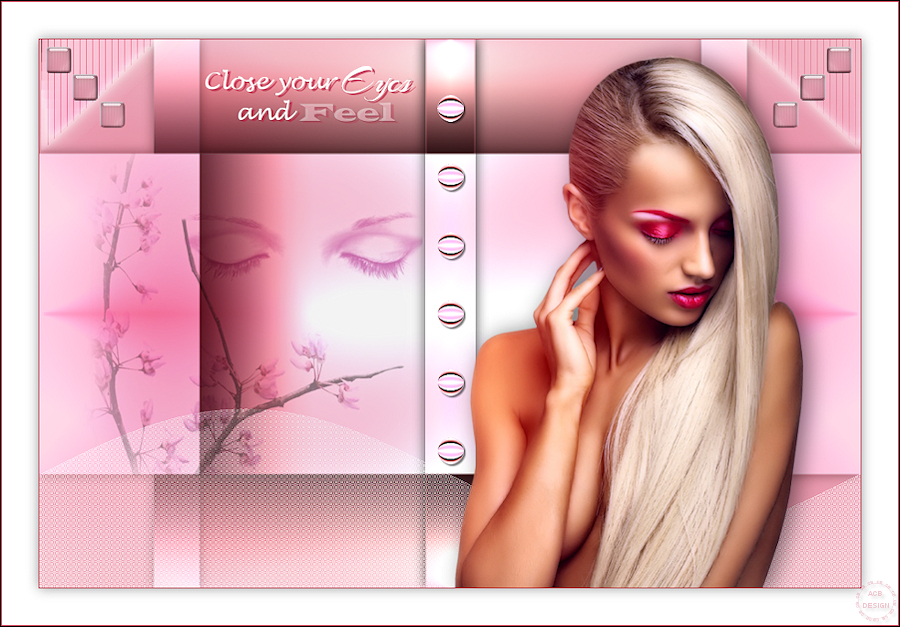
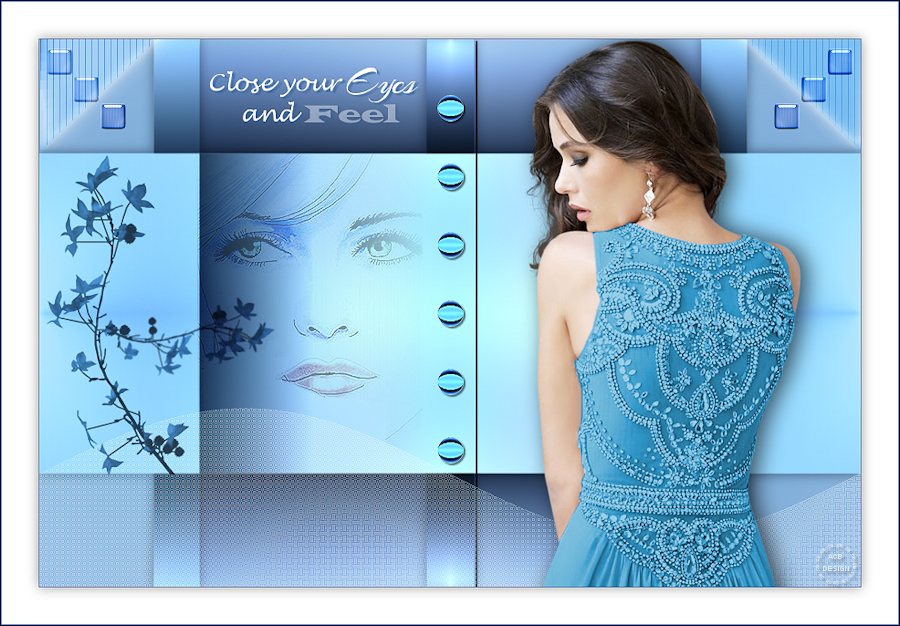
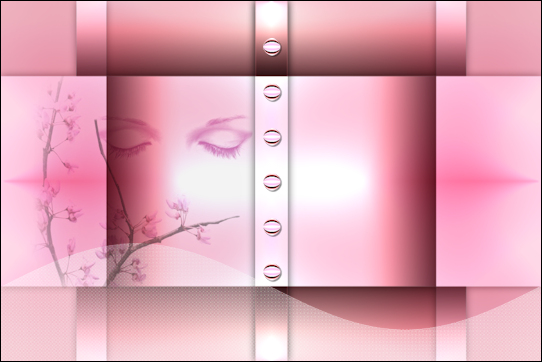
Open Tube "Gina misted FEMME 2457"
Edit - copy
Edit - Paste - Paste As New Layer
Note: If you are using Different colors, change the Blend Mode to Luminance(Legacy) or Colorize
Image - Resize - 65% - All Layers not checked
Move into place like this:
Layer Palette: Set the Blend Mode of this layer to Multiply
Selections - Load/Save - Load Selection from Alpha Channel - Selectie4
Edit - Cut - or hit the Delete key on your keyboard
Selections -
Select None
09
Open Text "376_KaD_Text1
Edit - copy
Edit - Paste - Paste As New Layer
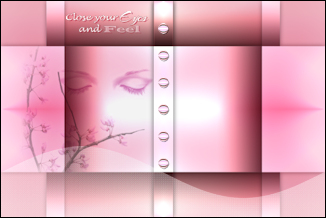
Move into place like this:
Effects - 3D Effects - Drop Shadow - Shadow on New Layer checked
Layer Palette: Click on the Layer above
Layers - Merge - Merge Down
10
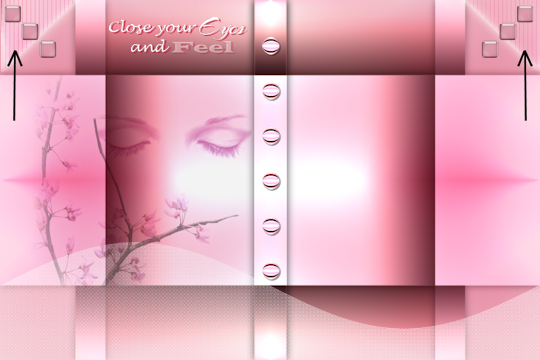
Open Tube"376_KaD_Deco1
Edit - copy
Edit - Paste - Paste As New Layer
Move like this:
Colorize to match your work
11
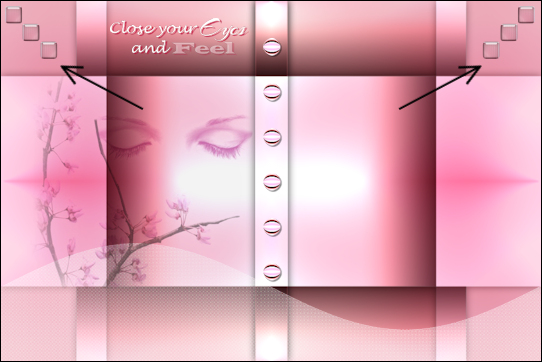
Open Tube"376_KaD_Deco2
Edit - copy
Edit - Paste - Paste As New Layer
Layers - Arrange - Move Down
Move like this:
Colorize to match your work
Layer Palette: Set the Blend Mode of this Layer to Hard Light
12
Open Tube "Gabry-woman 539"
Edit - Copy
Edit - Paste - Paste As New Layer
Layers - Arrange - Bring To Top
Image - Resize - 85% - All Layers not checked
Press K on your keyboard to activate the Move Tool
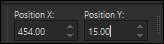
Enter these Parameters:
Click on any key to deactivate the Move Tool
Effects - 3D Effects - Drop Shadow
Adjust - Sharpness Unsharp Mask
13
Image - Add Borders - Symmetric checked - 1px - Foregroundcolor 
Selections - Select All
Image - Add Borders - Symmetric checked - 40px - #ffffff 
Selections - Invert
Effects - 3D Effects - Drop Shadow

Selections - Select
None
Image - Add Borders - Symmetric checked - 1px - Foregroundcolor
14
Optional:
Image - Resize - Width 900 Pixels - Resize all Layers checked
Add your name or watermark, save as JPG
file and you're done!
If you wish you can post your result on my Facebook Page