The tutorial:
01
Maximize "
388_KaD_Alfakanaal"
from tray (This
image contains
Alpha
Selections)
Effects - Plugins
- Mehdi -Wavy Lab
1.1
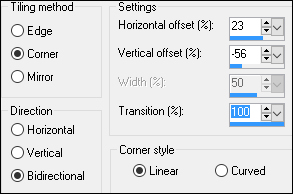
Effects - Image Effects - Seamless Tiling - Preset -
Side By Side

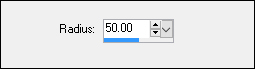
Adjust Blur
- Gaussian Blur
Edit - Repeat
Gaussian Blur
02
Layers - New
Raster Layer
Fill the Layer
with the
Foregroundcolor

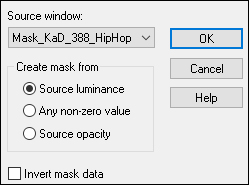
Layers - New Mask
Layer - From Image -
"Mask_KaD_388_HipHop"
Layers - Merge -
Merge Group
Layer Palette:
Change the Blend
Mode to Multiply
Layers - Merge -
Merge Visible
Image - Resize -
75% - Resize All
Layers - not
checked
Adjust -
Sharpness - Sharpen
03
Layers - New
Raster Layer
Selections -
Select All
Maximize "388
KaD_Background"
from tray
Edit - Copy
On your work
image: Edit -
Paste - Paste Into
Selection
Selections -
Select None
04
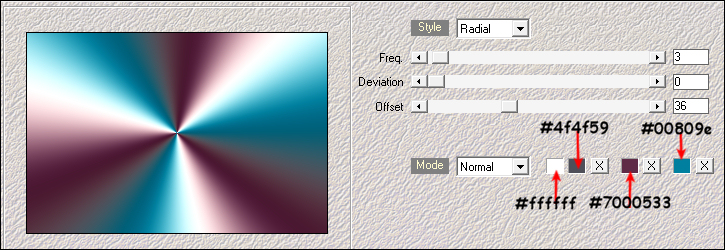
Effects - Plugins
- <I.C.NET Software>
Filters Unlimited
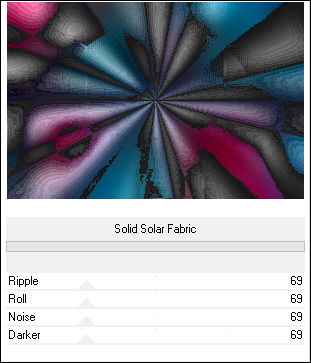
2.0 - &<Bkg Designer
sf10 III> - Solid
Solar Fabric
Effects - Image
Effects - Seamless
Tiling
Effects - Plugins
- Simple - 4 Way
Average
05
Layers -
Duplicate
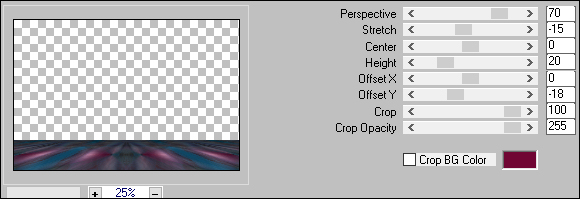
Effects - Plugins
- MuRa's Meister -
Perspective Tiling
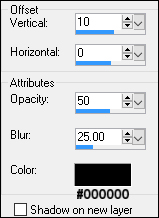
Effects - 3D
effects - Drop
Shadow
Layer Palette:
Click on the Bottom
Layer
Layers - Arrange
- Bring to Top
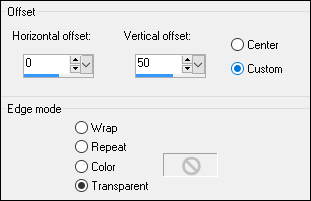
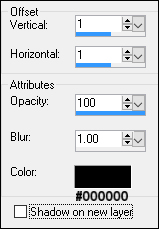
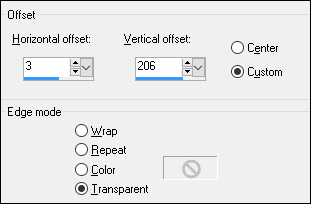
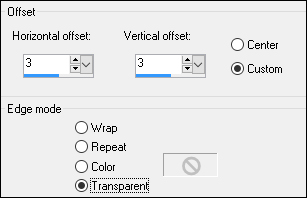
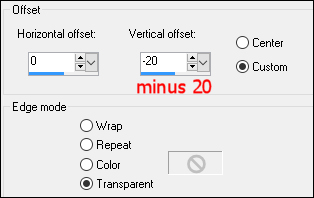
Effects - Image
Effects - Offset
06
Maximixe
"388_Text2"
from tray
Edit - Copy
On your work
image: Edit -
Paste - Paste As New
Layer
Image - Resize -
45% - Resize All
Layers - not
checked
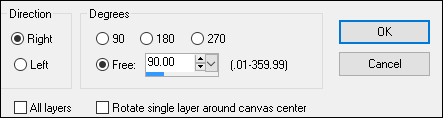
Image - Free
Rotate:
Adjust - Hue and
Saturation -
Colorize - Hue
237 Saturation
201
Effects - Image
Effects - Offset

Effects - 3D
Effects - Drop
Shadow
07
Color Palette:
Change the
Backgroundcolor to
#000000

Layers -
Duplicate
Layer Palette:
Change the Blend
Mode of this Layer
to Screen
Layers - New
Raster Layer
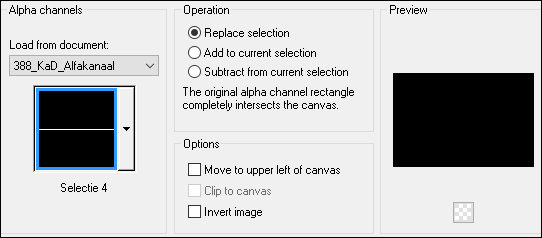
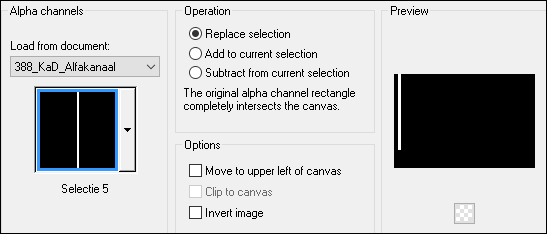
Selections -
Load/Save - Load
Selection From Alpha
Channel
"388_KaD_Alfakanaal"
- Selection 4
Fill the
Selection with the
Backgroundcolor
Selections -
Select None
08
Maximize
"388_Deco1"
from tray
Edit - Copy
On your work
image: Edit -
Paste - Paste As New
Layer
Image - Resize -
85% - Resize All
Layers - not
checked
Move to the Left
like this:
Layers - Merge -
Merge Down
Effects - Plugins
- Alien Skin Eye
Candy 5 - Impact -
Gradient Glow -
Preset -
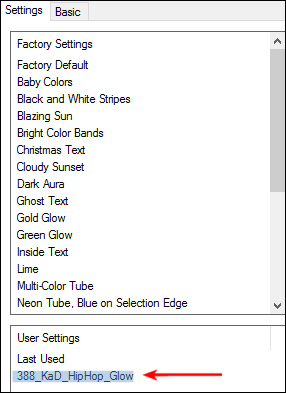
388_KaD_HipHop_Glow
Effects - 3D
Effects - Drop Shadow
09
Maximize
"388_Text4" from
Tray
Edit - Copy
On your work
image: Edit -
Paste - Paste As New
Layer
Image - Resize -
25% - Resize All
Layers - not
checked
Effects - Image
Effects - Offset
10
Layers -
Duplicate
Layer Palette:
Click on the Layer
below (original
Text)
Image - Negative
Image
Note: This
option is available
in older versions of
PSP but you need to
add it to the
Toolbar:
View - Customize
- Adjust
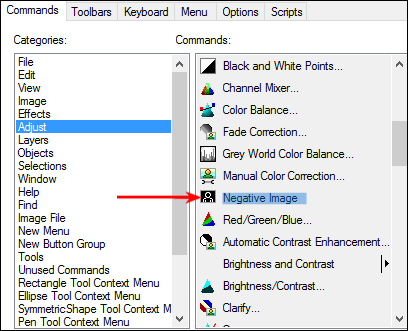
Drag the icon
with your mouse and
Drop onto the
Toolbar to use it.
On your work
image:
Effects - Image
Effects - Offset
Layer Palette:
Click on the Top
Layer
Layers - Merge -
Merge Down
11
Layer Palette:
Click on the Bottom
Layer
Selections -
Load/Save - Load
Selection From Alpha
Channel - Selection
5
Selections -
Promote Selection to
Layer
Selections -
Select None
Effects - Plugins
- Toadies - What Are
You?

Layers -
Duplicate
Image - Mirror -
Mirror Horizontal
(Image - Mirror in
older versions of
PSP)
Layers - Merge -
Merge Down
Layer Palette:
Change the Blend
Mode to Screen
Effects - Edge
Effects - Enhance
12
Layers -
Duplicate
Effects -
Distortion Effects -
Wave

Image - Mirror -
Mirror Horizontal
(Image - Mirror in
older versions of
PSP)
Layers - Merge -
Merge Down
13
Color Palette:
Change the
Backgroundcolor to
#ffffff

Layer Palette:
Click on the 4th
Layer from the
Bottom (Merged)
Selection Tool
(S) Custom Selection
- Layer Opaque
Layers - New
Raster Layer
Selections -
Modify - Expand -
5px
Fill the
Selection with the
Backgroundcolor
Selections -
Modify - Contract -
5px
Edit - Cut
(or hit Delete on
your keyboard)
Selections -
Select None
14
Layer palette:
Cick on Copy of
Raster 1 (The
Floor)
Effects - Plugins
- Graphics Plus -
Cross Shadow -
Default Settings
Maximize
"KaD_HipHop 1"
from tray and erase
the watermark
Edit - Copy
On your work
image: Edit -
Paste - Paste As New
Layer
Layers - Arrange
- Move Up
Edit - Repeat
Move Layer Up
Image - Resize -
50% - Resize All
Layers - not
checked
Effects - Image
Effects - Offset
15
Layers -
Duplicate
Layers - Arrange
- Bring to Top
Layer Palette;
Click on the
Original Layer
(Raster 6)
Adjust - Blur -
Gaussian Blur
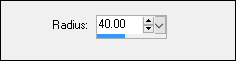
Image - Mirror -
Mirror Horizontal
(Image - Mirror in
older versions of
PSP)
Effects - Plugins
- <I.C.NET Software>
Filters Unlimited
2.0 - Tramages - Tow
The Line
Note: If
you are using a
different tube your
result will be
different
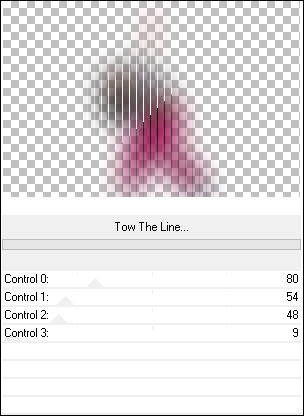
Layer Palette:
Change the Blend
Mode to Hard
Light
16
Selections -
Load/Save -Load
Selection From Alpha
Channel - Selection
3

Edit - Cut (or
hit Delete on your
keyboard)
Selections -
Select None
Layer Palette:
Click on the Top
Layer
Effects - 3D
Effects - Drop
Shadow
Adjust -
Sharpness - Sharpen
Layers - Merge -
Merge Visible
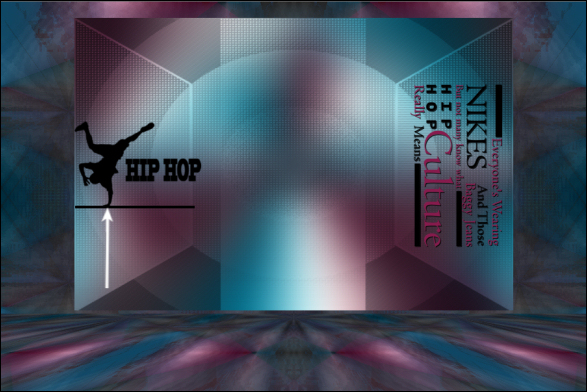
Your work looks
like this now:
17
Image - Add
Borders - Symmetric
checked - 1px -
#000000
Image - Add
Borders - Symmetric
checked - 25px -
#ffffff
Image - Add
Borders - Symmetric
checked - 1px -
#000000
18
Optional:
Image - Resize - Width 900 Pixels - Resize all Layers checked
Add your name or watermark, save as JPG
file and you're done!