The tutorial:
01
Open "420_KaD_Alfakanaal"
This image contains Alpha Selections
Window - Duplicate
(or shift+D) - Close the original and proceed on the copy
Effects - Plugins -
Mehdi - Wavy Lab 1.1
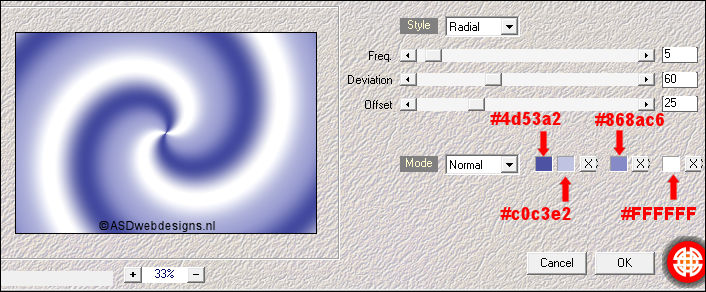
Effects - Image
Effects - Seamless
Tiling
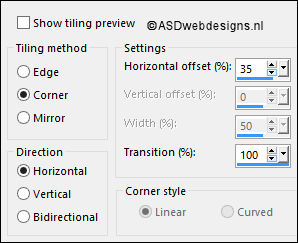
Adjust - Blur -
Gaussian Blur -
Radius 50
Effects - Plugins -
Visual Manipulation - Slipthrough
Effects - Plugins -
°v°
Kiwi's Oelfilter -
Zig Zack
(Because of the
°V° in the name,
this will show
last in your
Plugins list)

Adjust - Sharpness -
Sharpen
02
Layers -
Duplicate
Image - Free Rotate - Right
checked - 90° -
Both boxes unchecked
Image - Resize - 67% - Resize
all Layers not checked
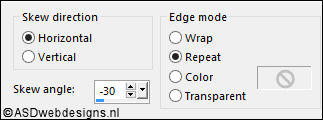
Effects - Geometric
Effects - Skew
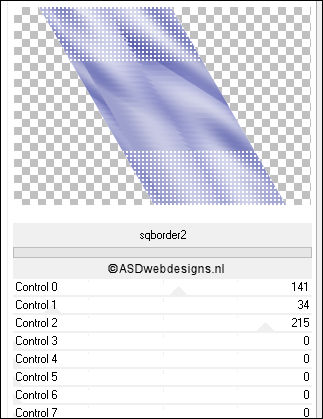
Effects - Plugins <I.C.NET
Software> - Filters Unlimited
2.0 - [AFS IMPORT] -
sqborder2
Effects - Image
Effects - Seamless
Tiling
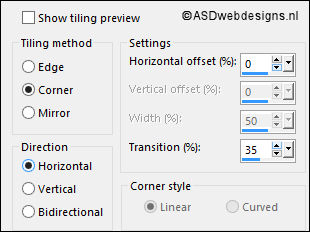
Effects - Edge
Effects - Enhance
Selections - Load/Save
Selection - Load
Selection From Alpha
Channel - Selectie 1
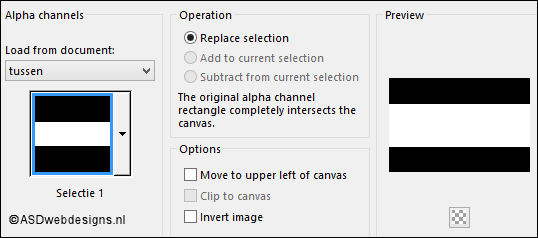
Edit - Cut (Or hit the Delete Key of
your Keyboard)

Keep selected
03
Layer Palette -
Click on the Bottom
Layer
Selections - Promote
Selection to Layer
Adjust - Blur -
Gaussian Blur -
Radius 20
Effects - Geometric
Effects - Circle -
Transparent checked
Selections - Select
None
Image - Resize - 20% - Resize
all Layers not checked
Selections
- Load/Save Selection - Load Selection From Alpha Channel - Selectie
2
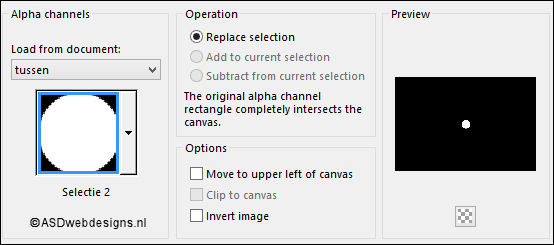
Effects - Plugins -
Alien Skin Eye Candy
5 Impact - Glass
- Settings
Tab:
Preset“420_KaD_Glass”
Selections - Select
None
Effects - Edge
Effects - Enhance
04
Edit - Cut
Edit
- Paste as New Image
Save
as PSP file and
minimize to tray
Go
back to your work
image
Layers - Delete
Layers - Merge -
Merge Visible
Effects - Image Effects - Seamless
Tiling - Default settings
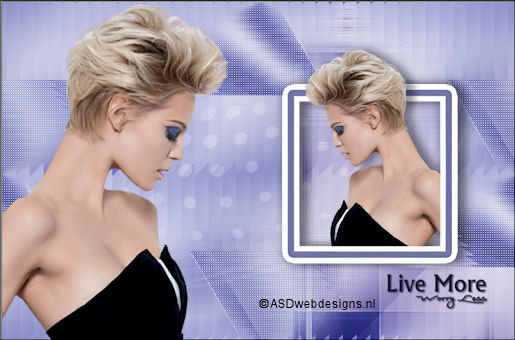
Result:
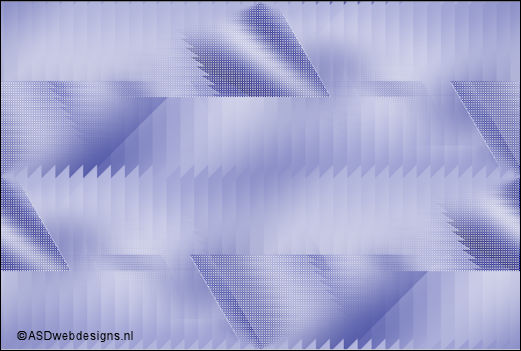
05
Color Palette:
Change the
Backgroundcolor to #ffffff

Layers - New Raster
Layer
Fill
with the
Backgroundcolor
(Right Mouse Click)
Layers - New Mask
Layer - From Image -
“Narah_mask_0464”

Layers - Merge - Merge Group
Layer Palette -
Double click on this Layer and set the Blend Mode to
"Soft Light"
06
Maximize Tube
"KaD_WomanFace47" from
tray
Remove the
Watermark
Edit - Copy
Minimize to
tray again, you need it again later
On your work image:
Edit - Paste As New
Layer
Image - Mirror -
Mirror Horizontal
Press K
on your
keyboard to
activate the
Pick Tool
Enter these
parameters for the
X and Y
Positions on the
Toolbar
 ( 406, Minus 2)
Hit any k)ey on
your keyboard to
close the Pick Tool
Effects - Plugins -
Mehdi - Weaver

Effects - Edge
Effects - Enhance
More
Layer Palette -
Double click on this Layer and set the Blend Mode to
"Soft Light"
07
Color Palette:
Change the
Foregroundcolor to
#868ac6 
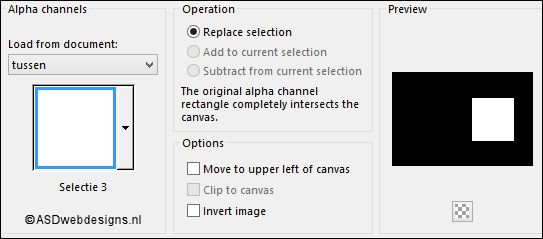
Selections - Load/Save Selection - Load Selection From Alpha Channel
- Selectie 3
Edit - Copy Special
- Copy Merged
Layers - New Raster Layer!!
Edit - Paste
Into Selection
Selections - Modify - Select
Selection Borders - Outside
checked - Anti-alias checked
- Border width: 10
Layers - New Raster Layer!
Fill the Selection
with the
Foregroundcolor

Selections - Modify - Select
Selection Borders - Outside
checked - Anti-alias checked
- Border width: 10
Layers - New Raster Layer!!
Fill the Selection
with the
Backgoundcolor

Effects - 3D Effects
- Drop Shadow -
Vertical 0 -
Horizontal 0 - Opacity
40
- Blur 20 - Color #000000

Selections - Select None
Layers - Merge -
Merge Down
08
Maximize Tube
"KaD_WomanFace47" from
tray
Edit - Copy
Minimize to
tray again, you need it again
On your work image:
Edit - Paste As New
Layer
Image - Mirror -
Mirror Horizontal
Image - Resize - 50% - Resize
all Layers not checked
Adjust - Sharpness - Unsharp Mask -
Radius
2 - Strength
30 - Clipping
2 - Luminance Only
Not Checked
Press K
on your
keyboard to
activate the
Pick Tool
Enter these
parameters for the
X and Y
Positions on the
Toolbar
 (525,82)
Do not worry that
the tube isn't
positioned correctly
in the frame, we
will fix this later
Effects - 3D Effects - Drop
Shadow - Vertical 0 -
Horizontal 15 - Opacity 40
- Blur 20 - Color #000000

09
Layer Palette - Click on the Second Layer from the Top
(Raster 3)
Edit - Repeat
Drop Shadow
Layer Palette - Click on the Top
Layer
Selections - Load/Save Selection - Load Selection From Alpha Channel
- again Selectie 3

Selections - Modify - Contract - 10 px
Selections - Invert
Eraser Tool
 : Erase the bottom
and Right part of
the tube which is
outside of the
frame,
the Selection prevents you from erasing
too much
Selections - Select None
Layers - Merge -
Merge Down
Edit - Repeat Layers
Merge Down
10
Color Palette:
Change the
Foregroundcolor to
#181932

Maximize Tube
"420_Text1" from
tray
Edit - Copy
On your work image:
Edit - Paste As New
Layer
Color Changer Tool


Click with the
Foregroundcolor
 in the text
Image - Resize - 60% - Resize
all Layers not checked
Press K
on your
keyboard to
activate the
Pick Tool
Enter these
parameters for the
X and Y
Positions on the
Toolbar
 (671, 476)
Hit any key on
your keyboard to
close the Pick Tool
Effects - 3D Effects - Drop
Shadow - Vertical 2 -
Horizontal 2 - Opacity 50
- Blur 2 - Color #000000

11
Maximize Tube
"KaD_WomanFace47" from
tray
Edit - Copy
On your work image:
Edit - Paste As New
Layer
Image - Resize - 80% - Resize
all Layers not checked
Move to the Left
like this:
Layer Palette -
Double click on this Layer and set the Blend Mode to
"Overlay"
12
Maximize the little
image you made
earlier from tray:

Edit - Copy
On your work image:
Edit - Paste As New
Layer
Image - Resize - 55% - Resize
all Layers not checked
Press K
on your
keyboard to
activate the
Pick Tool
Enter these
parameters for the
X and Y
Positions on the
Toolbar
 (785, 40)
13
Layers - Duplicate
Image - Mirror -
Mirror Horizontal
Layers - Merge -
Merge Down
Effects - 3D Effects - Drop
Shadow - Vertical 0 -
Horizontal 0 - Opacity 40
- Blur 20 - Color #000000

Adjust - Sharpness -
Sharpen
14
Image - Add Borders - Symmetric
checked - 10 px - #ffffff

Image - Add Borders - Symmetric
checked - 10 px -
#868ac6

Image - Add Borders - Symmetric
checked - 10 px - #ffffff

Selections - Select
All
Image - Add Borders - Symmetric
checked - 1 px -
#181932

Image - Add Borders - Symmetric
checked - 35 px - #ffffff

Effects - 3D Effects - Drop
Shadow - Vertical 0 -
Horizontal 0 - Opacity 40
- Blur 20 - Color #000000

Selections - Select None
15
Maximize Tube
"420_Deco1" from
tray
Edit - Copy
On your work image:
Edit - Paste As New
Layer
No need to move
Image - Add Borders - Symmetric
checked - 1 px -
#181932

16
Image - Resize - Width 900 Pixels - Resize all Layers checked
Add your name or watermark, save as JPG
file and you're done!
If you wish you can post your result on my Face book Page
