1/ KaD_WomanFace58
2/ KaD_Butterfly3
3/ KaD_Butterfly4
4/ 464_KaD_Deco1
5/ 464_KaD_Deco2
6/ 464_KaD_Text1
7/ 464_KaD_Text2
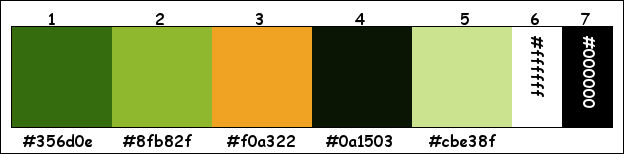
8/ 464_KaD_Kleurenpallet
Achtergrond :open in PSP en minimize
1/ 464_KaD_Achtergrond
Selecties :open in PSP en minimize
1/ 464_KaD_Alfakanaal
Masks :open in PSP en minimize
1/ Narah_Mask_1098
Filter Preset :Leave it in materials
1/ 464_KaD_FloodPreset
Color palette :
If you work with your own colors, make your own color palette with the alpha channel,
so that you can easily switch between your colors.
When working with your own colors, play with the Blend Mode and/or Opacity at your own discretion
Filters :
1/ Mehdi : Sorting Tiles
2/ Flaming Pear – Flood
3/ VanderLee : Unplugged X
4/ AP 01 [Innovations] : Lines – Silverlining
(-) Import into Filters Unlimited
---------------------------------------
THE TUTORIAL
From now on I use the terms "MIRROR" and "FLIP" again.
Mirror: Mirror horizontal - Flip: Mirror vertical
Let’s get started.
Remember to save your work often
1
Foreground color : Color 1 : #356d0e
Background color : Color 2 : #8fb82f
2
Open the alpha channel : 464_KaD_Alfakanaal
Window – Duplicate
Minimize the original – we continue on the copy
2
Select all
Activate and copy : 464_KaD_Achtergrond
Edit – Paste into selection
Select none
If you want, you can colorize with your own colors
3
Effects – Distortion Effects – Polar Coordinates – Polar to Rectangular
Image – Flip
4
Layers – Duplicate (Copy of Raster 1)
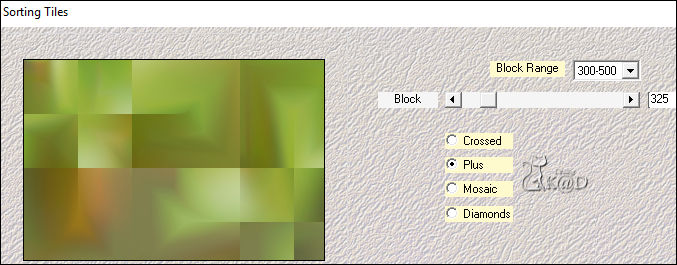
Plugins – Mehdi – Sorting Tiles – see PS
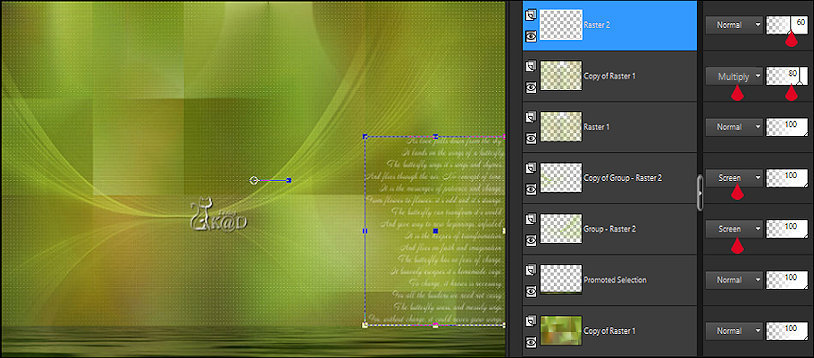
5
Layers – New Raster Layer (Raster 2)
Fill with Background color (Color 2)
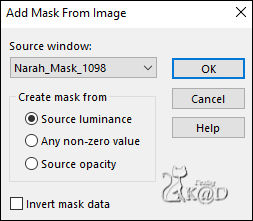
Layers – New Mask layer – from image “Narah_Mask_1098” – see PS
Layers – Merge – Merge Group (Group - Raster 2)
Blend Mode = Screen
6
Activate Raster 1
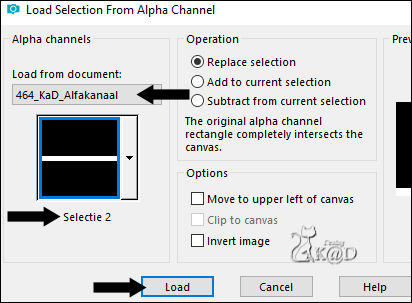
Selections – Load/Save Selection – Load Selection From Alpha Channel – Selectie 2 – see PS
Selections – Promote selection to layer
Layers – Move – Move up
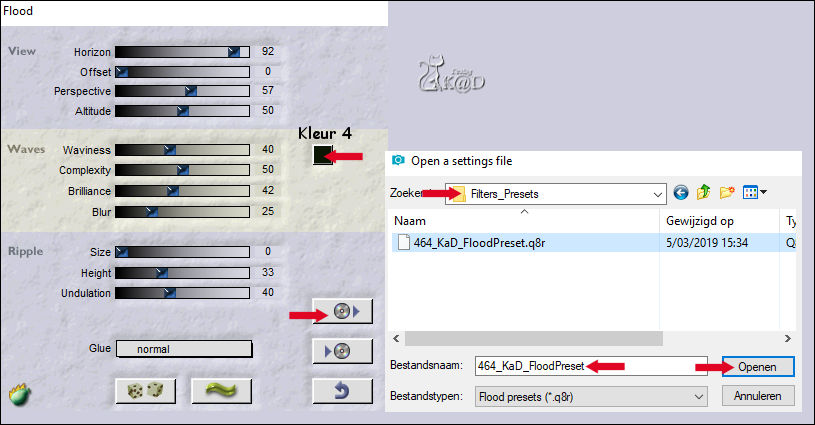
Plugins – Flaming Pear – Flood – Preset : 464_KaD_FloodPreset, Change Horizon to 0 – see PS
Select none
7
Activate Group Raster 2
Repeat plugin Flood, Activate the preset again, do not change Horizon this time !
Adjust – Sharpen – Sharpen More
8
Activate Raster 1
Layers – Move – Bring layer to top
Selections – Load/Save Selection – Load Selection From Alpha – Selectie 1 – see PS

Selections invert
Press Delete on the keyboard
Selections invert
Adjust – Blur – Gaussian blur : 30
Select none
9
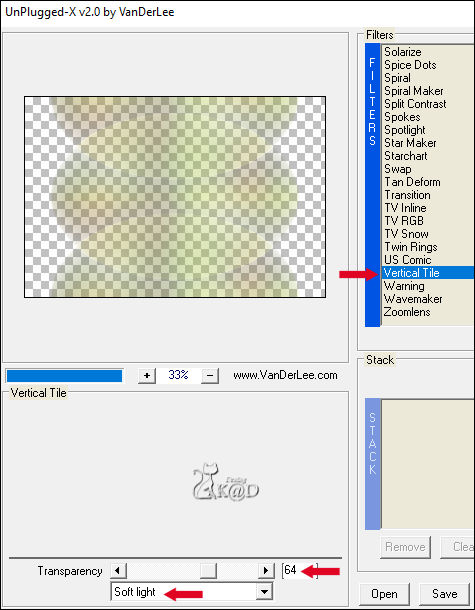
Plugins – VanderLee – Unplugged X – Vertical Tile – see PS
10
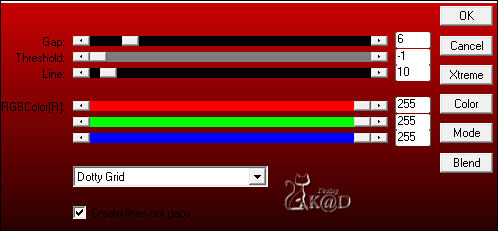
Plugins – AP 01 [Innovations] – Lines – Silverlining – Dotty Grid – see PS
11
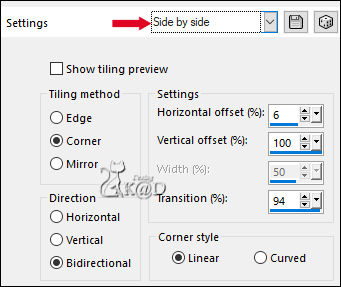
Effects – Image effects –Seamless Tiling – Side by side – see PS
12
Plugins – Flaming Pear – Flood – Click OK
Layers – Duplicate (Copy of Raster 1, you now have 2x Copy of Raster)
Blend mode = Multiply & Layer Opacity = 80
13
Activate Group - Raster 2
Layers – Duplicate (Copy of Group - Raster 2)
Image – Mirror
Press K – Pos X : -270 – Pos Y : 0 – Press M HELP
(K : activate the Move Tool – M : deactivate the Move Tool)
Blend mode = Screen
14
Activate top layer (Copy of Raster 1)
Select all
Image – Crop to selection
15
Activate & copy : 464_KaD_Text1
Edit – Past as a new layer
Press K – Pos X : 649 – Pos Y : 226 – Press M
Layer opacity = 60
Result
Layers – Merge – Merge visible (Merged)
16
Activate : 464_KaD_Kader
Window – Duplicate
Minimize the original, we work on the copy
16-1
Set Foreground color to Color 5
Reduce Opacity of the Flood Fill tool to 40
Click with magic wand in the middle =blanc part)
Layers – New Raster layer
Fill selection with Foreground color
Set Opacity of the Flood Fill tool to 100
16-3
Layers – New Raster layer
Activate & Copy : KaD_Butterfly4
Edit – Paste into selection
16-4
Select none
Effects – 3D-effects – Drop Shadow : V&H 0 – 40 – 20 – Color #000000
Adjust – Sharpen – Sharpen
Edit – Copy Merged
17
Return to main work
Edit – Past as a new layer (Raster 1)
Press K – Pos X : 666 – Pos Y : 48 – Press M
Effects – 3D-effects – Drop Shadow : V 0 – H 7 – 50 – 10 – Color 4
18
Activate & Copy : 464_KaD_Text2
Edit – Past as a new layer (Raster 2)
Press K – Pos X : 665 – Pos Y : 155 – Press M
Effects – 3D-effects – Drop Shadow : V 0 – H 7 – 50 – 10 – Color 4
19
Activate & Copy : KaD_WomanFace58
Edit – Past as a new layer (Raster 3)
Image – Resize : 60%, No check mark to all layers
Press K – Pos X : 3 – Pos Y : 17 – Press M
Effects – 3D-effects – Drop Shadow : V 0 – H 7 – 50 – 10 – Color 4
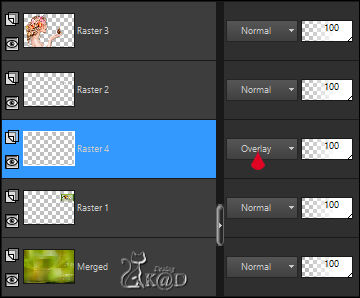
20
Activate & Copy : KaD_Butterfly3
Edit – Past as a new layer
Image – Resize : 20%, No check mark to all layers
21
Image – rotate : Left – 20 – no check marks
Press K – Pos X : 564 – Pos Y : 248 – Press M
Adjust – Sharpen – Sharpen
Effects – 3D-effects – Drop Shadow : V 0 – H 7 – 50 – 10 – Color 4
Layers – Merge – Merge down (Raster 3)
22
Activate & Copy : 464_KaD_Deco1
Edit – Past as a new layer (Raster 4)
Layers – Move – Move layer down 2x
Press K – Pos X : 447 – Pos Y : 16 – Press M
Blend Mode = Overlay
Adjust – Sharpen – Sharpen
Result

22
Image – Add Borders :
1 pix Color 4
3 pix Color 3
1 pix Color 4
15 pix Color 6
1 pix Color 3
23
Select all
35 pix Color 6
Effects – 3D-effects – Drop Shadow : V&H 0 – 60 – 25 – Color 4
Select none
24
Activate & Copy : 464_KaD_Deco2
Edit – Past as a new layer
Press K – Pos X : 3 – Pos Y : 3 – Press M
Effects – 3D-effects – Drop Shadow : V&H 1 – 50 – 1 – Color #000000
25
Add your name or watermark,
Add my watermark to your creation HERE
26
Image – Add Borders : 1 pix Color 4
Image –Resize : 900 pix
Adjust – Sharpen – Unsharp Mask : 2 – 30 – 2 – no check marks
Save as JPG file and you're done!
I hope you enjoyed this tutorial
Karin
05/03/2019
Email me your result 
Extra Example – Tube : Reveries & Alies


Click on the banner below to go to the galllery.