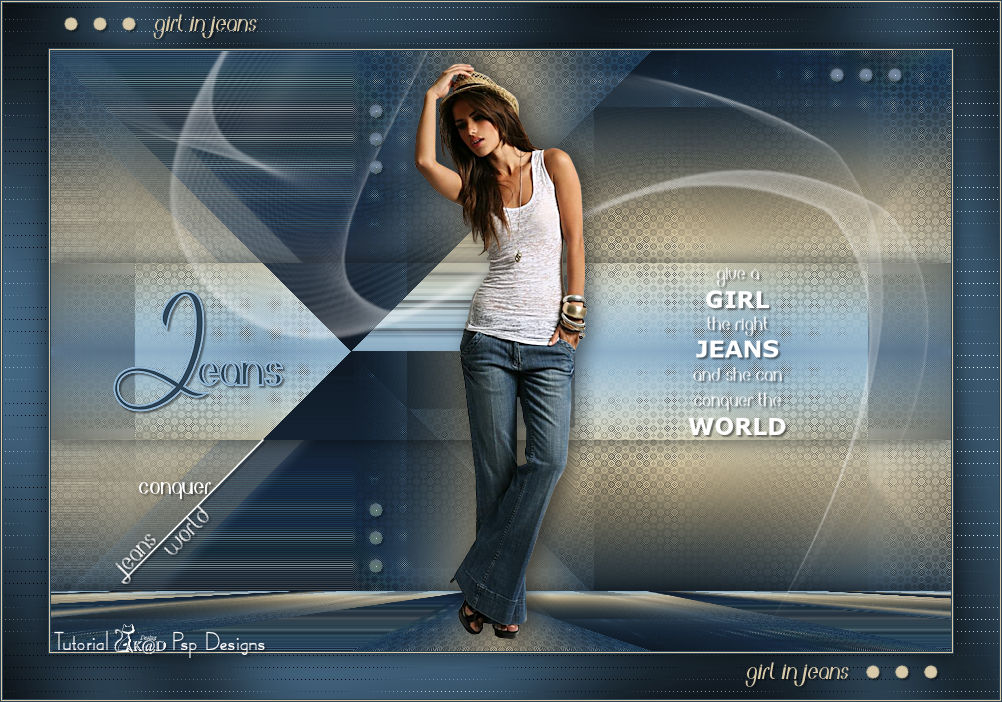
1/ KaD_Woman_218
2/ 493_KaD_Deco1 + 493_KaD_Deco2
3/ 493_KaD_Text + 493_KaD_Text1
Alpha Selections : open in PSP and minimize
(this image is not empty – it contains alpha selections)
1/ 493_KaD_Alfakanaal
Masks : open in PSP and minimize
1/ Narah_Mask_0980
Filter Preset : double click to install
1/ 493_KaD_Glass1
Color palette :
If you work with your own colors, make your own color palette with the alpha channel,
so you can easily switch between your colors.
There are color differences in the different versions of Psp.
Therefore, use the html codes of the color palette to be sure,
that you have the same colors. Also when merging layers, there may be color differences.

Plugins :
1/ Mehdi + Wavy Lab 1.1
2/ VM Natural : Weave Distortion
3/ L enK landksiteofwonders : Palmyre – Zitah
4/ Eye Candy 400 : Motion Trail
5/ Simple : Pizza Slice Mirror
6/ Vanderlee : Unplugged
7/ MuRa’s Meister : Perspective Tiling
8/ Alien Skin – Eye Candy 5 : Impact
9/ Graphics Plus : Cross Shadow
(-) Import into Filters Unlimited
------------------------------------------------
THE TUTORIAL
When working with your own colors, play with the Blend Mode and/or Opacity at your own discretion
From now on I use the terms "MIRROR" and "FLIP" again.
Mirror: Mirror horizontal - Flip: Mirror vertical
Let’s get started.
Remember to save your work often
Some print screens have other colors than the original.
 People who are visually impaired, contact me and I will send you a word document.
Colors :
Foreground color : Color 1
Background color : Color 2
1
Open the alpha channel : 493_KaD_Alfakanaal
Window – Duplicate
Minimize the original – we continue on the copy
2
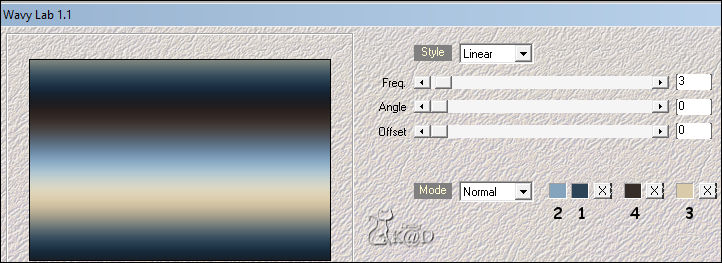
Plugins – Mehdi – Wavy Lab 1.1 – see PS
Adjust – Blur – Gaussian blur : 25
Layers – Duplicate
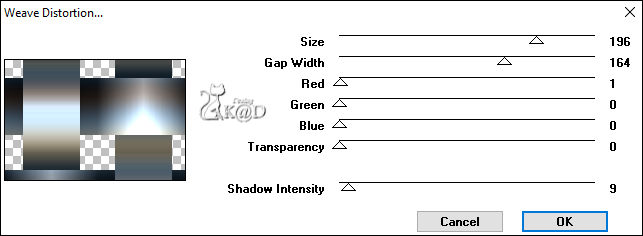
Plugins – VM Natural – Weave Distortion – see PS
3
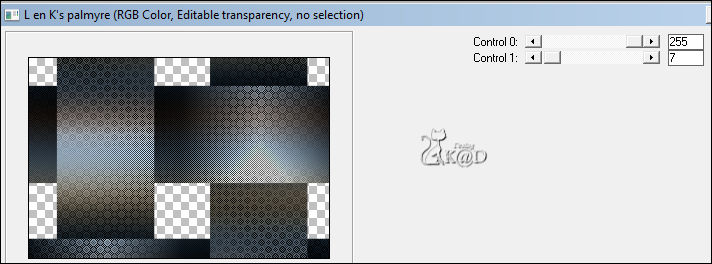
Plugins – L enK landksiteofwonders – Palmyre – see PS
4
Plugins – Eye Candy 400 – Motion Trail – see PS
5
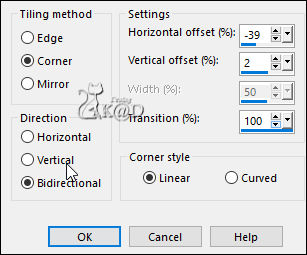
Effects – Image effects – Seamless Tiling – see PS

Adjust – Sharpness – Sharpen
Change Blend Mode to Hard Light and Layer opacity to 53
Result

Layers – Merge – Merge down
6
Plugins – Simple – Pizza Slice Mirror
7
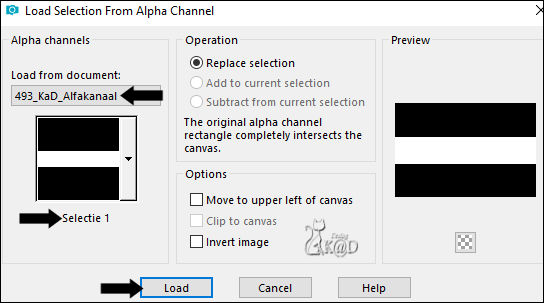
Selections – Load/Save Selection – Load Selection From Alpha Channel – Selectie 1 – see PS
Selections – Promote selection to layer (Promoted Selection)
Select none
Effects – 3D-effects – Drop Shadow : V&H 0 – 60 – 30 – Color #000000
8
Activate Raster 1
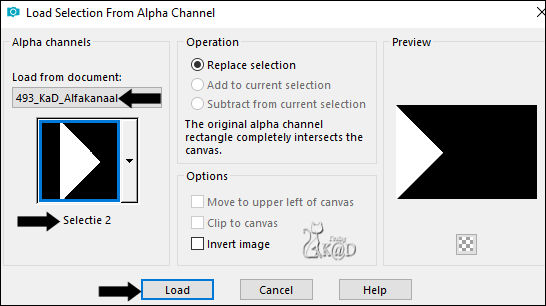
Selections – Load/Save Selection – Load Selection From Alpha Channel – Selectie 2 – see PS
Selections – Promote selection to layer (Promoted Selection 1)
Select none
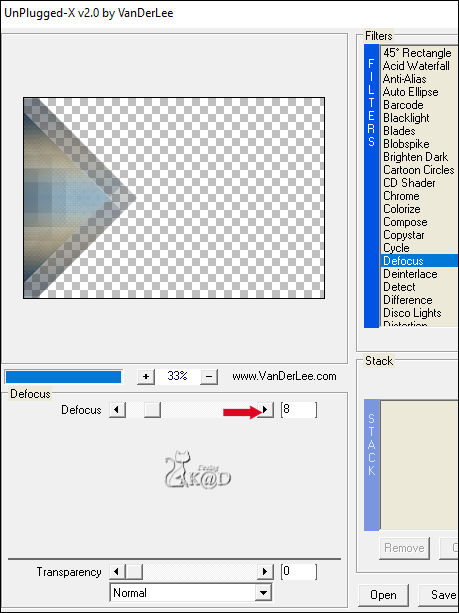
Plugins – Vanderlee – Unplugged X – Defocus – see PS
8-1
Effects – 3D-effects – Drop Shadow : V&H 4 – 35 – 10 – Color 2
9
Change Foreground color to Color 5 (white)
Layers – New Raster layer
Layers – Arrange – Bring to top
Fill with foreground color
Layers – New Mask layer – From Image “Narah_Mask_0980” – see PS
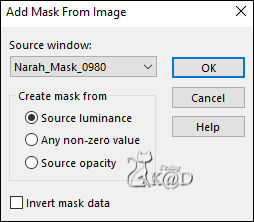
Layers – Duplicate (you now have 2x the mask in your layers )
Layers – Merge – Merge group (Group - Raster 2)
10
Activate Raster 1
Layers – Duplicate (Copy of Raster 1)
Plugins – MuRa’s Meister – Perspective Tiling – Default but Height : 10
Layers – Arrange – Move up
Effects – 3D-effects – Drop Shadow : V&H0 – 60 – 30 – Color #000000
11
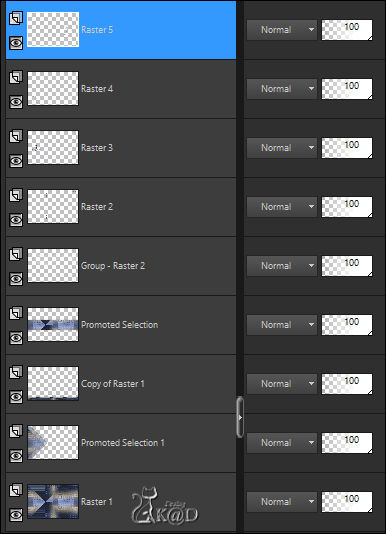
Layers – New Raster layer (Raster 2)
Layers – Arrange – Bring to top
Selections – Load/Save Selection – Load Selection From Alpha Channel – Selectie 3 – see PS
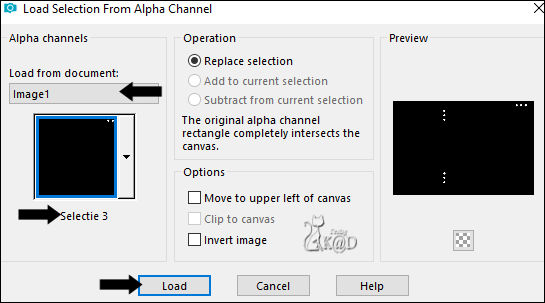
Fill with background color (Color 2)
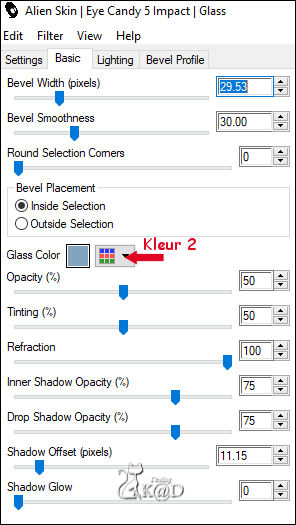
Plugins – Alien Skin – Eye Candy 5 – Impact – Glass :
Choose the preset on the left: 493_KaD_Glass1 but change your Color at the tab Basic – see PS
Select none
Effects – 3D-effects – Drop Shadow : V&H 2 – 35 – 2 – Color #000000
12
Change Foreground color to Color 1
Activate and copy : 493_KaD_Text
Edit – Paste as a new layer (Raster 3)
Press K – Pos X : 62 – Pos Y : 239 – Press M HELP
Activate tool ‘Change to Target’ and colorize with your color 1
Effects – 3D-effects – Drop Shadow : V&H 2 – 45 – 2 – Color #000000
Adjust – Sharpness – Sharpen
13
Activate and copy : 493_KaD_Deco1
Edit – Paste as a new layer (Raster 4)
Press K – Pos X : 63 – Pos Y : 388 – Press M
Effects – 3D-effects – Drop Shadow : V&H 2 – 45 – 2 – Color #000000
14
Activate and copy : 493_KaD_Text1
Edit – Paste as a new layer (Raster 5)
Image – Resize: 65%, all layers NOT checked
Image – Image Negative
Press K – Pos X : 637 – Pos Y : 216 – Press M
Effects – 3D-effects – Drop Shadow : V&H 2 – 45 – 2 – Color #000000
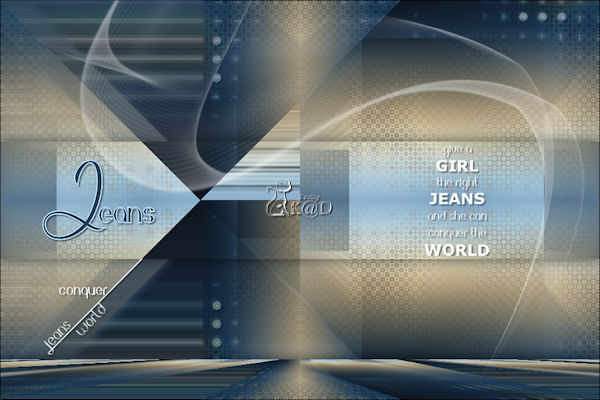
Result
15
Activate and copy : KaD_Woman_218
Edit – Paste as a new layer (Raster 6)
Image – Resize : 53%, all layers NOT checked
Press K – Pos X : 363 – Pos Y : 12 – Press M
Effects – 3D-effects – Drop Shadow : V 0 – H 7 – 50 – 30 – Color #000000
Adjust – Sharpness – Unsharp Mask : 2 – 30 – 2 – no check marks
16
Image – Add borders :
1 pix Color 1
1 pix Color 3
1 pix Color 1
Select all
17
Image – Add borders : 45 pix Color 1
Selections – Invert
Plugins – Graphics Plus – Cross Shadow : DEFAULT
17-1
Plugins – L en K landksiteofwonders – Zitah – see PS

Selections – Invert
Effects – 3D-effects – Drop Shadow : V&H0 – 60 – 30 – Color #000000
Select none
18
Change Foreground color to Color 3
Activate and copy : 493_KaD_Deco2
Edit – Paste as a new layer – don’t move
Activate Tool ‘Color changer’ and Colorize with Color 3 HELP
Effects – 3D-effects – Drop Shadow: V&H 2 – 45 – 2 – Color #000000
19
Add your name or watermark,
Add my watermark to your creation HERE
20
Image – Add borders :
1 pix Color 1
1 pix Color 3
1 pix Color 1
21
Image – Resize – Width 900 Pixels - Resize all Layers checked
Adjust – Sharpness – Unsharp Mask : 2 – 30 – 2 – no check marks
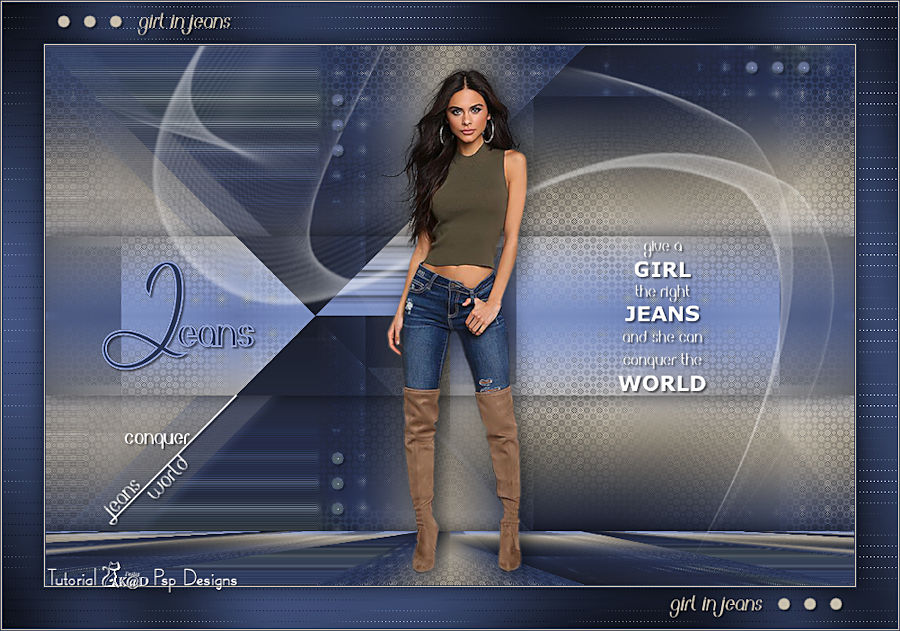
Save as JPG file and you're done!
I hope you enjoyed this tutorial
Karin
06/02/2021
Mail me your version 
Extra example – Tube LB

Click on banner below to go to the gallery


