Materials for the tutorial :
Disclaimer :
Each Graphic is the property of the original artist to whom the copyright belongs and
may not be placed in a collection or offered for sale on-line or otherwise.
Tubes :
(*) If you recognize them as one of your own, please let me know, so I can add your name or remove the tube.
In Winter .... we make a snowman.
Choose a tube of a winter scenery
I’m using a tube from SVB
1/ BL21_KaD_Deco1
2/ BL21_KaD_Element1
3/ BL21_KaD_Element2
4/ BL21_KaD_Snowballs
5/ BL21_KaD_Text1
Script : Put in folder “Scripts – restricted”
1/ BL21_KaD_Randen
Alpha Selections : open in PSP and minimize
1/ BL21_KaD_Alfakanaal
2/ BL21_KaD_Alfakanaal_Sneeuwman
Color palette :
If you work with your own colors, make your own color palette with the alpha channel,
so you can easily switch between your colors.
There are color differences in the different versions of Psp.
Therefore, use the html codes of the color palette to be sure,
that you have the same colors. Also when merging layers, there may be color differences.
Plugins :
1/ Mehdi : Wavy Lab 1.1
2/ Toadies : Weaver
3/ MuRa’s Meister : Perspective Tiling
4/ VanderLee : Snowflakes*
*(VDL Adrenaline – Snowflakes)
(-) Import into Filters Unlimited
---------------------------------------
THE TUTORIAL
When working with your own colors, play with the Blend Mode and/or Opacity at your own discretion
From now on I use the terms "MIRROR" and "FLIP" again.
Mirror: Mirror horizontal - Flip: Mirror vertical
Let’s get started.
Remember to save your work often
Colors :
First, make your own color palette, so you can change your colors easily.
Color 1 (Foreground color) = light blue from your winter scenery tube
Color 2 (Background color )= Light grey from your winter scenery tube
Color 3 : Darker then color 2
Color 4 : Darker then color 1
Color 5 : white (#ffffff)
Color 6 : black (#000000)
1
Open the alpha channel : BL21_KaD_Alfakanaal
Window – Duplicate
Minimize the original – we continue on the copy
2
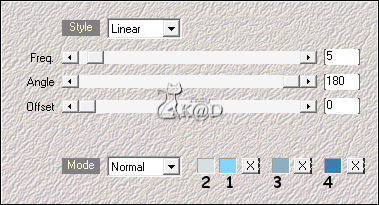
Plugings – Mehdi – Wavy Lab 1.1 – see PS
Adjust – Blur – Gaussian blur : 45
3
Layers – Duplicate (copy Raster 1)
Plugins – Toadies – Weaver – Default (59 – 48 – 222)
4
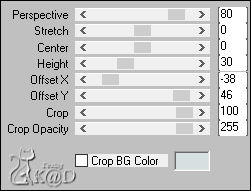
Plugings – MuRa’s Meister – Perspective Tiling – see PS
5
Effects – 3D-effects – Drop Shadow : V&H 0 – 40 – 20 – Color 4
6
Activate & copy : BL21_KaD_Deco1
Edit – Paste as a new layer
Objects – Align – Bottom (X : 0 – Y : 398)
Adjust – Sharpen – Sharpen
Opacity layer stays at 73
Layers – Merge – Merge down
7
Activate Raster 1
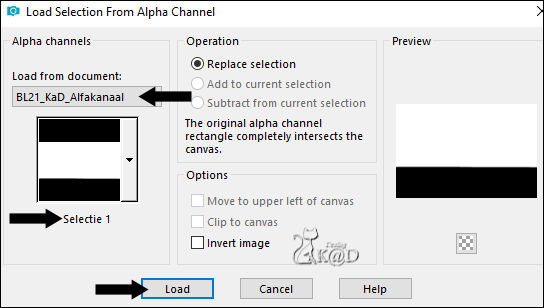
Selections – Load/Save Selection – Load Selection From Alpha Channel – Selectie 1 – see PS
Selections – Promote selection to layer (Promoted selection)
Layers – Arrange – Bring to top
8
Selections – Load/Save Selection – Load Selection From Alpha Channel – Selectie 2 – see PS
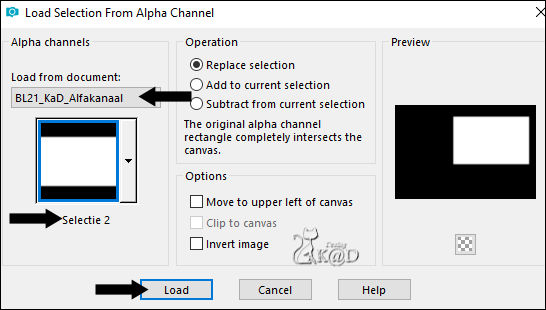
Press Delete on the keyboard
9
Activate & copy : winterscenery tube
Edit – Past as a new layer (Raster 2)
Move a beautiful piece of the tube into the selection
Layers – Move – Move down
10
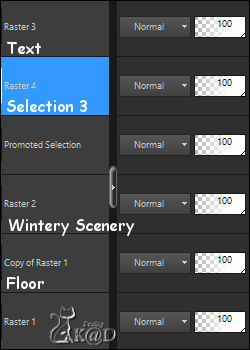
Layers – New Raster layer (Raster 3)
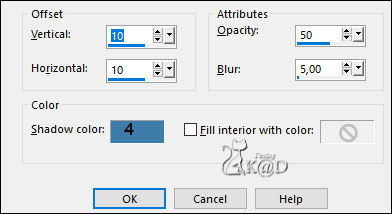
Effects – 3D-effects – Cutout – see PS
11
Layers – New Raster layer (Raster 4)
Repeat Cutout, but with V&H -10
Select none
Layers – Merge – Merge down 2x (Raster 2)
12
Activate & copy : BL21_KaD_Text1
Edit – Past as a new layer
Layers – Arrange – Move up
Press K – Pos X : 44 – Pos Y : 28 – Press M HELP
(K : activate the Move Tool – M : deactivate the Move Tool)
Effects – 3D-effects – Drop Shadow : V&H 2 – 35 – 2 – Color 4
13
Activate Raster 1
Select all
Activate Raster 2 (winter scenery tube)
Image – Crop to selection
14
Selections – Load/Save Selection – Load Selection From Alpha Channel – Selectie 2 – see #8
Selections – Modify – Contract : 23 pix
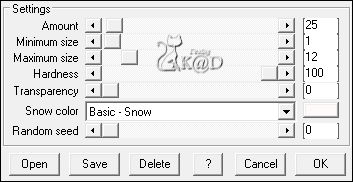
Plugins – VanderLee – Snowflakes* – see PS
* sometimes, this plugin is called VDL Adrenaline – Snowflakes
Select none
15
Change Foreground color to Color 4
Layers – New Raster layer (Raster 4)
Layers – Arrange – Move up
Selections – Load/Save Selection – Load Selection From Alpha Channel – Selectie 3 – see PS
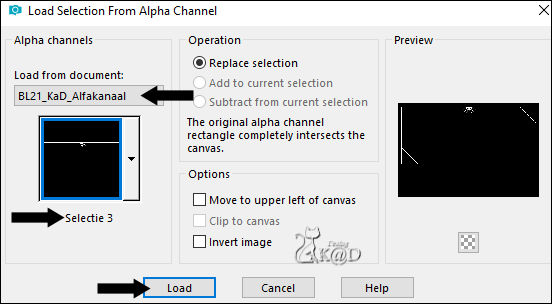
Fill selection with Foreground color
Select none
Effects – 3D-effectsn – Drop shadow : V&H 2 – 35 – 2 – Color 4
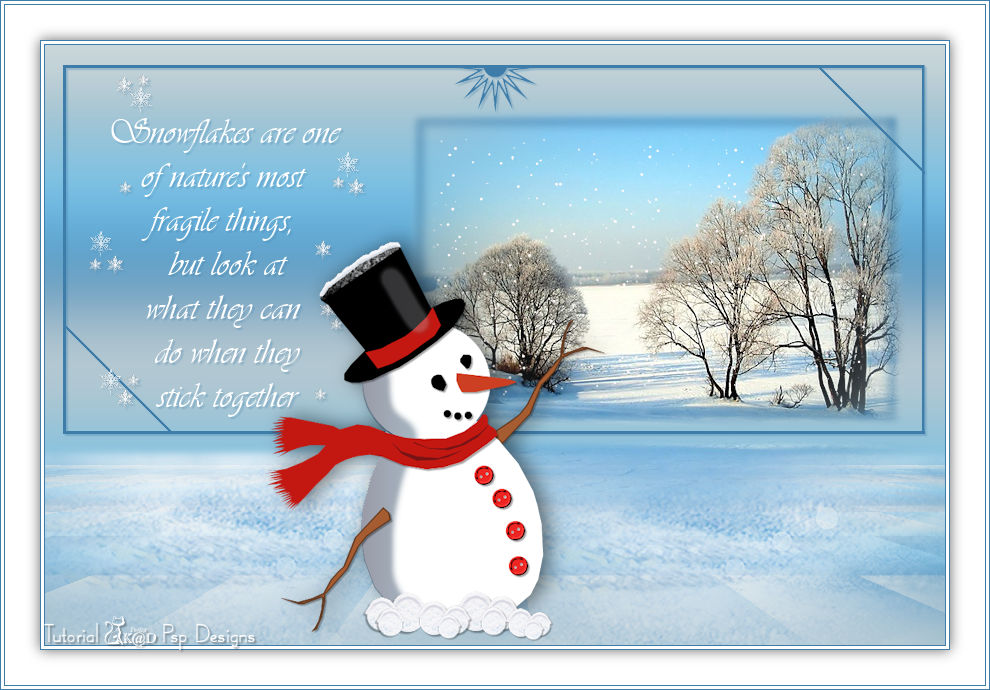
Result
Save as Psp Animation Shop image and put aside till later
We now will make our snowman …
16
You can close : BL21_KaD_Alfakanaal
Open : BL21_KaD_Alfakanaal_Sneeuwman
Window – Duplicate
Minimize original – we work on the copy
17
!We will use the colors on the top layer of the Alfa Channel (=Kleurenpallet) !
Activate Raster 1
Set foreground color to Color 7 and background color to Color 2
Selections – Load/Save Selection – Load Selection From Alpha Channel – Selectie 1 – see PS
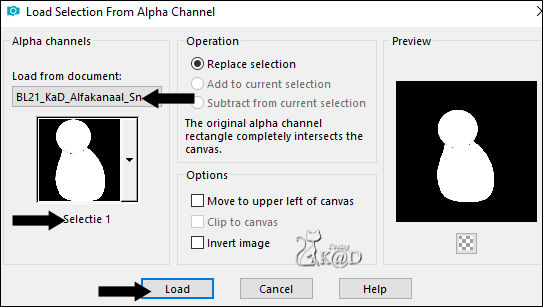
Fill with foreground color
18
Selections – Load/Save Selection – Load Selection From Alpha Channel – Selectie 2 – see PS
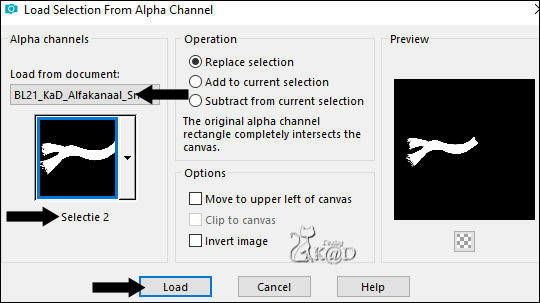
Fill with background color
Select none
19
Layers – New Raster layer
Selections – Load/Save Selection – Load Selection From Alpha Channel – Selectie 3 – see PS
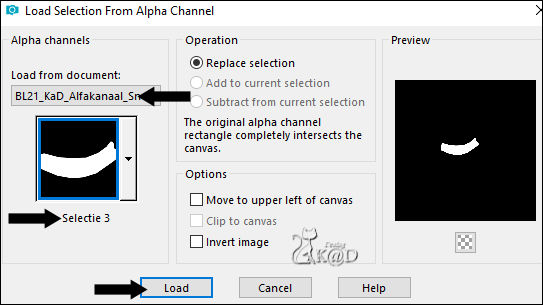
Effects – 3D-effects – Drop Shadow : V&H 2 – 35 – 2 – Color #000000
Select none
20
Set Foreground color to Color 1
Layers – New Raster layer
Selections – Load/Save Selection – Load Selection From Alpha Channel – Selectie 4 – see PS
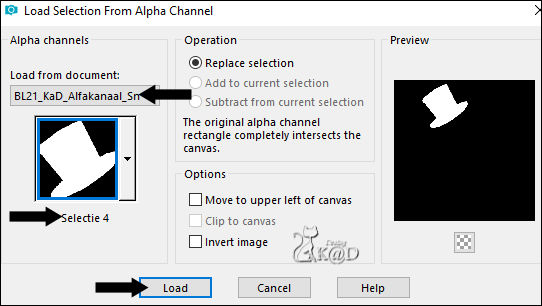
Fill with foreground color
Select none
21
Selections – Load/Save Selection – Load Selection From Alpha Channel – Selectie 5 – see PS
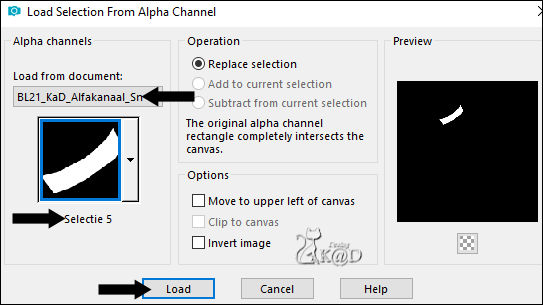
Fill with background color
Select none
Effects – 3D-effects – Drop Shadow : V&H 2 – 35 – 2 – Color #000000
22
Layers – New Raster layer
Selections – Load/Save Selection – Load Selection From Alpha Channel – Selectie 6 – see PS
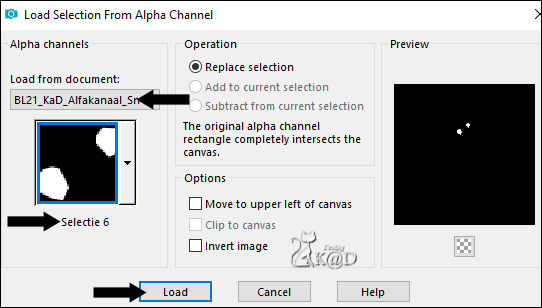
Fill with foreground color
23
Set Foreground color to Color 5
Selections – Load/Save Selection – Load Selection From Alpha Channel – Selectie 7 – see PS
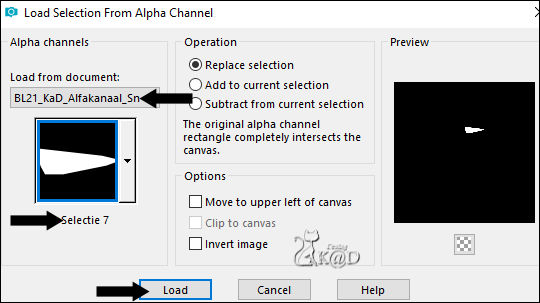
Fill with foreground color
Select none
Effects – 3D-effects – Drop Shadow : V&H 2 – 35 – 2 – Color #000000
24
Set Foreground color to Color 3 and background color to Color 4
Layers – New Raster layer
Selections – Load/Save Selection – Load Selection From Alpha Channel – Selectie 8 – see PS
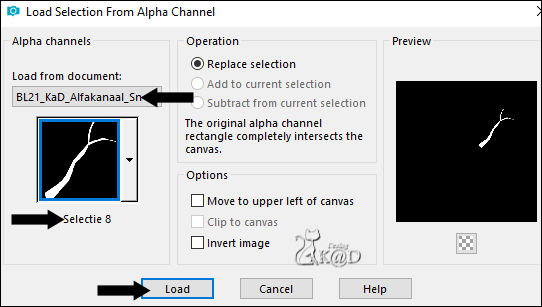
Fill with foreground color
Selections – Modify – Contract : 2
Fill with background color
Select none
25
Layers – Duplicate
Image – Mirror & Flip
Press K – Pos X : 66 – Pos Y : 367 – Press M
Effects – 3D-effects – Drop Shadow : V&H 2 – 35 – 2 – Color #000000
26
Activate Raster 5 (layer just beneath)
Effects – 3D-effects – Drop Shadow : V&H 2 – 35 – 2 – Color #000000
Layers – Arrange – Send to Bottom
27
Set Foreground color to Color 6
Activate Raster 2 (scarf)
Layers – New Raster layer
Selections – Load/Save Selection – Load Selection From Alpha Channel – Selectie 9 – zie PS
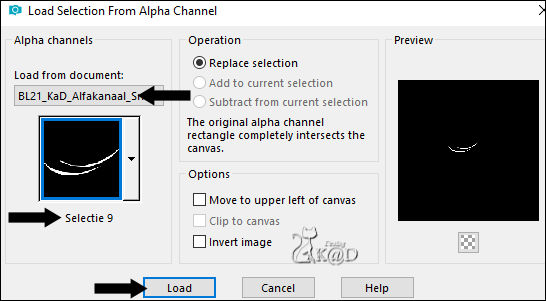
Fill with foreground color
Select none
28
Activate and copy : BL21_KaD_Element1 – Layer Schaduw
Edit – Paste as a new layer
Layers – Arrange – Send to top
Layers – Arrange – Move Down
Press K – Pos X : 192 – Pos Y : 42 – Press M
29
Activate and copy : BL21_KaD_Element1 – Layer Mond
Edit – Paste as a new layer
Press K – Pos X : 283 – Pos Y : 238 – Press M
30
Activate and copy : BL21_KaD_Element1 – Layer Knopen
Edit – Paste as a new layer
Press K – Pos X : 324 – Pos Y : 312 – Press M
Layers – Merge – Merge Down 2x
Effects – 3D-effects – Drop Shadow : V&H 2 – 35 – 2 – Color #000000
31
Activate and Copy : BL21_KaD_Element1 – Layer SneeuwHoed
Edit – Paste as a new layer
Press K – Pos X : 117 – Pos Y : 14 – Press M
32
Activate Raster 1 (Body)
Activate and Copy : BL21_KaD_Element2
Edit – Paste as a new layer
Press K – Pos X : 173 – Pos Y : 159 – Press M
Result
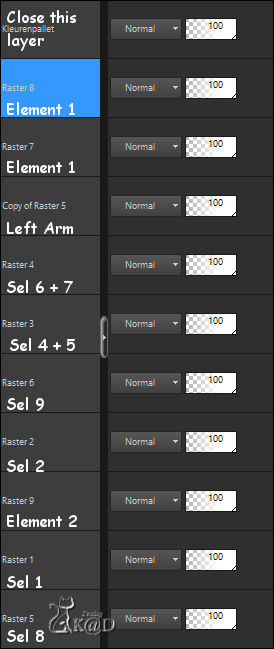
33
Close the top layer (=Kleurenpallet)
Make sure you are on another layer
Edit – Copy Merged
Back to your big work
32
Edit – Paste as a new layer
Layers – Arrange – Bring to top
Image – Resize : 75%, no checkmark to all layers
Press K – Pos X : 218 – Pos Y : 197 – Press M
Effects – 3D-effects – Drop Shadow : V 0 – H 7 – 50 – 30 – Color #000000
33
Activate and Copy : BL21_KaD_Snowballs
Edit – Paste as a new layer
Press K – Pos X : 317 – Pos Y : 546 – Press M
34
File – Script – Run :
Choose the script from your scrip folder : BL21_KaD_Randen
Activate Color changer and change the blue borders to your color 4
Or add borders Manually :
Image – Add Borders :
1 pix color 4
3 pix color 5
1 pix color 4
35
Select all
Image – Add Borders : 35 pix Color 5
Effects – 3D-effects – Drop Shadow : V&H 0 – 60 – 20 – Kleur #000000
Select none
36
Image – Add Borders :
1 pix color 4
3 pix color 5
1 pix color 4
37
Add your name or watermark,
Add my watermark to your creation HERE
38
Layers – Merge all layers
Image – Resize : 900 pix all layers
Adjust – Sharpen – Unsharp Mask : 2 – 30 – 2 – no check marks
Save as JPG file and you're done!
I hope you enjoyed this tutorial
Karin11/07/2019
Email me your result 


