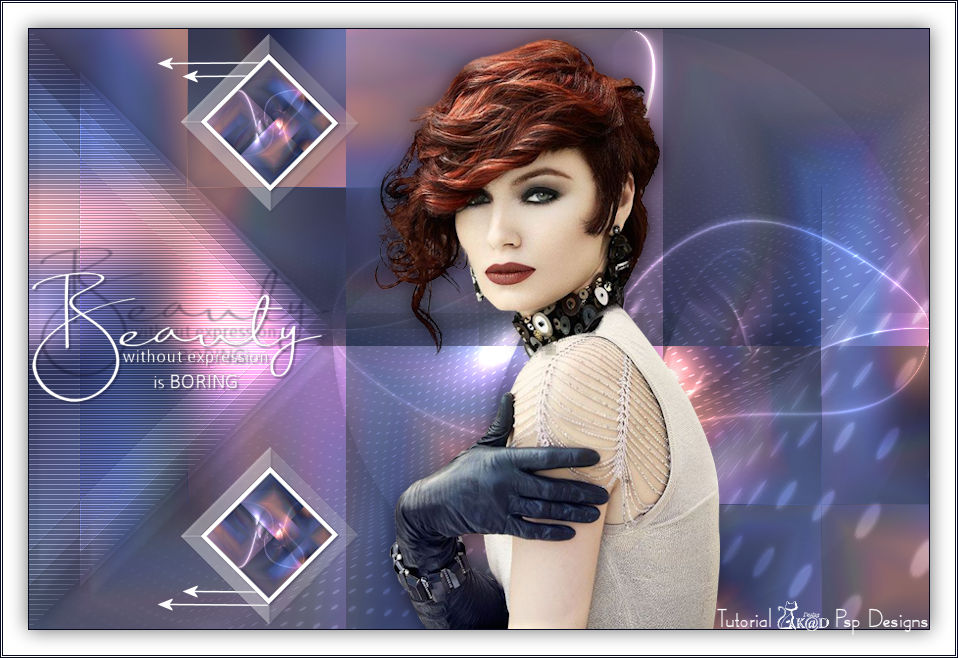
Alpha Selections : open in PSP and minimize
1/ BL24_KaD_Alfakanaal (this image is not empty – it contains alpha selections)
Masks : open in PSP and minimize
1/ Narah_mask_0524
2/ Narah_Mask_0910
Color palette :
If you work with your own colors, make your own color palette with the alpha channel,
so you can easily switch between your colors.
There are color differences in the different versions of Psp.
Therefore, use the html codes of the color palette to be sure,
that you have the same colors. Also when merging layers, there may be color differences.
Plugins :
1/ Mehdi : Wavy Lab 1.1 – Sorting Tiles
2/ Simple : Pizza Slice Mirror
3/ Carolaine & Sensibility : cs-texture
4/ Unlimited 2.0 : &<Bkg Designer sf10I> – Cruncher (-)
(-) Import into Filters Unlimited
---------------------------------------
THE TUTORIAL
When working with your own colors, play with the Blend Mode and/or Opacity at your own discretion
From now on I use the terms "MIRROR" and "FLIP" again.
Mirror: Mirror horizontal - Flip: Mirror vertical
Let’s get started.
Remember to save your work often
Colors :
Foreground : Color 1 - mid-tone color from your tube
Bachground : Color 2 - dark tone color from your tube
Extra colors : Lighter tone of your mid-tone color, a contrasting color, a light contrasting color, black and white.
1
Open the alpha channel : BL24_KaD_Alfakanaal
Window – Duplicate
Minimize the original – we continue on the copy
2
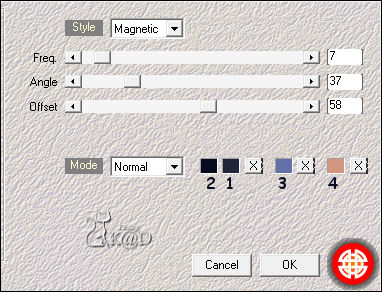
Plugins – Mehdi – Wavy Lab 1.1 – see PS
3
Effects – Image effects – Seamless Tiling – DEFAULT but TRANSITION to 100
Adjust – Blur – Gaussian blur : 25
4
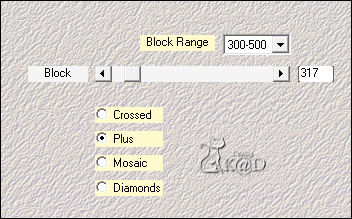
Plugins – Mehdi – Sorting Tiles – see PS
5
Set Foreground color to Color #cdc7bb
Layers – New Rasterlayer (Raster 2)
Fill with foreground
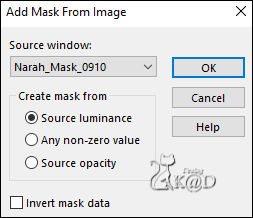
Layers – New Mask layer – From image “Narah_Mask_0910” – see PS
Layers –Merge group (Group - Raster 2)
6
Effects – Geometric effects – Circle – Transparent
Objects – Align – Right
Change Blend mode to Dodge
7
Layers – Duplicate
Image – Mirror and Flip
Objects – Align – Right
Change Blend mode to Soft Light and Opacity to 60
Result
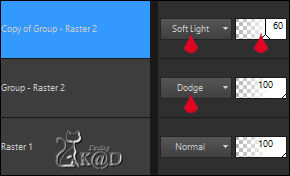
Layers – Merge down*
*Reduce the Opacity if necessary
8
Activate Raster 1
Layers – Duplicate
Plugins – Simple – Pizza Slice Mirror
Change Blend mode to Dodge and Opacity to 44
Result
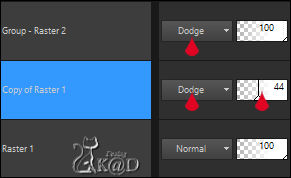
Layers – Merge down
9
Selections – Load/Save Selection – Load Selection From Alpha Channel – Selectie 1 – see PS
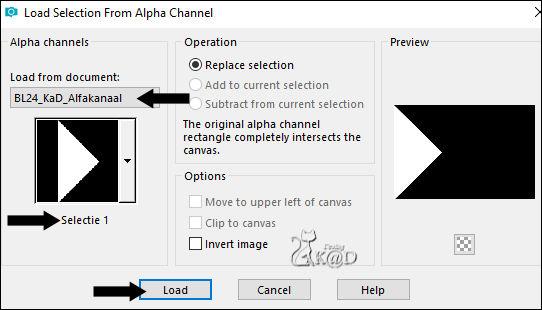
Selections – Promote selection to layer (Promoted Selection)
Adjust – Blur – Gaussian blur : 15
Plugins – Carolaine & Sensibility – cs-texture – see PS
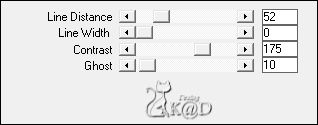
10
Selection – Modify – Contract : 25
Selections – Promote selection to layer (Promoted Selection 1)
Select none
Plugins – Unlimited 2.0 – &<Bkg Designer sf10I> – Cruncher : 15 – 15
11
Effects – Edge effects – Enhance
12
Effects – 3D-effects – Drop shadow : V & H 10 – 50 – 5 – Color 6 ( #ffffff)
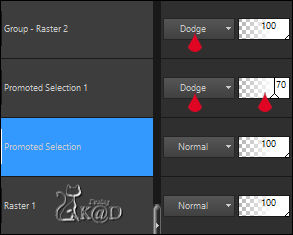
Change Blend mode to Dodge and Opacity to 70
13
Activate the layer just below (Promoted Selection)
Effects – 3D-effects – Drop shadow : V & H 0 – 60 – 30 – Color 2
Result
14
Activate Raster 1
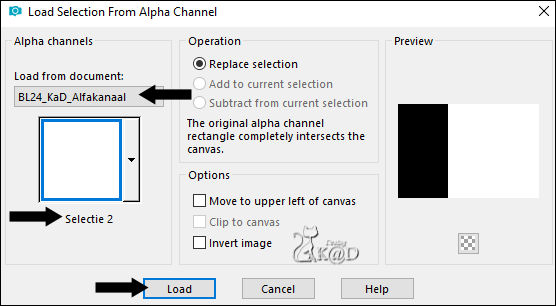
Selections – Load/Save Selection – Load Selection From Alpha Channel – Selectie 2 – see PS
Edit – Copy Merged
15
Edit – Paste as a NEW image
Image –Add borders :
1 pix color 2
25 pix color 6 #ffffff
Image –Resize : 15%, all layers
Edit – Copy
16
Back to your work
Select none
Edit – Paste as a new layer (Raster 2)
Layers – Arrange – Bring to top
17
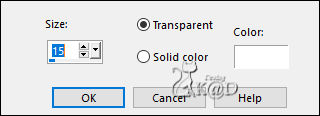
Effects – 3D-effects – Chisel – see PS
18
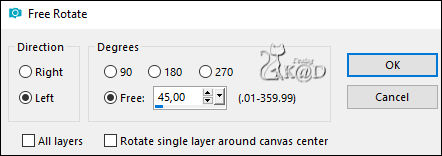
Image – Free rotate– see PS
Adjust – Sharpness – Sharpen
Press K – Pos X : 152 – Pos Y : 5 – Press M HELP
(K : activate the Move Tool – M : deactivate the Move Tool)
Layers – Duplicate
Image – Flip
Layers – Merge down
Effects – 3D-effects – Drop shadow : V&H 2 – 35 – 2 – Color 2
19
Activate and copy : BL24_KaD_Deco1
Edit – Paste as a new layer (Raster 3)
Press K – Pos X : 3 – Pos Y : 243 – Press M
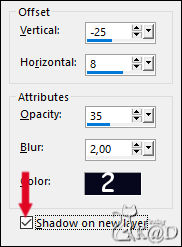
Effects – 3D-effects – Drop shadow: On a new layer – see PS (Raster 3 shadow 1)
20
Activate top layer (Raster 3)
Effects – 3D-effects – Drop shadow: V&H 2 – 35 – 2 – Color 2
Repeat if necessary (text must be legible)
21
Activate and copy : BL24_KaD_Deco2
Edit – Paste as a new layer (Raster 4)
Press K – Pos X : 128 – Pos Y : 28 – Press M
Layers – Arrange : Move down 3x
22
Activate Raster 1
Change foreground color to color 6
Layers – New Raster layer
Fill with foreground color
22-1
Layers – New Mask layer – From image – “Narah_mask_0524” – see PS
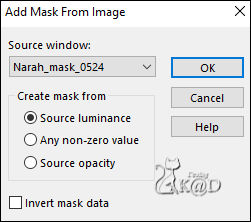
Image – Mirror
Layers – Duplicate
Layers –Merge Group (Group - Raster 5)
Change Blend mode to Overlay and Opacity to 44
23
Activate and copy your tube
Edit – Paste as a new layer (Raster 5)
Adjust if necessary
Layers – Arrange – Bring to top
Move her a bit off center (Approximately: Pos X: 343), looking to the left
24
Layers – Duplicate (Copy of Raster 5)
Activate the layer just below (Raster 5)
Adjust – Blur – Gaussian blur : 8
Change Blend mode to Multiply and Opacity to 61
(See what fits your tube and background!)
25
Image –Add borders :
1 pix Color 2
Select all
25 pix Color 6
Effects – 3D-effects – Drop shadow : V&H 0 – 60 – 30 – Color #000000
Select none
26
Image –Add borders :
1 pix Color 2
1 pix Color 6
1 pix Color 2
27
Add your name or watermark,
Add my watermark to your creation HERE
28
Merge all layers (flatten)
Image – Resize – Width 900 Pixels – all Layers
Adjust – Sharpen – Unsharp Mask : 2 – 30 – 2 – no check marks
Save as JPG file and you're done!
I hope you enjoyed this tutorial
Karin
28/01/2020
Email me your result 


