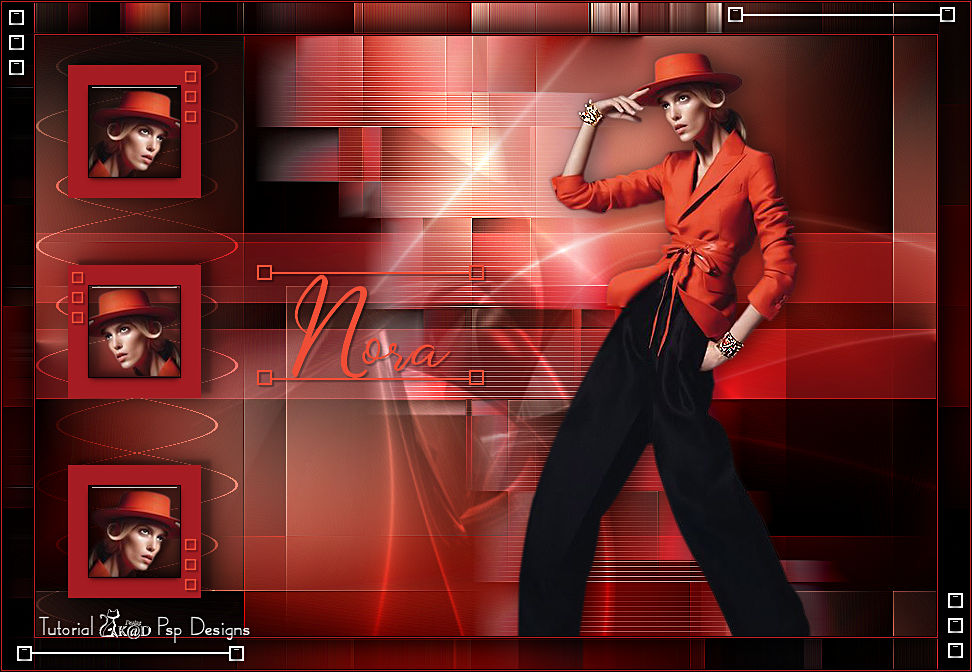
Materials for the tutorial :
Disclaimer :
Each Graphic is the property of the original artist to whom the copyright belongs and
may not be placed in a collection or offered for sale on-line or otherwise.
Choose a tube of a woman wit legs (feet can too)
I’m using a tube from LB
1/ BL29_KaD_Deco1
Alpha Selections : open in PSP and minimize
1/ BL29_KaD_Alfakanaal (this image is not empty – it contains alpha selections)
Masks : open in PSP and minimize
1/ BL29_KaD_Alfakanaal
Filter Preset : double click to install
1/ BL29_KaD_Glass
Color palette :
If you work with your own colors, make your own color palette with the alpha channel,
so you can easily switch between your colors.
There are color differences in the different versions of Psp.
Therefore, use the html codes of the color palette to be sure,
that you have the same colors. Also when merging layers, there may be color differences.
Plugins :
1/ VanderLee : Unplugged X
2/ Mehdi : Sorting Tiles
3/ Alien Sin – Eye Candy 5 : Impact
4/ Italian Editors : Effetto Fantasma
5/ Carolaine & Sensibility : cs-texture
6/ Toadies : Weaver
(-) Import into Filters Unlimited
---------------------------------------
THE TUTORIAL
When working with your own colors, play with the Blend Mode and/or Opacity at your own discretion
From now on I use the terms "MIRROR" and "FLIP" again.
Mirror: Mirror horizontal - Flip: Mirror vertical
Let’s get started.
Remember to save your work often
Colors :
Color 1 (Foreground color) = #000000
Color 2 (Background color ) = Color from your tube
Color 3 : a lighter version of color 2
Color 4 : white (#ffffff)
1
Open the alpha channel : BL29_KaD_Alfakanaal
Window – Duplicate
Minimize the original – we continue on the copy
2
Fill with foreground color
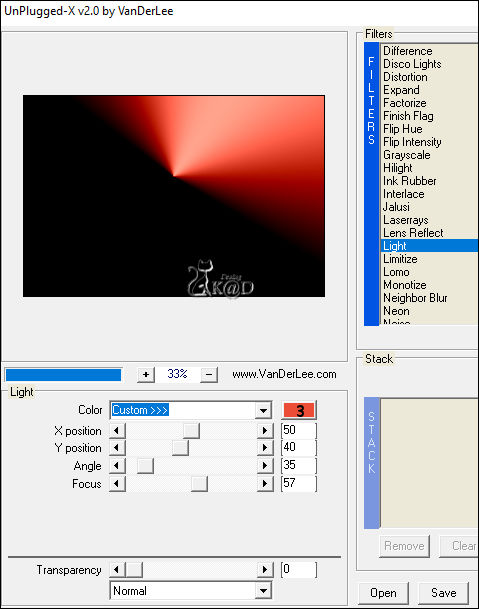
Plugins – VanderLee – Unplugged X – Light – see PS
3
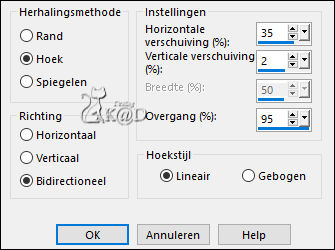
Effects – Image effects – Seamless Tiling – see PS
Adjust – Blur – Gaussian blur : 50
4
Layers – Duplicate (Copie of Raster 1)
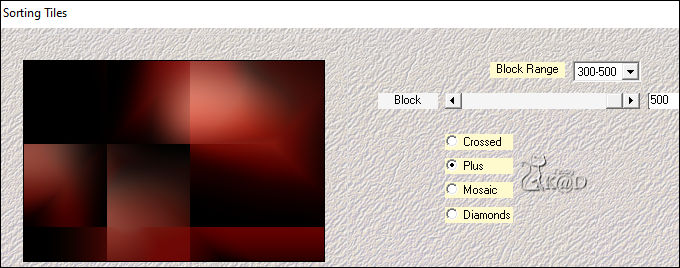
Plugins – Mehdi – Sorting Tiles – see PS
5
Effects – Edge effects – Enhance more
6
Effects – Image effects – Seamless Tiling – same values
7
Change foreground color to Color 4
Layers – New Raster layer (Raster 2)
Selections – Load/Save Selection – Load Selection From Alpha Channel – Selectie 1 – see PS
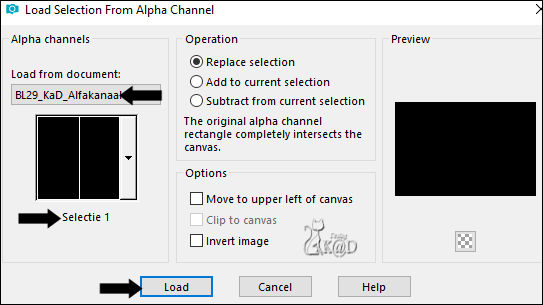
Fill with foreground color
Select none
Effects – Distortion effects – Wave – see PS

7-1
Layers – Duplicate
Image – Mirror
Press K – Pos X : 0 – Pos Y : 0 – Press M HELP
(K : activate the Move Tool – M : deactivate the Move Tool)
Layers – Merge down
Change Blend Mode to Overlay
Layers – Duplicate
Layers – Merge down (Raster 2)
8
Layers – New Raster layer (Raster 3)
Selections – Load/Save Selection – Load Selection From Alpha Channel – Selectie 2 – see PS
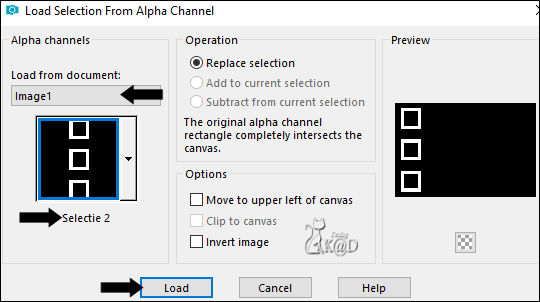
Fill with background color
9
Change foreground color to Color 1
Selections – Load/Save Selection – Load Selection From Alpha Channel – Selectie 3 – see PS
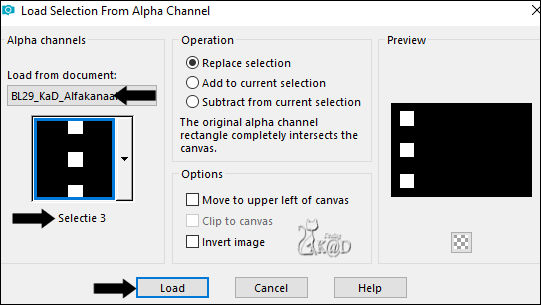
Fill with foreground color
Selections – Modify – Contract : 1
Press Delete op the keyboard
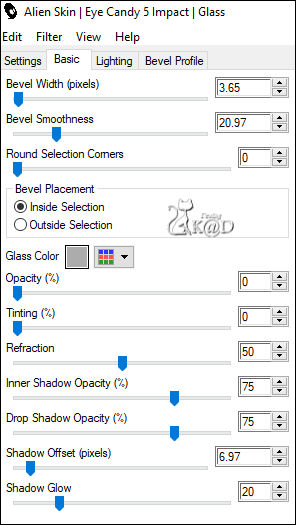
Plugins – Alien Sin – Eye Candy 5 – Impact – Glass – Choose the Preset “BL29_KaD_Glass”
or put the values in manually – see PS
Select none
10
Activate : your woman tube
Make sure she stand with the nose to the right
Edit – Copy
Edit – Paste as a new layer on your crea
Depending on your tube: Image – Resize, so the face fits nicely in the frame
10-1
Selections – Load/Save Selection – Load Selection From Alpha Channel – Selectie 4 – see PS
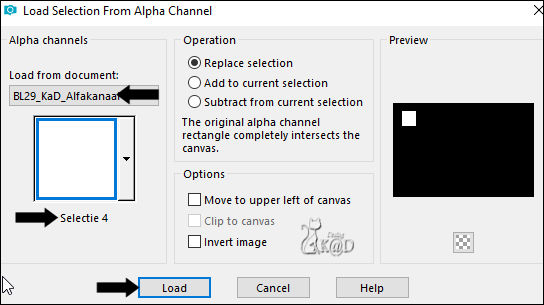
Place the tube in the top square
Selections – Invert
Press Delete op the keyboard
Select none
Layers – Arrange – Move down
11
Layers – Duplicate
Image –Mirror
Press K – Pos X : 52 – Pos Y : 251 – Press M
11-1
Layers – Duplicate
Image –Mirror
Press K – Pos X : 52 – Pos Y : 453 – Press M
Layers –Merge down 2x (Raster 4)
11-2
Activate Raster 3 (Top Layer – Frames)
Layers –Merge down (Raster 4)
Effects – 3D-effects – Drop Shadow : V -5 – H 10 – 40 – 5 – Color #000000
12
Activate Raster 1
Selections – Load/Save Selection – Load Selection From Alpha Channel – Selectie 5 – see PS
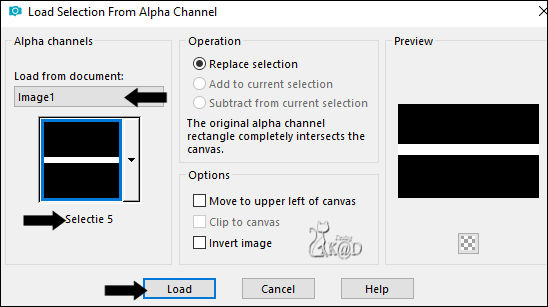
Selections – Promote to layer (Promoted Selection)
Layers – Arrange – Move up
Select none
Plugins – Italian Editors – Effetto Fantasma : 41 – 41
12-1
Effects – Edge effects – Enhance
Change Blend mode to Screen
13
Activate Raster 1
Selections – Load/Save Selection – Load Selection From Alpha Channel – Selectie 6 – see PS
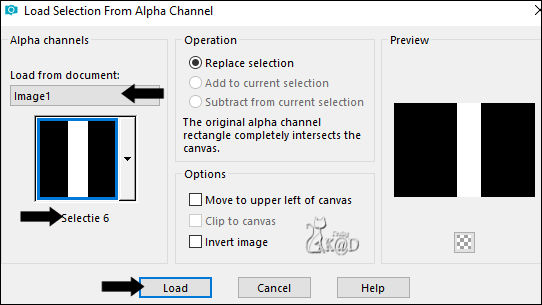
Selections – Promote to layer (Promoted Selection 1)
Layers – Arrange – Move up
Plugins – Carolaine & Sensibility – cs-texture – see PS
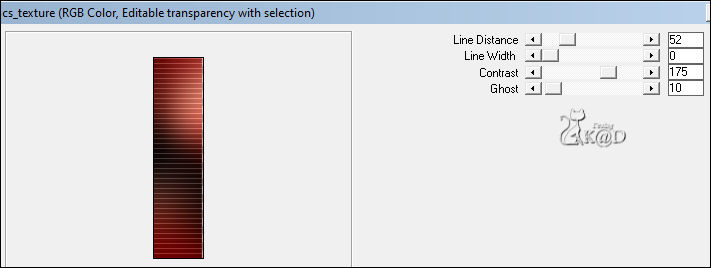
Select none
14
Effects – Geometric Effects – Skew – see PS
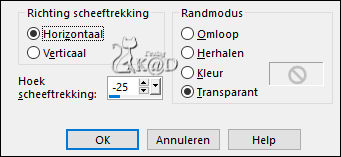
14-1
Plugins – Toadies – Weaver – see PS

14-2
Layers – Duplicate (Copy of Promoted Selection 1)
Effects – Distortion Effects – Wind – see PS
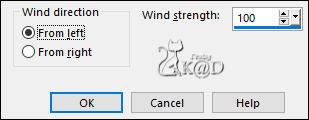
Layers – Arrange – Move down
Change Blend mode to Screen
14-3
Activate the layer just above (Promoted Selection 1)
Effects – Edge effects – Enhance
15
Layers – New Raster layer (Raster 3)
Change background color to color 3
Selections – Load/Save Selection – Load Selection From Alpha Channel – Selectie 7 – see PS
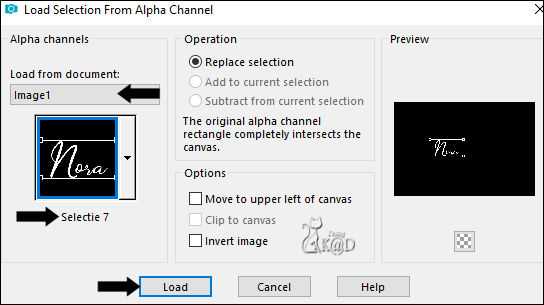
Fill with background color
Select none
Effects – 3D-effects – Drop Shadow : V&H 2 – 35 – 2 – Color #000000
Layers – Arrange – Bring to top
16
Layers – New Raster layer (Raster 5)
Selections – Load/Save Selection – Load Selection From Alpha Channel – Selectie 8 – see PS
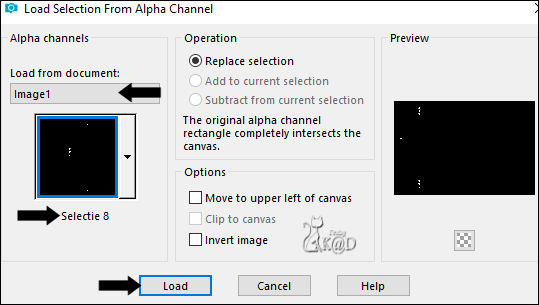
Fill with background color
Select none
Effects – 3D-effects – Drop Shadow : V&H 2 – 35 – 2 – Color #000000
17
Change foreground color to Color 4
Activate Promoted Selection
Layers – New Raster layer
Fill with foreground color
Layers – New Mask layers – From image “Narah_Mask_0910”
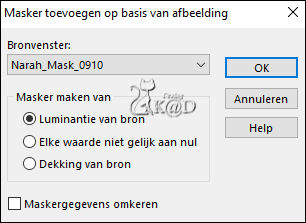
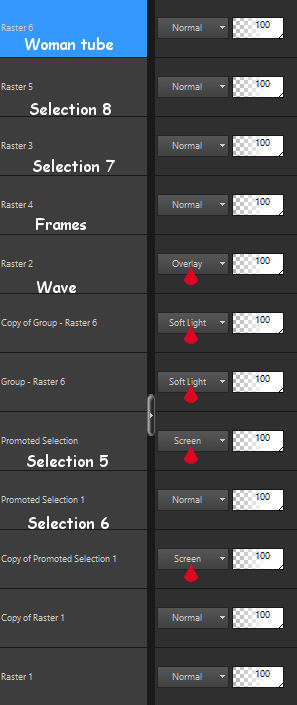
Layers – Merge – Merge group (Group - Raster 6)
Change Blend mode to Soft Light
17-1
Layers – Duplicate (Copy of Group - Raster 6)
Image – Free Rotate: Right – 90 – no check marks
Change Blend mode to Overlay
18
Activate: woman tube
Make sure she stand with the nose to the left
Edit – Copy
Edit – Paste as a new layer on your work
Layers – Arrange – Bring to top
Move slightly to the right, but not against the edge and at the bottom against the edge
(As Indication for my tube: Pos X : 479 – Pos Y : 15)
Effects – 3D-effects – Drop Shadow : V 0 – H 7 – 50 – 30 – Color #000000
Result
19
Activate Raster 1
Edit – Copy
Image – Add borders :
1 pix color 1
1 pix color 2
1 pix color 1
Select all
30 pix color 2
Selection Invert
Edit – Past into selection
20
Plugins – Toadies –Weaver – same values
20-1
Effects – Edge effects – Enhance
Selection Invert
Effects – 3D-effects – Drop Shadow : V&H 0 – 80 – 40 – Color #000000
Repeat 1x
Select none
21
Image – Add borders :
1 pix color 1
1 pix color 2
1 pix color 1
22
Activate and copy : BL29_KaD_Deco1
Edit – Paste as a new layer
Do not move
23
Add your name or watermark,
Add my watermark to your creation HERE
24
Layers – Merge all layers
Image – Resize - Width 900 Pixels - Resize all Layers checked
Adjust – Sharpen – Unsharp Mask : 2 – 30 – 2 – no check marks
Save as JPG file and you're done!
I hope you enjoyed this tutorial
Karin
17/07/2020
