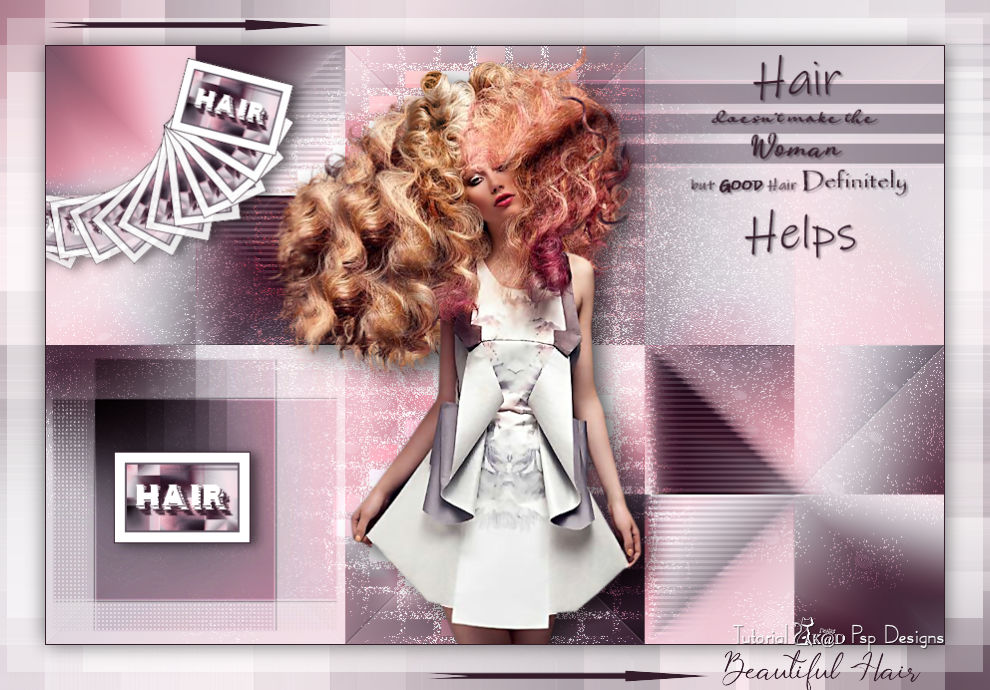
Materials for the tutorial :
Disclaimer :
Each Graphic is the property of the original artist to whom the copyright belongs and
may not be placed in a collection or offered for sale on-line or otherwise.
Choose a tube of a woman, preferably above the knees, with a lot of/big hair.
I am using a tube from Animabelle
1/ BL33_KaD_Element1 + Element2
2/ BL33_KaD_Kader
Alpha Selections : open in PSP and minimize
1/ BL33_KaD_Alfakanaal (this image is not empty – it contains alpha selections)
Masks : open in PSP and minimize
1/ 1/ Narah_Mask_1102
Filter Preset : double click to install
1/ 1/ BL33_KaD_Shadow1
Color palette :
If you work with your own colors, make your own color palette with the alpha channel,
so you can easily switch between your colors.
There are color differences in the different versions of Psp.
Therefore, use the html codes of the color palette to be sure,
that you have the same colors. Also when merging layers, there may be color differences.
Plugins :
1/ Medhi : Wavy Lab 1.1 – Sorting Tiles
2/ Carolaine & Sensibility : CS-HLines
3/ Effecten – Unlimited 2.0 – &<BKG Designer sf10I> (-)
4/ Unlimited 2.0 – [AFS IMPORT] – sqborder 2 (-)
5/ Toadies : Blast’em
6/ Alien Skin – Eye Candy 5 : Impact
(-) Import into Filters Unlimited
---------------------------------------
THE TUTORIAL
When working with your own colors, play with the Blend Mode and/or Opacity at your own discretion
From now on I use the terms "MIRROR" and "FLIP" again.
Mirror: Mirror horizontal - Flip: Mirror vertical
Let’s get started.
Remember to save your work often
Colors :
First create your own color palette, so that you can easily switch between your colors.
Use the Alfa_Kleurpallet-6 in the materials for this.
Foreground: 1 = Dark color from your tube (not too dark)
Background: 2 = Light variant of color 1
Color 3: Dark variant of Color 1
Color 4: contrasting color from your tube, not too dark
Color 5: #ffffff
Color 6: # 000000
1
Open the alpha channel : BL33_KaD_Alfakanaal
Window – Duplicate
Minimize the original – we continue on the copy
2
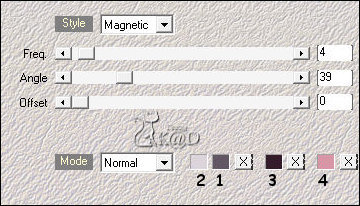
Plugins – Mehdi – Wavy Lab 1.1 – see PS
Adjust – Blur – Gausian Blur : 20
3
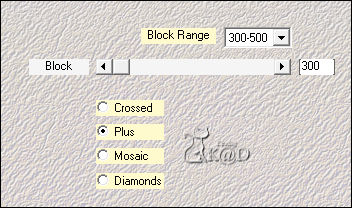
Plugins – Mehdi – Sorting Tiles – see PS
4
Layers – Duplicate
Image – Mirror and Flip
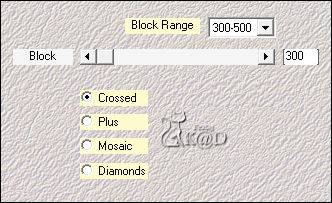
Plugins – Mehdi – Sorting Tiles – see PS
Change Blend mode to Soft Light and layer opacity to 50
Effects – Edge effects –Enhance more
Layers – Merge – Merge down
5
Selections – Load/Save Selection – Load Selection From Alpha Channel – Selectie 1 – see PS
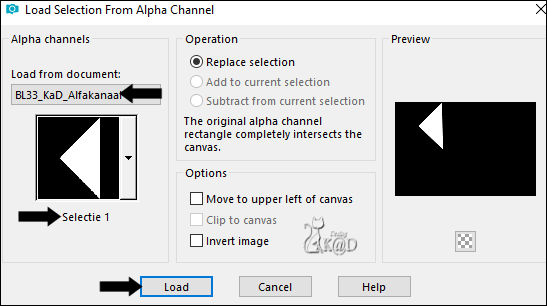
Selections – Promote selection to layer (Promoted selection)
Plugins – Carolaine & Sensibility – CS-HLines – see PS
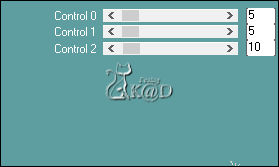
Select none
5-1
Effects – Image effects –Offset : H -3 – V 0 – Transparent
Effects – Distortion effects – Wind : From Right – 65
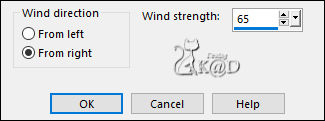
5-2
Layers – Duplicate
Image – Mirror and Flip
Layers – Merge – Merge down
6
Change Foreground color to Gradient : Fading Foreground – see PS
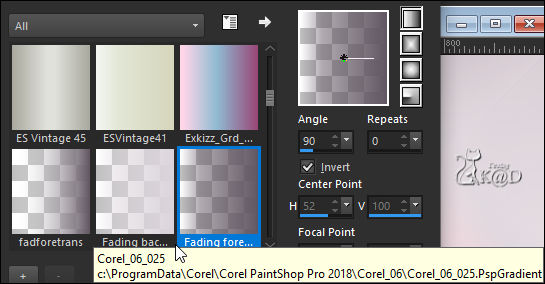
Change opacity of filling tool to 60
Layers – New Raster layer (Raster 2)
Selections – Load/Save Selection – Load Selection From Alpha Channel – Selectie 2 – see PS
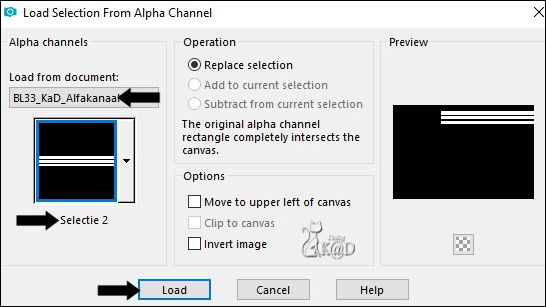
Fill with gradient
Change opacity of filling tool 100
Change foreground color to Color 1
Select none
6-1
Layers – Duplicate (Copy of Raster 2)
Effects – 3D-effect –Chisel – see PS

Layers – Arrange – Move Down
Change Blend mode to Overlay
7
Activate Raster 1
Selections – Load/Save Selection – Load Selection From Alpha Channel – Selectie 3 – see PS
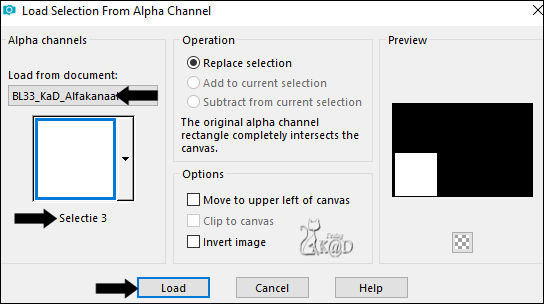
Selections – Promote selection to layer (Promoted Selection 1)
Plugins – Unlimited 2.0 – &<BKG Designer sf10I> – Cruncher : 20 – 20
Select none
Plugins – Unlimited 2.0 – &<BKG Designer sf10I> – Cruncher : 20 – 20
7-1
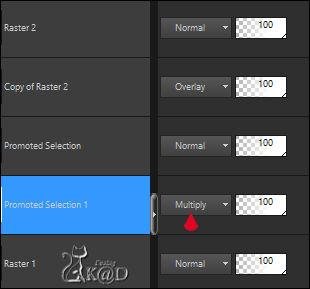
Image – Resize : 90%, No check marks
Press K – Pos X : 6 – Pos Y : 313 – Press M HELP
(K : activate the Move Tool – M : deactivate the Move Tool)
Change Blend mode to Multiply
7-2
Layers – Duplicate
Adjust – Sharpness – Sharpen more
Layers – Merge – Merge down
8
Plugins – Unlimited 2.0 – [AFS IMPORT] – sqborder 2 – see PS
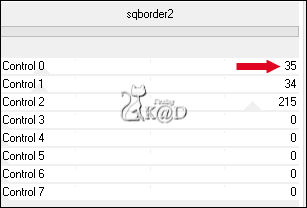
Layers – Duplicate
Adjust – Sharpness – Sharpen
Layers – Merge – Merge down (Promoted Selection 1)
Result
9
Layers – New Raster layer
Fill with background color
Layers – New Raster layers – From Image “Narah_Mask_1102” – see PS
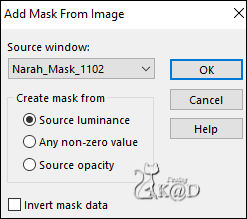
Layers – Duplicate (you now have 2x the mask in your layer palette)
Layers – Merge – Merge group (Group Raster 3)
Plugins – Toadies – Blast’em : 20 – 211
Change Blend mode to Overlay
Adjust – Sharpness – Sharpen
Layers – Arrange – Move Down
10
Edit – Copy merged
Edit – Paste as a new image
Set aside until later
11
Change background color to Color 3
Activate and copy : BL33_KaD_Element1
Edit – Paste as a new layer (Raster 3)
Layers – Arrange – bring to top
Press K – Pos X : 646 – Pos Y : 8 – Press M
11-1
Activate color changer tool and click right in the text (background color ) – see PS

Effects – 3D-effects – Drop shadow : V&H 2 – 35 – 2 – Color #00000
12
Activate your woman tube
Edit – Paste as a new layer (Raster 4)
Adjust if necessary
Place in the middle
12-1
Layers – Duplicate (Copy of Raster 4)
Activate the layer just below (Raster 4)
Adjust – Blur – Gausian Blur : 10
Effects – Texture effects –Mosaic – Antique – see PS

Change Blend mode to Dodge
12-2
Activate top layer (Copy of Raster 4)
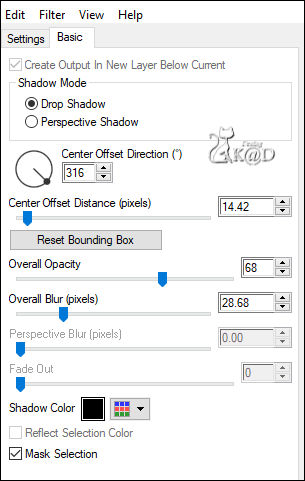
Plugins – Alien Skin – Eye Candy 5 – Impact – Perspective Shadow
Choose the Preset on the left : BL33_KaD_Shadow1 or set manually – see PS
13
Change background color to color 5 (white)
Activate the image that we have set aside at # 10
Window – Duplicate (Shift d)
Minimize again, we still need the image later
13-1
Image – Resize : 15%, all layers
Activate and copy : BL33_KaD_Element2
Edit – Paste as a new layer – don’t move
Effects – 3D-effects – Drop shadow : V&H 3 – 100 – 1 – Color 3
Repeat 1x
13-2
Layers – New Raster layer
Fill with background color
Select all
Selection – Modify – Contract : 10
Effects – 3D-effects – Drop shadow : V&H 0 – 50 – 40 – Color #000000
13-3
Fill with foreground color
Selection – Modify – Contract : 2
Press Delete on the keyboard
Select none
Image – Add borders : 1 pix color 3
Edit – Copy
14
Back to your work
Edit – Paste as a new layer (Raster 5)
Layers – Duplicate (Copy of Raster 5)
Press K – Pos X : 20 – Pos Y : 26 – Press M
Plugins – MuRa’s Meister – Copies – see PS
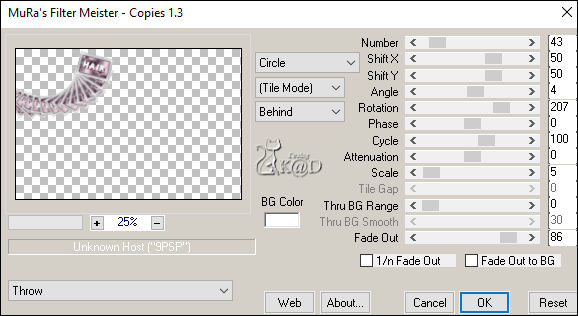
Image – Resize : 80%, no check marks
Press K – Pos X : -65 – Press Y : 5 – Druk M
Erase the small piece at the top – see PS
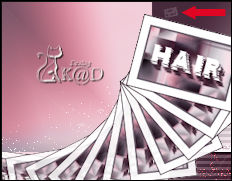
Effects – 3D-effects – Drop shadow : V 2 – H 7 – 50 – 15 – Color #000000
If necessary, move underneath your 2 tube layers
14-1
Activate Raster 5
Press K – Pos X : 68 – Pos Y : 407 – Press M
Effects – 3D-effects – Drop shadow: V 2 – H 7 – 50 – 15 – Color #000000
14-2
Layers – Merge – Merge visible
Set aside until later
15
Change foreground color to color 3
Open : BL33_KaD_Kader
Window – Duplicate, we work on the copy
Layers – New Raster layer (Raster 2)
Fill selection with foreground color (color 3)
Select none
15-1
Activate the layer “afbeeldingPunt10”
Press Delete op the keyboard
Select all
Selection – Modify – Contract : 45
Selection invert
Copy your image that you have set aside at # 10
Edit – Paste into selection
Plugins – Unlimited 2.0 – Cruncher : 20 – 20
Repeat 1x
15-2
Selection invert
Selection – Modify – Contract : 1
Activate and copy your work (14-2)
Edit – Paste into selection
Effects – 3D-effects – Drop shadow : V&H 0 – 60 – 30 – Color #000000
Select none
16
Add your name or watermark,
Add my watermark to your creation HERE
Merge all layers (Flatten)
17
Image – Resize – Width 900 Pixels – Resize all Layers checked
Adjust – Sharpen – Unsharp Mask : 2 – 30 – 2 – no check marks
Save as JPG file and you're done!
I hope you enjoyed this tutorial
Karin
13/12/2020
