Materials for the tutorial :
Disclaimer :
Each Graphic is the property of the original artist to whom the copyright belongs and
may not be placed in a collection or offered for sale on-line or otherwise.
THEME
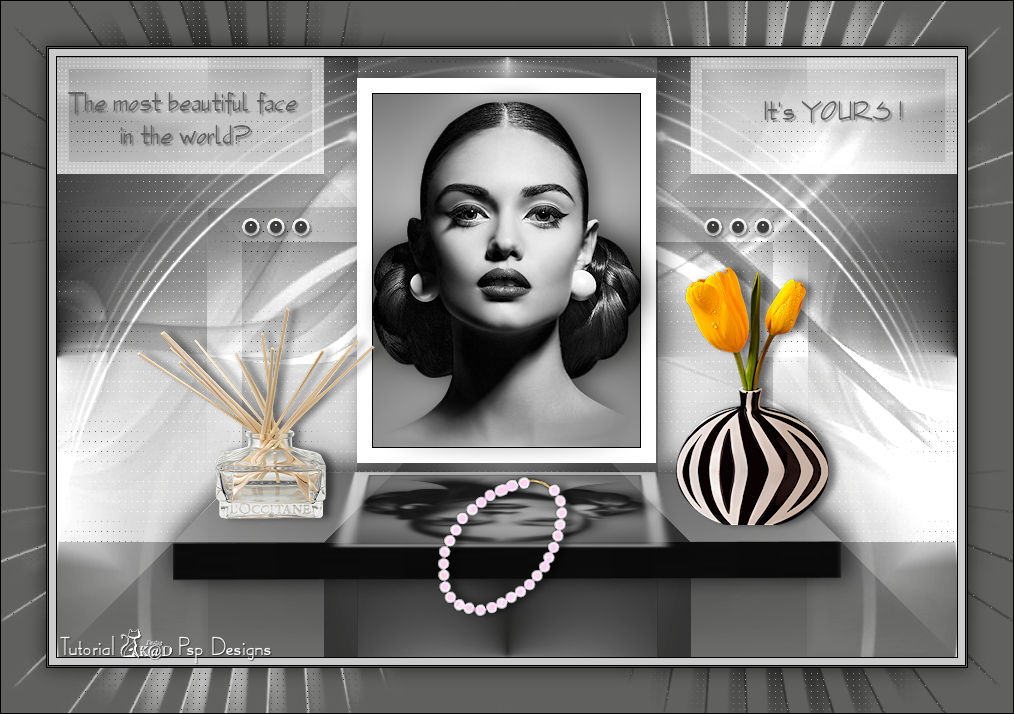
RETRO & Black and white.
The only color in your creation comes from your vase and my pearls.
The rest is BLACK / WHITE !!!!!!
You need :
1 tube of a face in black and white, preferably a front view *.
1 tube of (retro) vase with flower
* Do you have a color tube : Effects - Photo Effects - Black and White and play with the brightness.
I use tubes from Criss & Alies
1/ BL36_KaD_Element1 + BL36_KaD_Element2 + BL36_KaD_Element3
2/ nicole-deco-7-2012
Alpha Selections : open in PSP and minimize
1/ BL36_KaD_Alfakanaal
Masks : open in PSP and minimize
1/ Narah_Mask_1341
2/ Narah_Mask_1435
Filter Presets : double click to install
1/ BL36_KaD_Extrude
2/ BL36_KaD_Glass
3/ BL36_KaD_Shadow
Color palette :
If you work with your own colors, make your own color palette with the alpha channel,
so you can easily switch between your colors.
There are color differences in the different versions of Psp.
Therefore, use the html codes of the color palette to be sure,
that you have the same colors. Also when merging layers, there may be color differences.
Plugins :
1/ Mehdi : Wavy lab – Sorting Tiles
2/ Toadies : *Sucking Toad* Bevel II.2
3/ Alien Skin – EyeCandy 5 : Impact
4/ L en K landksiteofwonders : Zitah
(-) Import into Filters Unlimited
---------------------------------------
THE TUTORIAL
When working with your own colors, play with the Blend Mode and/or Opacity at your own discretion
From now on I use the terms "MIRROR" and "FLIP" again.
Mirror: Mirror horizontal - Flip: Mirror vertical
Let’s get started.
Remember to save your work often.
Some print screens have other colors than the original.
Use the same colors or colors in the same hue!
Colors :
Color 1 (Foreground color): #60605f
Color 2 (Background color ): #cbcbcb
Color 3 : #ffffff (white)
Color 4 : #000000 (black )
1
Open the alpha channel : BL36_KaD_Alfakanaal
Window – Duplicate
Minimize the original – we continue on the copy
2
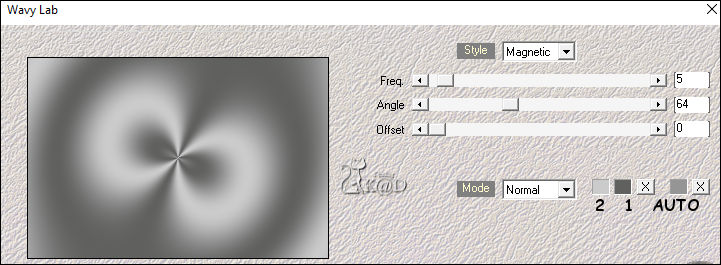
Plugins – Mehdi – Wavy lab – see PS
3
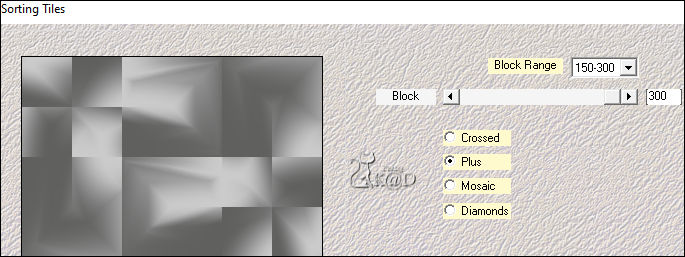
Plugins – Mehdi – Sorting Tiles – see PS
4
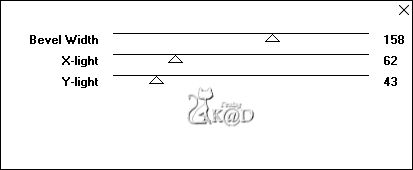
Plugins – Toadies – *Sucking Toad* Bevel II.2 – see PS
5
Effects – Image effects – Seamless Tiling : Default, but transition to 100
6
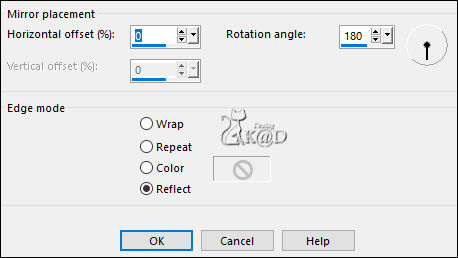
Effects – Reflection effects – Rotating mirror – see PS
7
Selections – Load/Save Selection – Load Selection From Alpha Channel – Selectie 1 – see PS
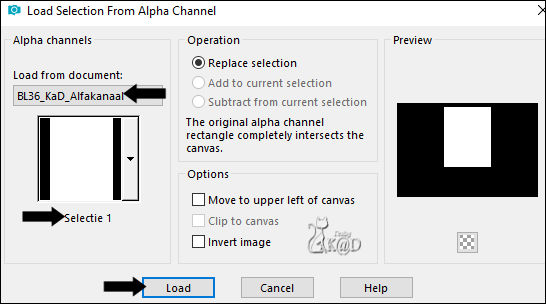
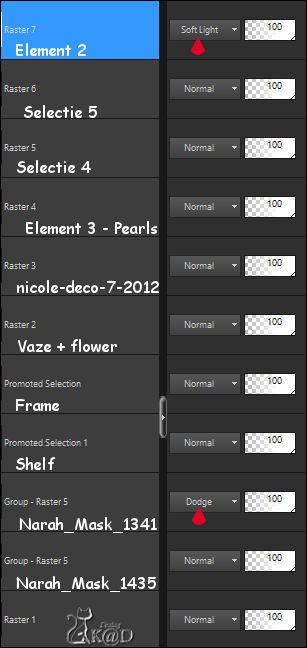
Selections – Promote selection to layer (Promoted Selection)
Adjust – Blur – Gaussian Blur : 20
8
Change Foreground color to Color 3 (White)
Change Background color to Color 4 (Black)
Layers – New Raster layer
Fill with foreground color
Selection – modify – Contract : 15
Fill with background color
Selection – modify – Contract : 1
Press Delete on the keyboard
9
Activate and copy your tube (face)
Edit – Paste as a new layer
Adjust to fit the selection (frame)
Put in the middle of the selection
Selection – Invert
Press Delete on the keyboard
Select none
Adjust – Sharpness - Sharpen
Effects – 3D-effects – Drop shadow : V 0 – H 7 – 50 – 30 – Color #000000
10
Selections – Load/Save Selection – Load Selection From Alpha Channel – Selectie 1 – see above
Selection – Invert
Press Delete on the keyboard
Select none
11
Layers – Merge – Merge down 2x (Promoted Selection)
Effects – 3D-effects – Drop shadow : V 0 – H 7 – 50 – 30 – Color #000000
11-1
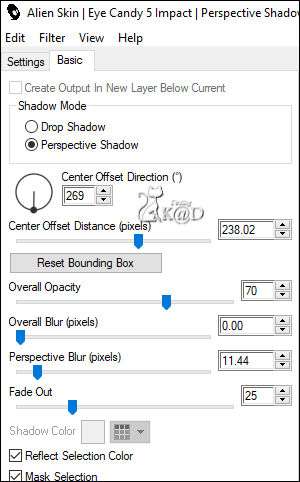
Plugins – Alien Skin – EyeCandy 5 – Impact – Perspective Shadow :
On the left, choose preset : BL36_KaD_Shadow or enter the values manually – see PS
12
Activate Raster 1
Selections – Load/Save Selection – Load Selection From Alpha Channel – Selectie 2 – see PS
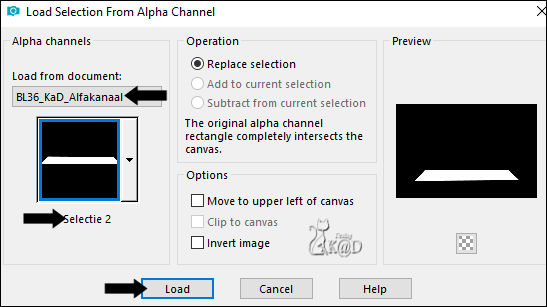
Selections – Promote selection to layer (Promoted Selection 1)
Select none
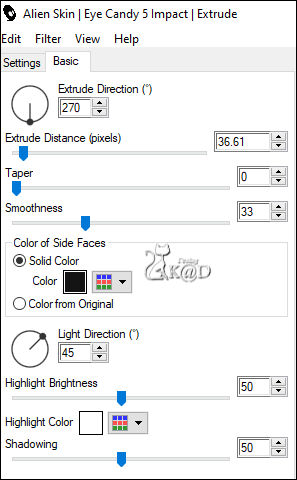
Plugins – Alien Skin – Eye Candy 5 – Impact – Extrude :
On the left, choose preset: BL36_KaD_Extrude or enter the values manually – see PS
12-1
Effects – 3D-effects – Drop shadow: V 0 – H 7 – 50 – 30 – Color #000000
Repeat with V -7 – H 0
13
Activate and copy your vaze tube
Edit – Paste as a new layer (Raster 2)
Layers – Arrange – Bring to top
Place on the shelf to the right of your frame
Adjust so it doesn't go higher than half of your frame
Effects – 3D-effects – Drop shadow : V 0 – H 7 – 50 – 10 – Color #000000
Sharpen if necessary
14
Activate and copy : nicole-deco-7-2012
Edit – Paste as a new layer (Raster 3)
Image – Resize : 40%, all layers NOT checked
Place on the shelf to the left of your frame
Effects – 3D-effects – Drop shadow : V 0 – H 7 – 50 – 10 – Color #000000
Adjust – Sharpness – Sharpen
14-1
Activate and copy : BL36_KaD_Element3
Edit – Paste as a new layer (Raster 4)
Put the pearls on the shelf (Pos X : 379 – Pos Y : 418)
Effects – 3D-effects – Drop shadow : V 0 – H 7 – 50 – 10 – Color #000000
Adjust – Sharpness – Sharpen
15
Activate Raster 1
Layers – New Raster layer
Fill with foreground color
Layers – New Mask layer – From Image “Narah_Mask_1435” – see PS
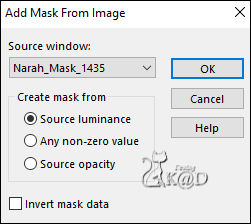
Layers – Duplicate (You have 2x the mask in your layers)
Layers – Merge – Merge group (Group - Raster 5)
16
Layers – New Raster layer
Fill with foreground color
Layers – New Mask layer – From Image “Narah_Mask_1341” – see PS
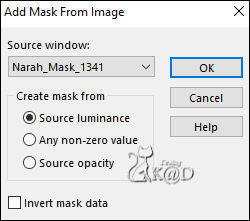
Layers – Merge – Merge group (Group - Raster 5)
Change Blend mode to Dodge
Adjust – Sharpness – Sharpen more
17
Activate Raster 1
Selections – Load/Save Selection – Load Selection From Alpha Channel – Selectie 3 – see PS
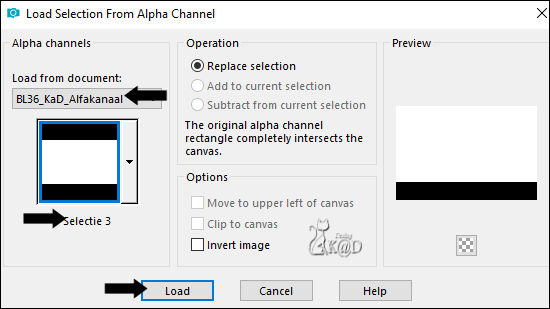
Plugins – L en K landksiteofwonders – Zitah – see PS
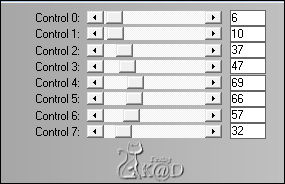
Select none
18
Change Foreground color to Color 1
Change Background color to Color 3
Layers – New Raster layer (Raster 5)
Layers – Arrange – Bring to top
Selections – Load/Save Selection – Load Selection From Alpha Channel – Selectie 4 – see PS
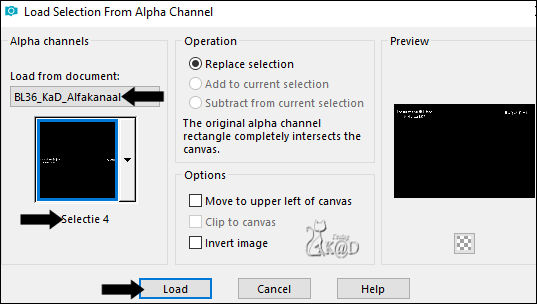
Fill with foreground color
Select none
Effects – 3D-effects – Drop shadow : V&H 2 – 35 – 2 – Color #000000
19
Layers – New Raster layer (Raster 6)
Selections – Load/Save Selection – Load Selection From Alpha Channel – Selectie5 – see PS
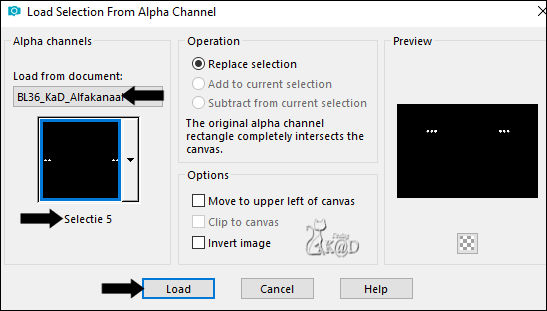
Fill with background color
Selection – Modify – Contract : 3
Fill with foreground color
Plugins – Alien Skin – Eye Candy 5 – Impact – Glass :
On the left, choose preset :BL36_KaD_Glass or enter the values manually – see PS
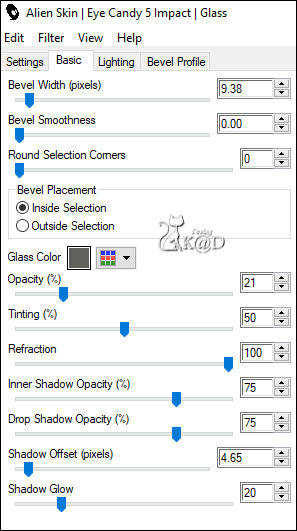
Select none
Effects – 3D-effects – Drop shadow : V&H 2 – 35 – 2 – Color #000000
20
Activate and copy : BL36_KaD_Element2
Edit – Paste as a new layer (Raster 7)
Objects – Align – Top (or Pos X : 0 – Pos Y : 0)
Change Blend mode to Soft Light
Result
21
Image – Add borders :
1 pix Color 4
7 pix Color 2
1 pix Color 4
1 pix Color 1
1 pix Color 4
Select all
22
Image – Add borders : 45 pix Color 1
Effects – 3D-effects – Drop shadow : V&H 0 – 60 – 30 – Color #000000
Select none
23
Activate and copy : BL36_KaD_Element1
Edit – Paste as a new layer –Don’t move
Change layer opacity to 75
24
Add your name or watermark,
Add my watermark to your creation HERE
25
Image – Add Borders : 1 pix color 4
Image – Resize – Width 900 Pixels – Resize all Layers checked
Adjust – Sharpen – Unsharp Mask : 2 – 30 – 2 – no check marks
Save as JPG file and you're done!
I hope you enjoyed this tutorial
Karin
09/02/2021
