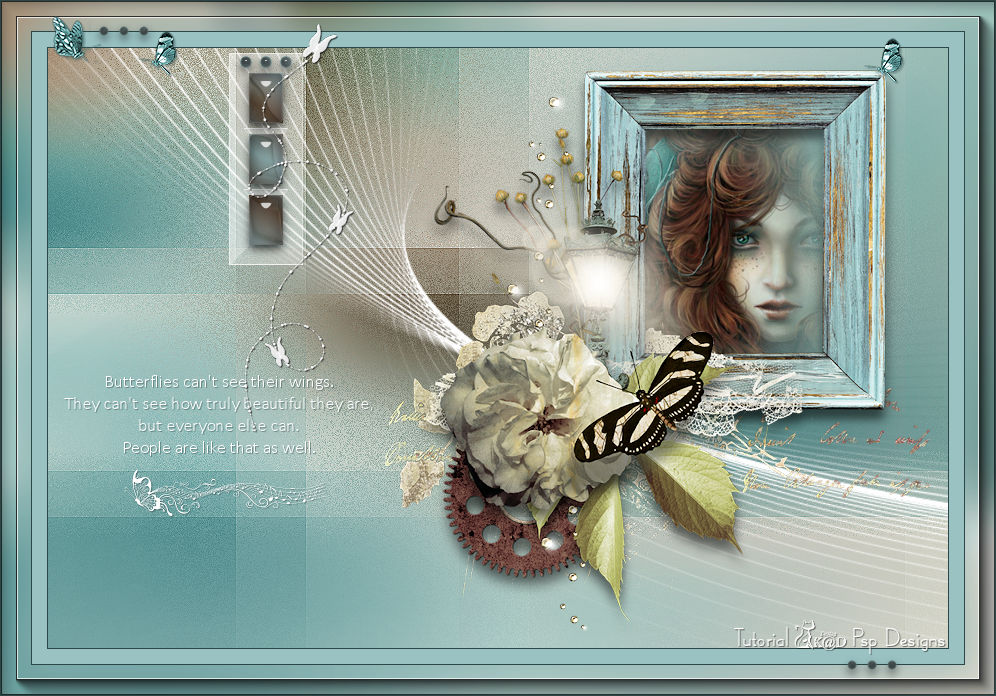
Materials for the tutorial :
Disclaimer :
Each Graphic is the property of the original artist to whom the copyright belongs and
may not be placed in a collection or offered for sale on-line or otherwise.
THEME
We use a cluster
Use a misted tube of a woman's face to match the frame or change the color of the frame*.
I use a tube of K@rine Dreams
1/ 04vario 006 – *To colorize frame, use BL38_Cluster_Bewerkt
2/ BL38_KaD_Deco1 + BL38_KaD_Deco2
3/ BL38_KaD_Tekst1
Alpha Selections : open in PSP and minimize
1/ BL38_KaD_Alfakanaal (this image is not empty – it contains alpha selections)
Masks : open in PSP and minimize
1/ Narah_Mask_1166
Filter Preset : Double click to install
1/ BL38_KaD_Glass
Color palette :
If you work with your own colors, make your own color palette with the alpha channel,
so you can easily switch between your colors.
There are color differences in the different versions of Psp.
Therefore, use the html codes of the color palette to be sure,
that you have the same colors. Also when merging layers, there may be color differences.
Plugins :
1/ Mehdi : Wavy Lab – Sorting Tiles
2/ Unlimited 2.0 : &<BKG Designer sf 10 I> – Cruncher (-)
3/ Toadies : Blast ’n Blur
4/ Alien Skin – Eye Candy 5 : Impact
(-) Import into Filters Unlimited
---------------------------------------
THE TUTORIAL
When working with your own colors, play with the Blend Mode and/or Opacity at your own discretion
From now on I use the terms "MIRROR" and "FLIP" again.
Mirror: Mirror horizontal - Flip: Mirror vertical
Let’s get started.
Remember to save your work often.
Some print screens have other colors than the original.
Colors :
Foreground : Color 1 = Light color from your tube and or frame
Background: Color 2 = Dark color from your tube and or frame
Color 3 : Darker than color 1
Color 4: Lighter than color 2
Color 5 = white
Color 6 = black
1
Open the alpha channel : BL38_KaD_Alfakanaal
Window – Duplicate
Minimize the original – we continue on the copy
2
Plugins – Mehdi – Wavy Lab – see PS
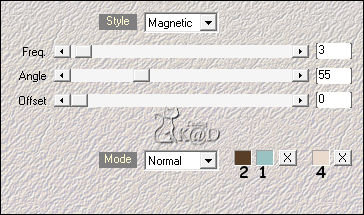
Adjust – Blur – Gaussian Blur : 25
3
Change background color to Color 3
Layers – New Raster layer
Plugins – Mehdi – Wavy Lab – see PS
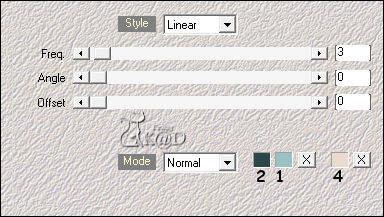
Change Blend mode to Soft Light
Layers – Merge – Merge down
4
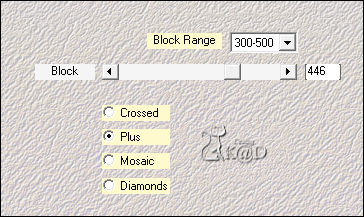
Plugins – Mehdi – Sorting Tiles – see PS
5
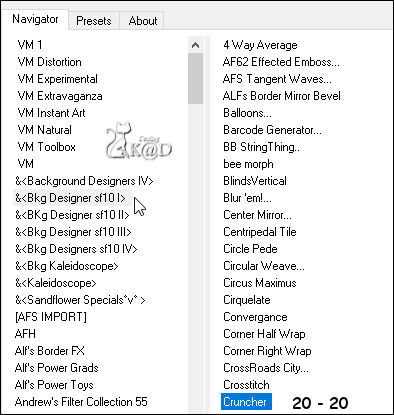
Plugins – Unlimited 2.0 – &<BKG Designer sf 10 I> – Cruncher : 20 – 20 – see PS
6
Effects – Edge effects – Enhance
7
Layers – Duplicate (Copy of Raster 1)
Plugins – Toadies – Blast ’n Blur – see PS

Change Blend mode to Multiply
Adjust – Sharpness – Sharpen
8
Change Foreground color to color 5 (white)
Layers – New Raster layer
Fill with foreground color
Layers – New Mask layer – From image “Narah_Mask_1166” – see PS
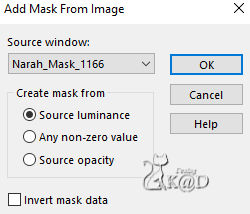
Image – Flip
Layers – Merge – Merge group (Group - Raster 2)
9
Change Foreground color to Color 1
Change background color to color 2
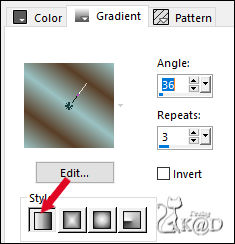
Change foreground to gradient : Linear – see PS
Layers – New Raster layer (Raster 2)
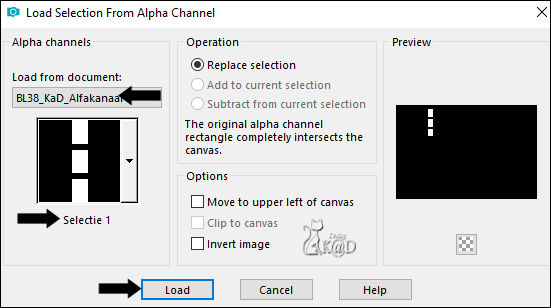
Selections – Load/Save Selection – Load Selection From Alpha Channel – Selectie 1 – see PS
Fill selection with gradient
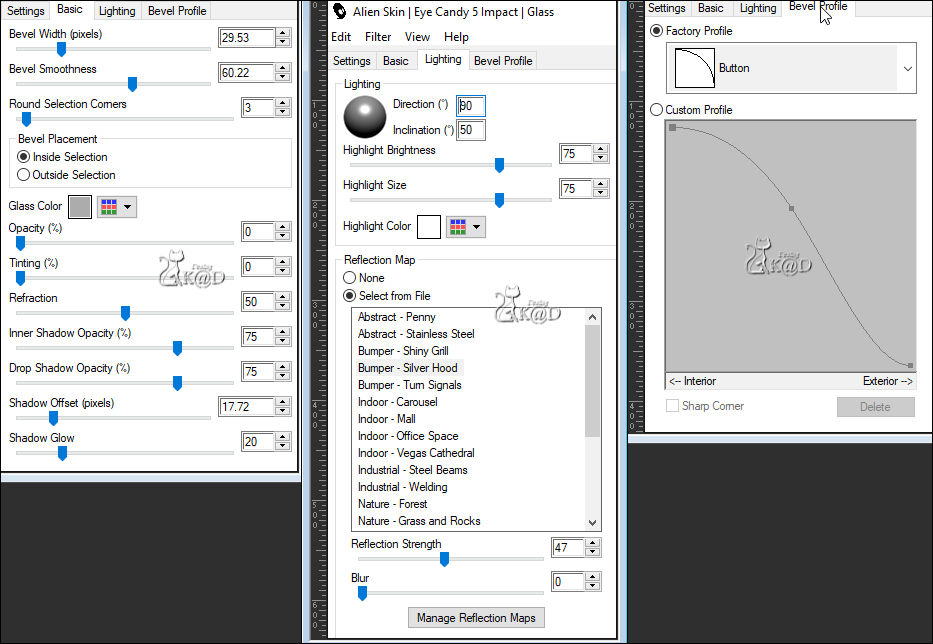
Plugins – Alien Skin – Eye Candy 5 – Impact – Glass :
Choose the preset on the left : BL38_KaD_Glass or enter manually.
10
Change Foreground color to Color 5 (wit)
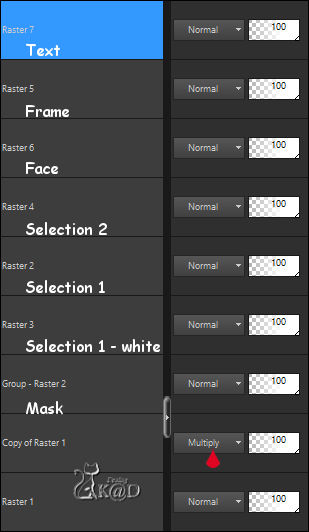
Layers – New Raster layer (Raster3)
Fill selection with Foreground color
Select none
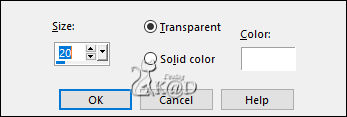
Effects – 3D-effects – Chisel – see PS
Layers – Arrange – Move down
11
Change Foreground color to color 1
Layers – New Raster layer (Raster 4)
Layers – Arrange – Bring to top
Selections – Load/Save Selection – Load Selection From Alpha Channel – Selectie 2 – see PS
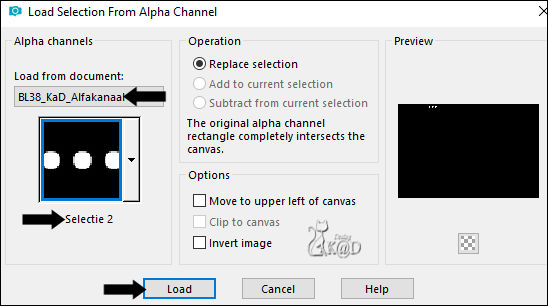
Fill selection with Foreground color
Plugins – Alien Skin – Eye Candy 5 – Impact – Glass : same values
Select none
12
Activate and copy : 04vario 006
*or the one you colorized “BL38_Cluster_Bewerkt”
Edit – copy
Edit – Paste as a new layer (Raster 5)
Image – Resize : 75%, all layers NOT checked
Press K – Pos X : 337 – Pos Y : 18 – Press M HELP
(K : activate the Move Tool – M : deactivate the Move Tool)
Adjust – Sharpness – Sharpen
13
Activate your misted woman face
Edit – copy
Edit – Paste as a new layer (Raster 6)
Image – Resize, so she fits into the frame. Slide the face into the frame
Selections – Load/Save Selection – Load Selection From Alpha Channel – Selectie 3 – see PS
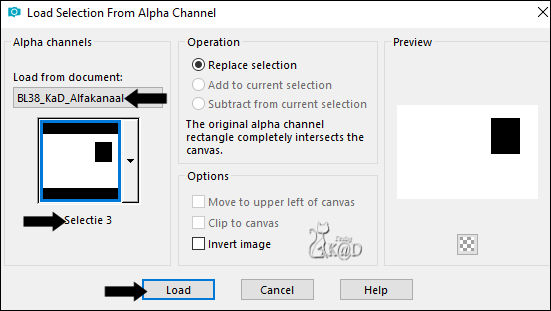
Press Delete on the keyboard
Select none
Adjust – Sharpen – Unsharp Mask : 2 – 30 – 2 – no check marks
Layers – Arrange – Move down
14
Activate and copy : BL38_KaD_Tekst1
Edit – Paste as a new layer (Raster 7)
Layers – Arrange – Bring to top
Press K – Pos X : 16 – Pos Y : 327 – Press M
Effects – 3D-effects – Drop Shadow : V&H 1 – 50 – 1 – Color 3
Result
Edit – Copy merged
15
Image – Add border :
1 pix color 3
15 pix color 1
1 pix color 3
Select all
16
Image – Add border : 30 pix color 1
Selections – Selection Invert
Edit – Paste into selection
Adjust – Blur – Gaussian Blur : 15
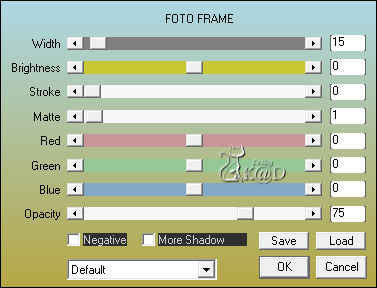
Plugins – AAA Frames – Foto Frame – see PS
Select none
17
Layers – New Raster layer
Selections – Load/Save Selection – Load Selection From Alpha Channel – Selectie 4 – see PS
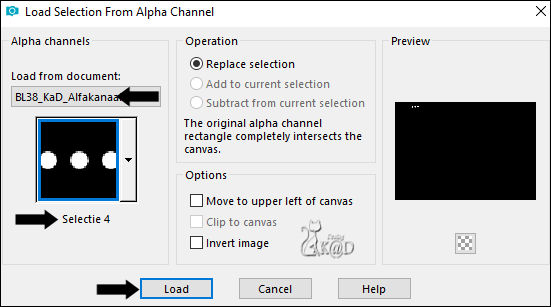
Fill selection with Foreground color
Select none
Press K – Pos X : 97 – Pos Y : 24 – Press M
18
Layers – Duplicate
Image – Mirror and Flip
Layers – Merge – Merge down
Plugins – Alien Skin – Eye Candy 5 – Impact – Glass : same values
19
Activate and copy : BL38_KaD_Deco1
Edit – Paste as a new layer
Press K – Pos X : 51 – Pos Y : 15 – Press M
Effects – 3D-effects – Drop Shadow : V&H 2 – 35 – 5 – Color 3
20
Activate and copy : BL38_KaD_Deco2
Edit – Paste as a new layer
Press K – Pos X : 243 – Pos Y : 22 – Press M
21
Add your name or watermark,
Add my watermark to your creation HERE
22
Image – Add Borders : 1 pix color 3
Image – Resize – Width 900 Pixels – Resize all Layers checked
Adjust – Sharpen – Unsharp Mask : 2 – 30 – 2 – no check marks
Save as JPG file and you're done!
I hope you enjoyed this tutorial
Karin
12/05/2021
