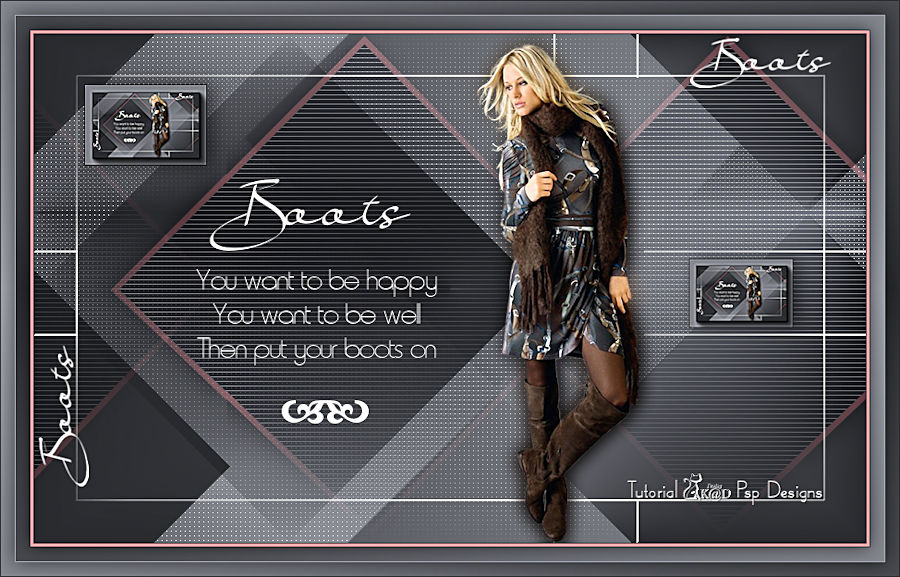
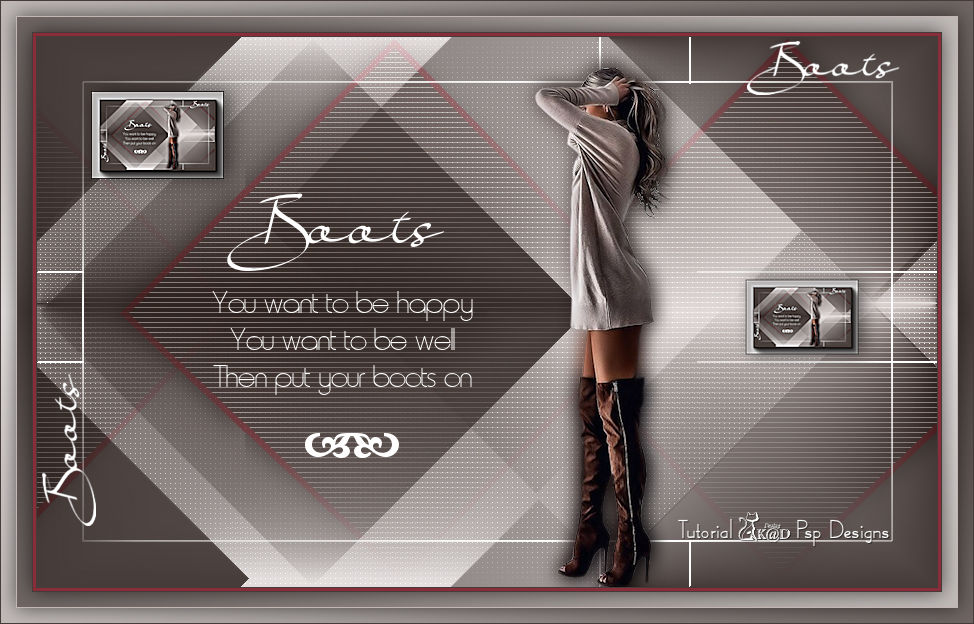
Materials for the tutorial :
Disclaimer :
Each Graphic is the property of the original artist to whom the copyright belongs and
may not be placed in a collection or offered for sale on-line or otherwise.
Tubes :
(*) If you recognize them as one of your own, please let me know, so I can add your name or remove the tube.
THEMA
BOOTS
You need a tube of a woman/man/child with boots on (so a full tube with feet!)
I use a tube from LB
1/ BL45_KaD_Element1
2/ BL45_KaD_Element2
Alpha Selections : open in PSP and minimize
1/ 1/ BL45_KaD_Alfakanaal (this image is not empty – it contains alpha selections)
Color palette :
If you work with your own colors, make your own color palette with the alpha channel,
so you can easily switch between your colors.
There are color differences in the different versions of Psp.
Therefore, use the html codes of the color palette to be sure,
that you have the same colors. Also when merging layers, there may be color differences.
Plugins :
1/ VanDerLee – Unplugged-X – 45° Rectangle
2/ AP [Innovations] – Lines – Silverlining
3/ AAA Frames – Foto Frame
(-) Import into Filters Unlimited
---------------------------------------
THE TUTORIAL
When working with your own colors, play with the Blend Mode and/or Opacity at your own discretion
From now on I use the terms "MIRROR" and "FLIP" again.
Mirror: Mirror horizontal - Flip: Mirror vertical
Let’s get started.
Remember to save your work often.
Some print screens have other colors than the original.
Colors :
Foreground : Color 1 = Light color from your tube
Background : Color 2 = Dark version of color 1
Color 3 : Slightly lighter version of Color 2
Color 4: Contrasting color to match your other colors
Color 5: #ffffff
Color 6 : #000000
Foreground gradient : Radial – see PS
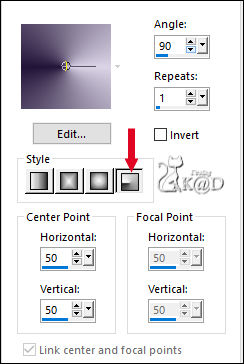
1
Open the alpha channel : BL45_KaD_Alfakanaal
Window – Duplicate
Minimize the original – we continue on the copy
2
Fill with gradient
3
Layers – New raster layer (Raster 2)
Plugins – VanDerLee – Unplugged-X – 45° Rectangle – Color 2 – see PS
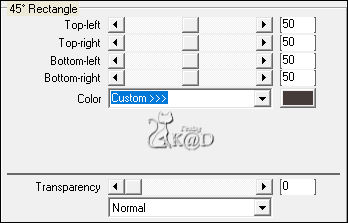
4
Effects – Image effects – Seamless Tiling – see PS
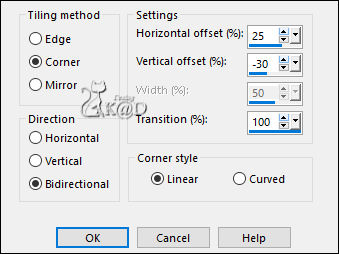
5
Activate Raster 1
Selections – Load/Save Selection – Load Selection From Alpha Channel – Selectie 1 – see PS
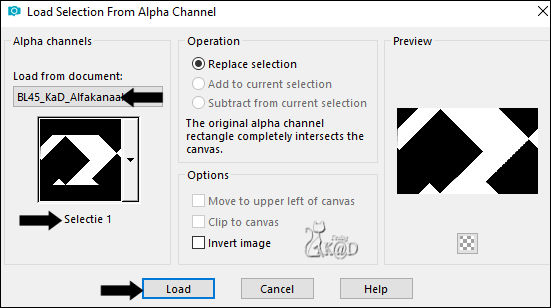
Selections – Promote selection to layer (Promoted selection)
Plugins – AP [Innovations] – Lines – Silverlining – Dotty Grid – see PS
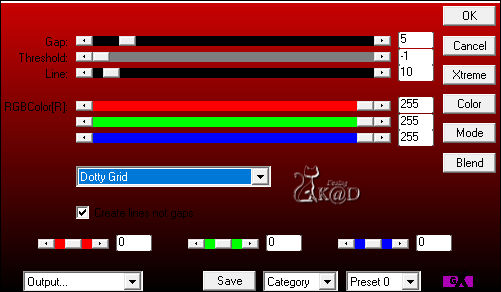
Select none
6
Effects – Image effects – Seamless Tiling – same values
7
Change Foreground color to color 4
Layers – New raster layer (Raster 3)
Layers – Arrange – Bring to top
Selections – Load/Save Selection – Load Selection From Alpha Channel – Selectie 2 – see PS
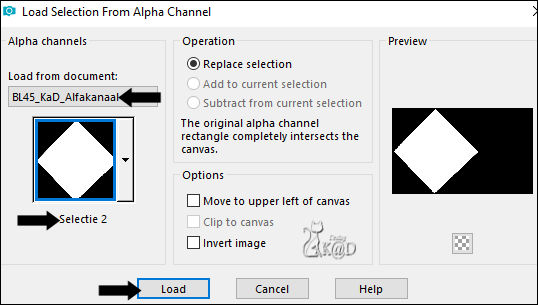
Fill selection with Foreground color
Selection – Modify – Contract : 7
Fill selection with Background color
Plugins – AP [Innovations] – Lines – Silverlining – Horizontaal – All other values the same
Select none
8
Effects – Image effects – Seamless Tiling – Side by side– see PS
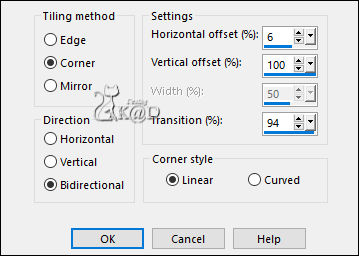
9
Effects – 3D-effects – Drop shadow : V 0 – H 7 – 50 – 30 – Color #000000
10
Effects – Reflection effects – Rotating Mirror – see PS
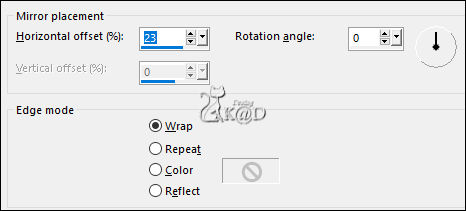
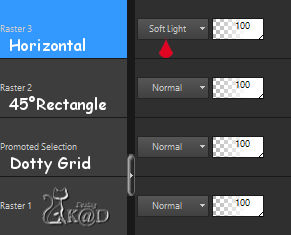
Change Blend mode to Soft Light
Result
11
Activate and copy : BL45_KaD_Element1
Edit – Paste as a new layer (Raster 4)
Don’t move (Pos X : 0 – Pos Y : 0)
12
Activate and copy: BL45_KaD_Element2
Edit – Paste as a new layer (Raster 5)
Press K – Pos X : 5 – Pos Y : 4 – Press M HELP
(K : activate the Move Tool – M : deactivate the Move Tool)
13
Activate and copy your persons tube
Edit – Paste as a new layer (Raster 6)
Adjust if necessary
Place to the Right, at the end of the diamond and at the bottom against the edge
Sharpen if necessary
14
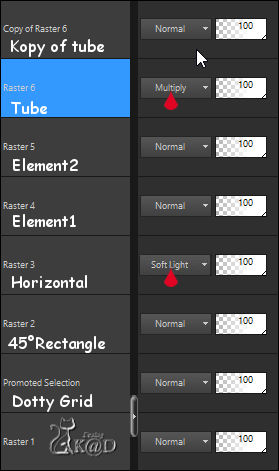
Layers – Duplicate (Copy of Raster 6)
Activate the layer just below (Raster 6)
Adjust – Blur – Gaussian blur : 10
Change Blend mode to Multiply
Result
15
Layers – Merge – Merge visible
Edit – Copy
Edit – Paste as a New Image
Image – Resize : 15%, all layers
16
Image – Add borders : 1 pix Color 2
Select all
Image – Add borders : 10 pix Color 1
Effects – 3D-effects – Drop shadow : V&H 0 – 40 – 20 – Color #000000
17
Selection – Invert
Plugins – AAA Frames – Foto Frame – see PS
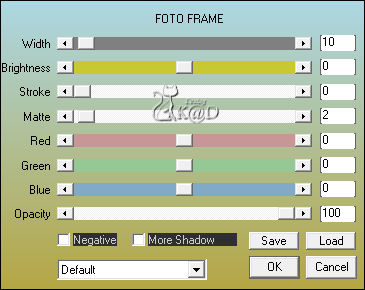
Select none
Image – Resize : 85%, all layers
Adjust – Sharpness – Sharpen more
Edit – Copy
Go back to your image
18
Edit – Paste as a new layer
Press K – Pos X : 54 – Pos Y : 54 – Press M
Effects – 3D-effects – Drop shadow : V 0 – H 7 – 50 – 30 – Color #000000
19
Layers – Duplicate
Image – Resize : 85%, all layers NOT checked
Press K – Pos X : 696 – Pos Y : 224 – Press M
20
Image – Add borders :
1 pix color 2
3 pix color 4
1 pix color 2
Select all
21
Change foreground color back to gradient from the beginning
Image – Add borders : 15 pix color 3
Selection – Invert
Fill with gradient
22
Selection – Invert
Effects – 3D-effects – Drop shadow : V&H 0 – 60 – 30 – Color #000000
Select none
23
Image – Add borders : 1 pix color 3
Select all
24
Image – Add borders : 15 pix color 3
Selection – Invert
Layers – New Raster layer
Fill with gradient
Image – Mirror
Selection – Invert
25
Effects – 3D-effects – Drop shadow : V&H 0 – 60 – 30 – Color #000000
Select none
26
Add your name or watermark,
Add my watermark to your creation HERE
27
Image – Add Borders : 1 pix color 2
Image – Resize – Width 900 Pixels - Resize all Layers checked
Adjust – Sharpen – Unsharp Mask : 2 – 30 – 2 – no check marks
Save as JPG file and you're done!
I hope you enjoyed this tutorial
Karin
28/04/2022
Extra vb met tube van Tocha
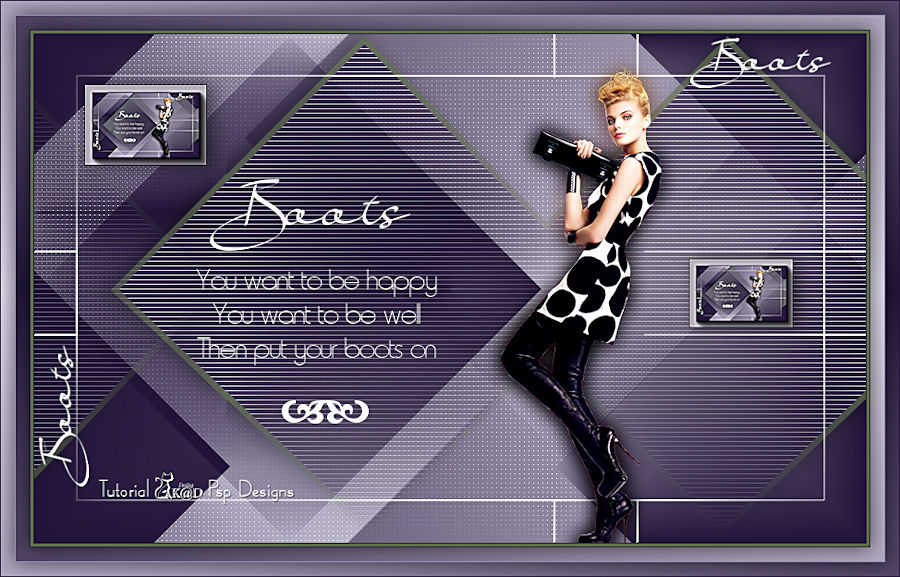
Extra vb met tube van LB
