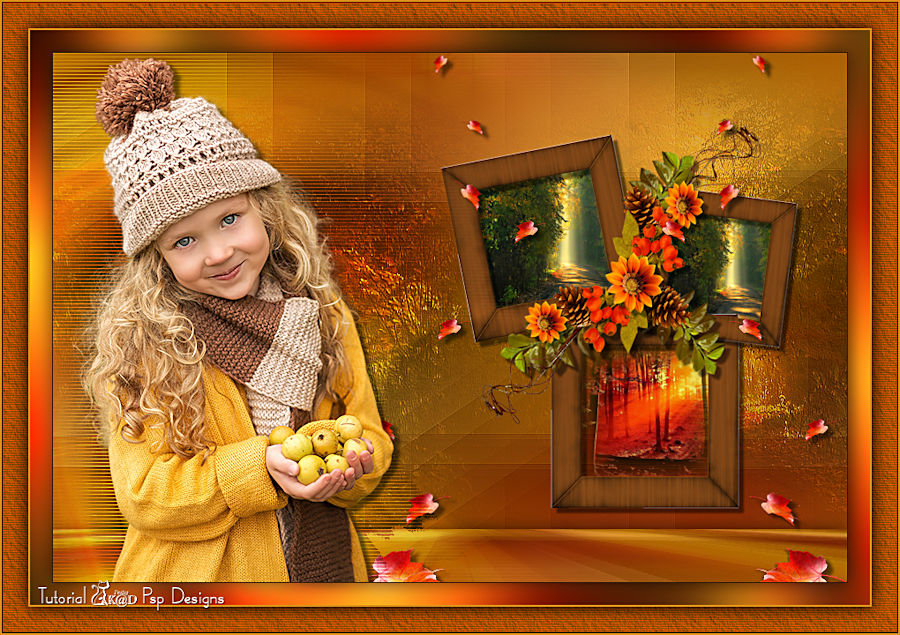
Materials for the tutorial :
Disclaimer :
Each Graphic is the property of the original artist to whom the copyright belongs and
may not be placed in a collection or offered for sale on-line or otherwise.
Tubes :
(*) If you recognize them as one of your own, please let me know, so I can add your name or remove the tube.
THEME
AUTUMN with a template/frame
Tubes : (*)
Do you recognize a tube of yourself, please contact me so that I can mention your name or – if you wish – the tube can be removed.
Choose a tube of a child in autumn colors and 2 tubes of a misted autumn landscape
I use tubes from Calguis and Gabry
1/ AS Frame Cluster
2/ BL63_KaD_Achtergrond
3/ BL63_KaD_VloerPunt22
4/ KaD_FallingLeaves1
Alpha Selections : open in PSP and minimize
1/ BL63_KaD_Alfakanaal
(this image is not empty – it contains alpha selections)
Color palette :
If you work with your own colors, make your own color palette with the alpha channel,
so you can easily switch between your colors.
There are color differences in the different versions of Psp.
Therefore, use the html codes of the color palette to be sure,
that you have the same colors. Also when merging layers, there may be color differences.
Plugins :
1/ Toadies – Sucking Toad Bevel I
2/ Graphics Plus : Emboss – Cross Shadow
3/ Unlimited 2.0 - Filter Factory Gallery J - Drink to me (-)
4/ Unlimited 2.0 – VM Extravaganza – Aura Detector (-)
5/ AP 01 [Innovations] – Lines – Silverlining – Horizontal
6/ MuRa’s Meister – Perspective Tiling (element zit in de materialen)
6/ AAA Frames – Texture Frame
(-) Import into Filters Unlimited
---------------------------------------
THE TUTORIAL
When working with your own colors, play with the Blend Mode and/or Opacity at your own discretion
From now on I use the terms "MIRROR" and "FLIP" again.
Mirror: Mirror horizontal - Flip: Mirror vertical
Let’s get started.
Remember to save your work often.
Some print screens have other colors than the original.
Colors :
First create your own color palette, so that you can easily switch between your colors.
Use the Alfa_Kleurenpallet-6 in the materials for this.
Choose your Colors from the frame
Color 1 : Foreground : yellow/orange
Color 2: Background: Orange (not too light)
Color 3: Dark orange/brownish
Color 4 : #ffffff
Color 5 : #000000
1
Open the alpha channel : BL63_KaD_Alfakanaal
Window – Duplicate
Minimize the original – we continue on the copy
2
Activate and copy : BL63_KaD_Achtergrond
Edit – Paste into selection*
Select none
*If necessary, adjust the color via the Adjust – Variations filter or
with a layer in your Color of choice underneath and then set to Overlay/Hard Light/… and merge.
3
Plugins – Toadies – Sucking Toad Bevel I – see PS
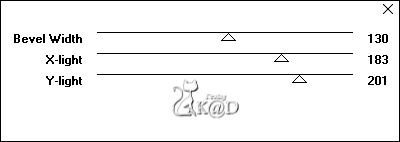
4
Effects – Image effects – Seamless Tiling – see PS
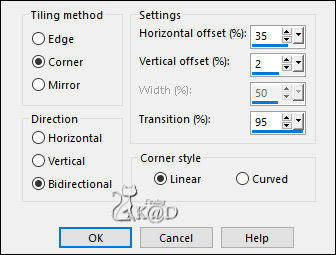
Repeat 1x
5
Effects – Image effects – Seamless Tiling – DEFAULT but Transition to 100
6
Plugins – Unlimited 2.0 – FFGJ – Drink to me – DEFAULT: 15
7
Effects – Edge Effects – Enhance
8
Activate and copy : AS Frame Cluster
Edit – Paste as a new layer (Raster 2)
Image – Resize: 60%, all layers NOT checked
Press K – Pos X : 439 – Pos Y : 74 – Press M HELP
9
Layers – New Raster layer (Raster 3)
Selections – Load/Save Selection – Load Selection From Alpha Channel – Selectie 1 – see PS
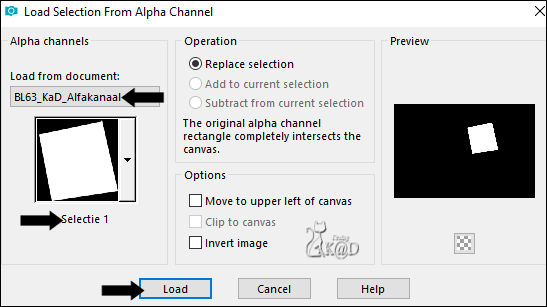
Activate and copy : your first autumn landscape
Edit – Paste into selection
Select none
Layers – Arrange – Move down
Adjust – Sharpness – Unsharp Mask : 2 – 30 – 2 – no check marks
10
Layers – New Raster layer (Raster 4)
Selections – Load/Save Selection – Load Selection From Alpha Channel – Selectie 2 – see PS
Edit – Paste into selection (tube is still in memory)
Select none
Adjust – Sharpness – Unsharp Mask : 2 – 30 – 2 – no check marks
11
Layers – New Raster layer (Raster 5)
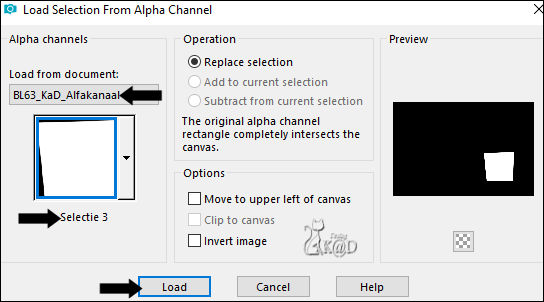
Selections – Load/Save Selection – Load Selection From Alpha Channel – Selectie 3 – see PS

Activate and copy : your second autumn landscape
Edit – Paste into selection
Select none
Adjust – Sharpness – Unsharp Mask : 2 – 30 – 2 – no check marks
12
Activate Raster 2 (Top layer)
Layers – Merge – Merge down
Repeat 2x (Raster 3)
13
Edit – Paste as a new layer (tube is still in memory)
(Or choose the tube that is best suited for this)
Layers – load/save Mask – Load Mask from disc – see PS
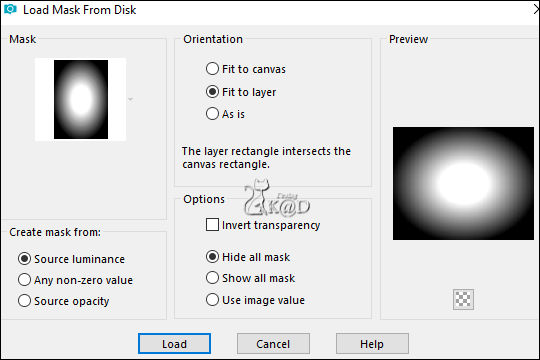
Layers – Duplicate (you now have 2x the mask in your layers)
Layers – Merge – Merge Group (Group - Raster 2)
Layers – Arrange – Move down
14
Objects – Align – Left
Change Blend mode to Soft light (See what suits your work best)
Plugins – Graphics Plus – Emboss – DEFAULT
15
Effects – Image effects – Seamless Tiling – Side by Side
16
Activate and copy : KaD_FallingLeaves1
Edit – Paste as a new layer (Raster 2)
Layers – Arrange – Move up
17
Layers – Duplicate
Image – Mirror
Objects – Align – Right
Layers – Merge – Merge down
Effects – 3D-effects – Drop Shadow : V 5 – H 7 – 50 – 5 – Color #000000
18
Activate and copy : your tube of a child
Edit – Paste as a new layer (Raster 4)
Adjust if necessary (Resize, sharpen, etc.)
Place on the left, in front of your fall tube
19
Layers – Duplicate (Copy of Raster 4)
Activate the layer just below (Raster 4)
Adjust – Blur – Radial blur – see PS
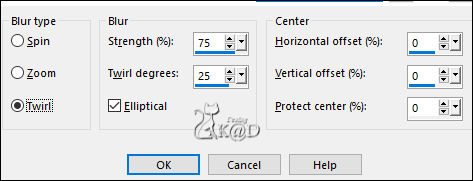
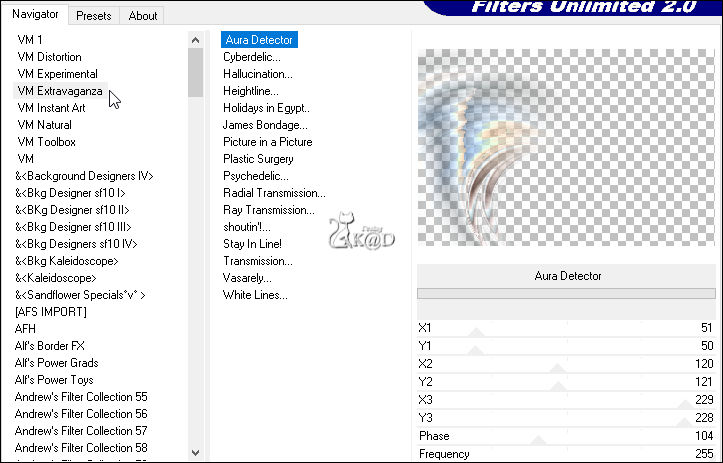
Plugins – Unlimited 2.0 – VM Extravaganza – Aura Detector – see PS
20
Plugins – AP 01 [Innovations] – Lines – Silverlining – Horizontal – see PS
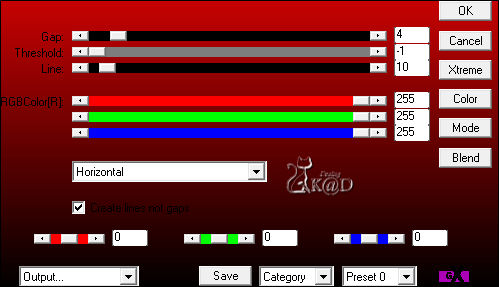
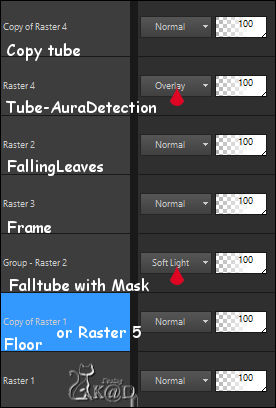
Change Blend mode to Overlay
21
Activate top layer (Copy of Raster 4)
Effects – 3D-effects – Drop Shadow : V 5 – H 7 – 50 – 5 – Color #000000
22
Activate Raster 1
Layers – Duplicate (Copy of Raster 1)
Plugins – MuRa’s Meister – Perspective Tiling – DEFAULT but Height on 10
Effects – 3D-effects – Drop Shadow : V&H 0 – 60 – 30 – Color #000000
*If this filter does not work
Activate and copy: BL63_KaD_VloerPunt22
Edit – Paste as new layer (Raster 5)
Objects – Align – Bottom
Drop shadow as above – If not visible: Repeat 1x*
Result
23
Change foreground color to Gradient – Lineair – see PS
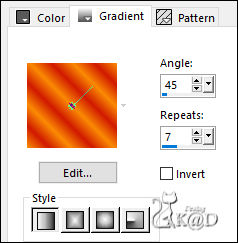
Image – Add borders :
1 pix Color 3
Select all
25 pix Color 5
Selection – Invert
24
Fill selection with gradient
Adjust – Blur – Gaussian blur : 15
Plugins – Graphics Plus – Cross Shadow – STANDAARD
25
Selection – Invert
Effects – 3D-effects – Drop Shadow : V&H 0 – 60 – 30 – Color #000000
Select none
26
Image – Add borders :
2 pix Color 1
Select all
30 pix Color 2
Selection – Invert
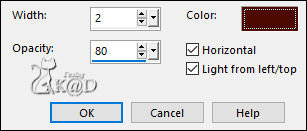
Effects – Texture effects – Blinds – Color 3 – see PS
27
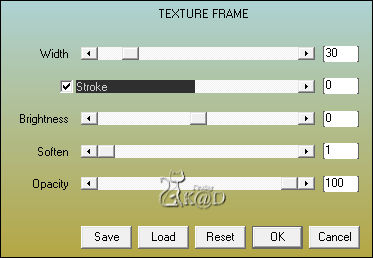
Plugins – AAA Frames – Texture Frame – see PS
Selection – Invert
Effects – 3D-effects – Drop Shadow : V&H 0 – 60 – 30 – Color #000000
Repeat 1x
Select none
28
Add your name or watermark,
Add my watermark to your creation HERE
29
Image – Add Borders : 2 pix color 1
Image – Resize – Width 900 Pixels – Resize all Layers checked
Adjust – Sharpness – Unsharp Mask : 2 – 30 – 2 – no check marks
Save as JPG file and you're done!
I hope you enjoyed this tutorial
Karin
19/04/2024
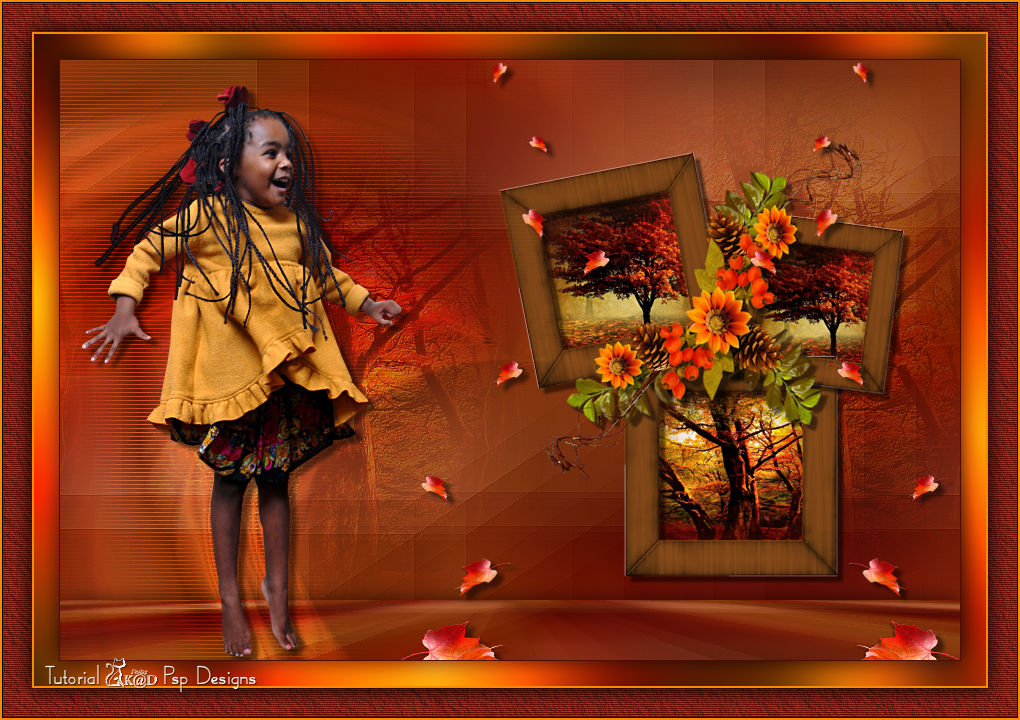
Extra voorbeeld met tube van KarineDreams & LuzCristina & Anna-Br
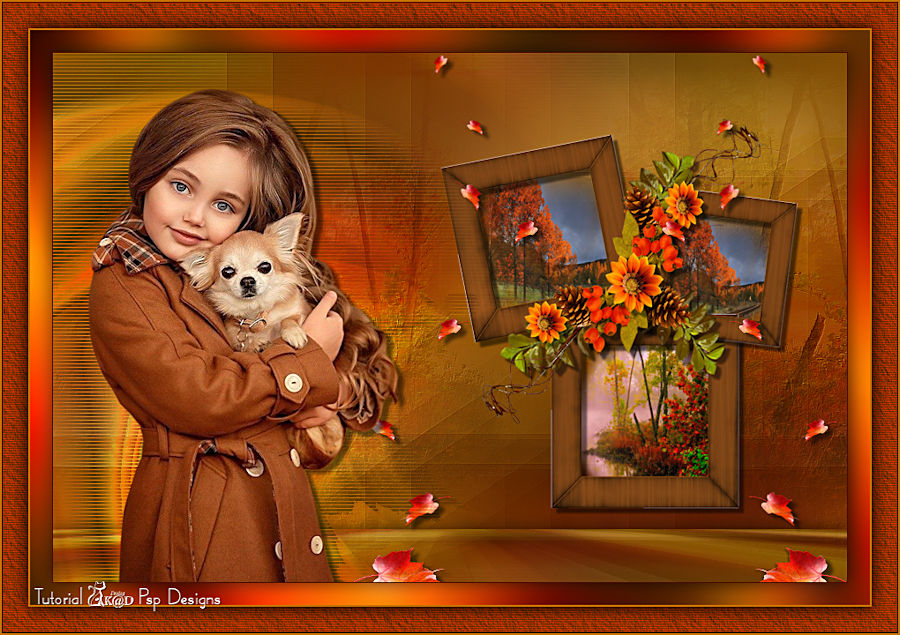
Extra voorbeeld met tube van MR & LB & Anna-Br
