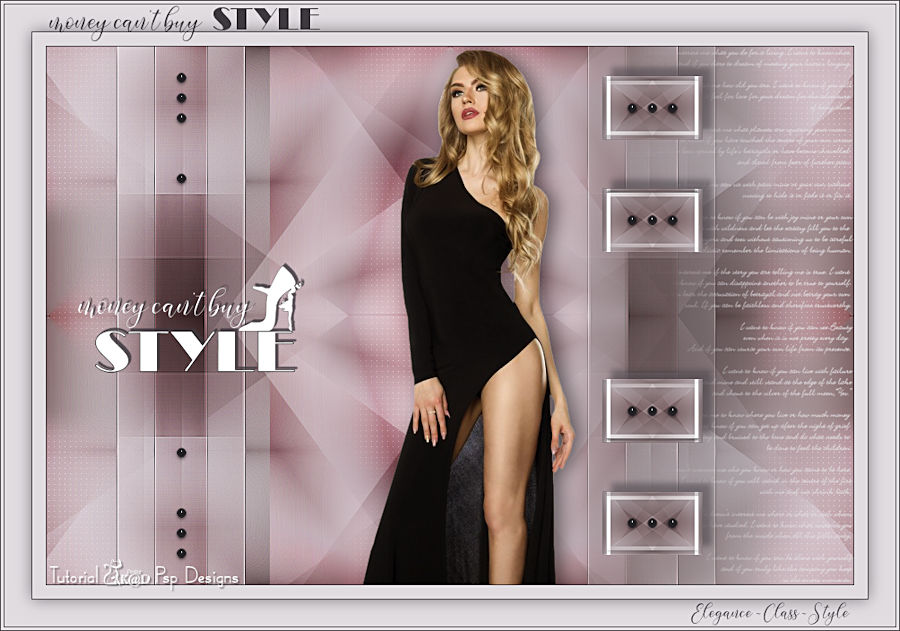
Open your tubes in PSP, duplicate them and close the originals.
1/ KaD_Woman_200
2/ 465_KaD_Text1
3/ 465_KaD_Text2
4/ 465_KaD_Text3
Alpha Selections : open in PSP en minimalize
1/ 465_KaD_Alfakanaal (this image is not empty – it contains alpha selections)
Color palette :
If you work with your own colors, make your own color palette with the alpha channel,
so that you can easily switch between your colors.
When working with your own colors, play with the Blend Mode and/or Opacity at your own discretion

Plugins :
1/ Mehdi : Wavy Lab 1.1 – Weaver
2/ VanderLee – Unplugged X : Transition
3/ Simple : Half Wrap
4/ Carolaine & Sensibility : CS-LDots
5/ It@lian Editors Effect : Effetto Fantasma
6/ Alien Skin – Eye Candy 5 : Impact
(-) Import into Filters Unlimited
------------------------------------------------
From now on I use the terms "MIRROR" and "FLIP" again.
Mirror: Mirror horizontal - Flip: Mirror vertical
Let’s get started.
Remember to save your work often
Colors :
Foreground color : Color 1 = #3f3a40
Background color : Color 2 = #e0dce0
1
Open the alpha channel : 465_KaD_Alfakanaal
Window – Duplicate
Minimize the original – we continue on the copy
2
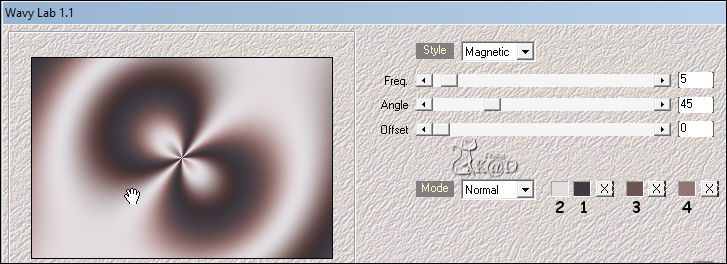
Plugins – Mehdi – Wavy Lab 1.1 – see PS
3
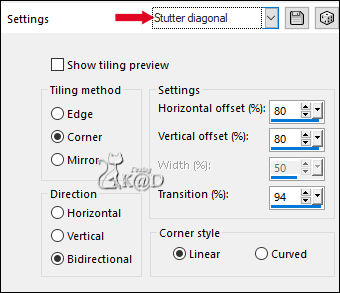
Effects – Image effects – Seamless Tiling – Stutter diagonal – see PS
Adjust – Blur – Gaussian blur : 40
4
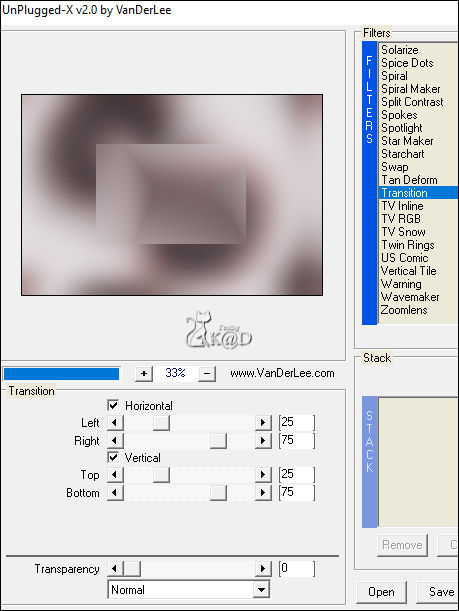
Plugins – VanderLee – Unplugged X – Transition – see PS
5
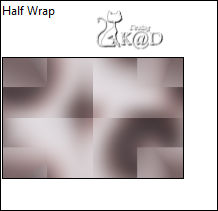
Plugins – Simple – Half Wrap – see PS
6
Effects – Reflection Effects – Rotating Mirror – see PS
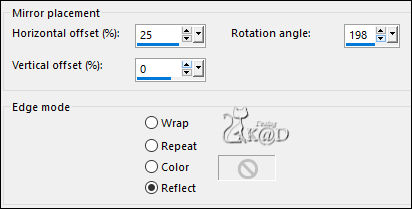
Image – Mirror
Repeat Rotating Mirror
7
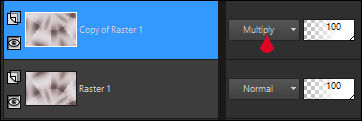
Layers – duplicate
Image – Flip
Blend Mode = Multiply
Result
Layers – Merge down
8
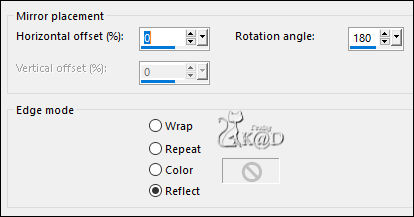
Effects – Reflection Effects – Rotating Mirror – see PS
9
Layers – Duplicate (Copy of Raster 1)
Selections –select all
Selections – Edit – Contract : 100
Plugins – AAA Frames – Foto Frame – see PS
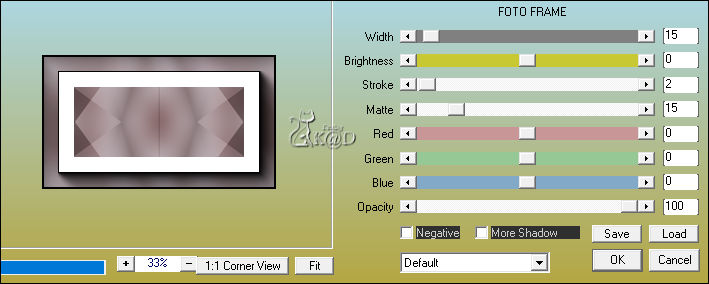
Selections – Invert
Press Delete on the keyboard
Select none
10
Effects – Image effects – Seamless Tiling – see PS
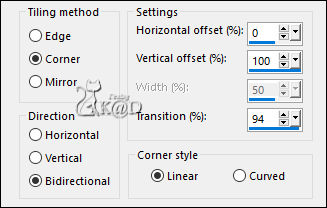
11
Selections – Load selection from Alpha channel – Selectie 1 – see PS
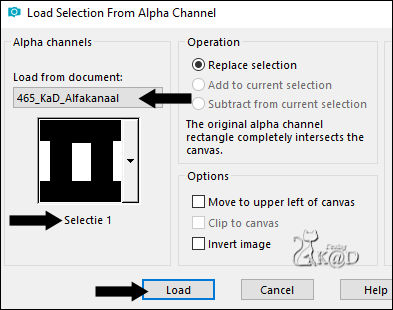
Selections – Promote selection to layer (Promoted Selection)
12
Activate the layer beneath (Copy of Raster 1)
Press delete on the keyboard
Select none
Layers – Move – Move layer to top
Image –Resize : 70%, NO check marks
13
Image – Rotate : Left – 90 – NO checkmarsk
Effects – Reflection Effects – Rotating Mirror – click OK
14
Image – Resize : 40%, NO check marks
Press K – Pos X : 620 – Pos Y : 33 – Press M HELP
(K : activate the Move Tool – M : deactivate the Move Tool)
Layers – Duplicate
Image – Flip
Layers – Merge – Merge down
Adjust – Sharpen – Sharpen more
Effects – 3D-effects – Drop shadow : V -10 – H 10 – 50 – 10 – Color 1
15
Activate the layer beneath (Promoted Selection)
Selections – Load selection from Alpha channel – Selectie 2 – see PS
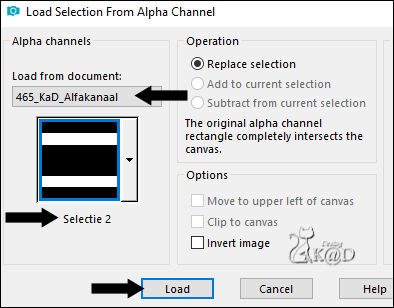
Press Delete on the keyboard
Select none
Adjust – Blur – Gaussian blur : 15
16
Effects – Image effects – Seamless Tiling – Default
17
Plugins – Carolaine & Sensibility – CS-LDots – see PS
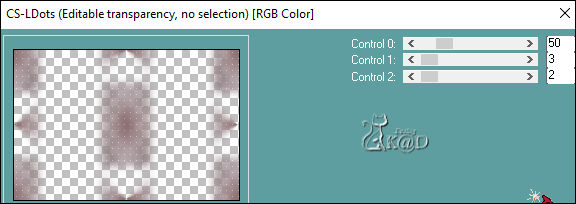
Blend Mode = Overlay
18
Activate Raster 1
Selections – Load selection from Alpha channel – Selectie 3 – see PS
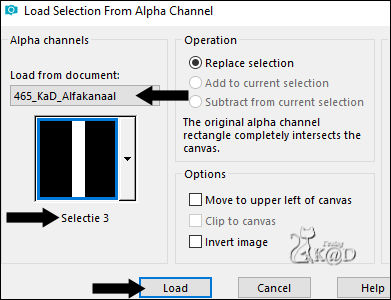
Selections – Promote selection to layer (Promoted Selection 1)
Select none
Layers – Move – Move on top
Plugins – Mehdi – Weaver – see PS
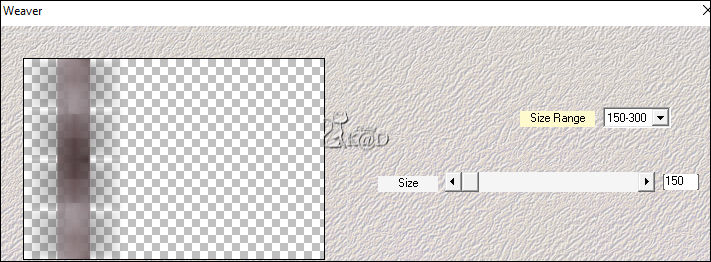
19
Plugins – It@lian Editors Effect – Effetto Fantasma : 12 – 0
20
Effects – Egde effects – Enhance
Layers – Duplicate (Copy of Promoted Selection 1)
Blend Mode = Overlay
21
Activate the layer beneath (Promoted Selection 1)
Effects – 3D-effects – Drop Shadow : V&H 0 – 40 – 20 – Color 1
22
Layers – Duplicate
Image – Mirror
Press K – Pos X : 505 – Pos Y : 0 – Press M
Layers – Move – Move down 2x
23
Activate Raster 1
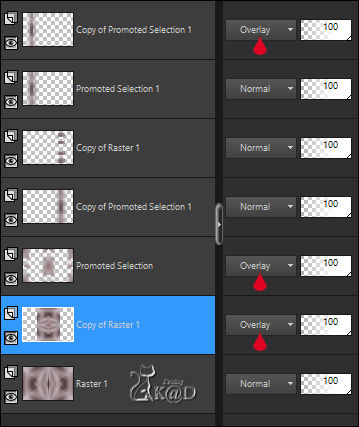
Layers – Duplicate (Copy of Raster 1)
Image – Rotate : Left – 90 – NO check marks
Image – Resize : 67%, NO check mars all layers
Blend Mode = Overlay
Result
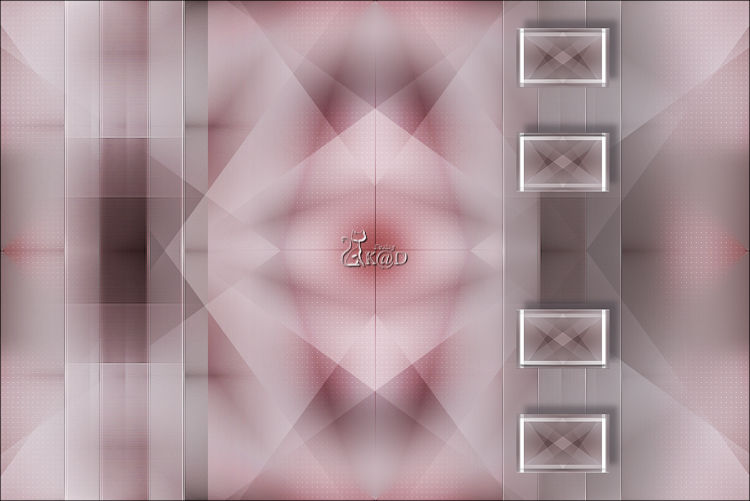
24
Activate & copy : 465_KaD_Text1
Edit – Paste as a new layer (Raster 2)
Layers – Move – Move on top
Image – Resize: 67%, NO check mars all layers
Press K – Pos X : 35 – Pos Y : 244 – Press M
Effects – 3D-effects – Drop Shadow : V -3 – H 3 – 80 – 1 – Color 1
25
Activate & copy : 465_KaD_Text2
Edit – Paste as a new layer (Raster 3)
Objects – Align – Vector align Right (X : 659 – Y : 1)
Layers – Move – Move down 5x
26
Layers – New Raster layers (Raster 4)
Layers – Move – Move on top
Selections – Load selection from Alpha channel – Selectie 4 – zie PS
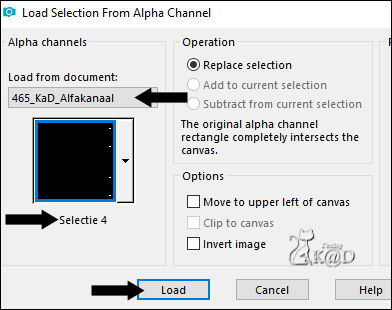
Fill with Foreground color (Color 1)
Plugins – Alien Skin – Eye Candy 5 – Impact – Glass : CLEAR
Select none
27
Activate & copy : KaD_Woman_200
Edit – Paste as a new layer (Raster 5)
Druk K – Pos X : 308 – Pos Y : 2 – Druk M
Effects – 3D-effects – Drop Shadow : V 0 – H 7 – 50 – 30 – Kleur #000000
28
Image – Add borders :
1 pix Color 1
15 pix Color 2
1 pix Color 1
Select all
30 pix Color 2
Effects – 3D-effects – Drop Shadow : V&H 0 – 60 – 25 – Color 1
Select none
29
Activate & copy : 465_KaD_Text3
Edit – Paste as a new layer
Don’t move.
30
Image – Add borders :
1 pix Color 1
3 pix Color 2
1 pix Color 1
31
Add your name or watermark,
Add my watermark to your creation HERE
Layers – Merge all
32
Image – Resize : 900 pix
Adjust – Sharpen – Unsharp Mask : 2 – 30 – 2 – NO check marks
Save as JPG file and you're done!
I hope you enjoyed this tutorial
Karin
09/03/2019
E-mail me your result 
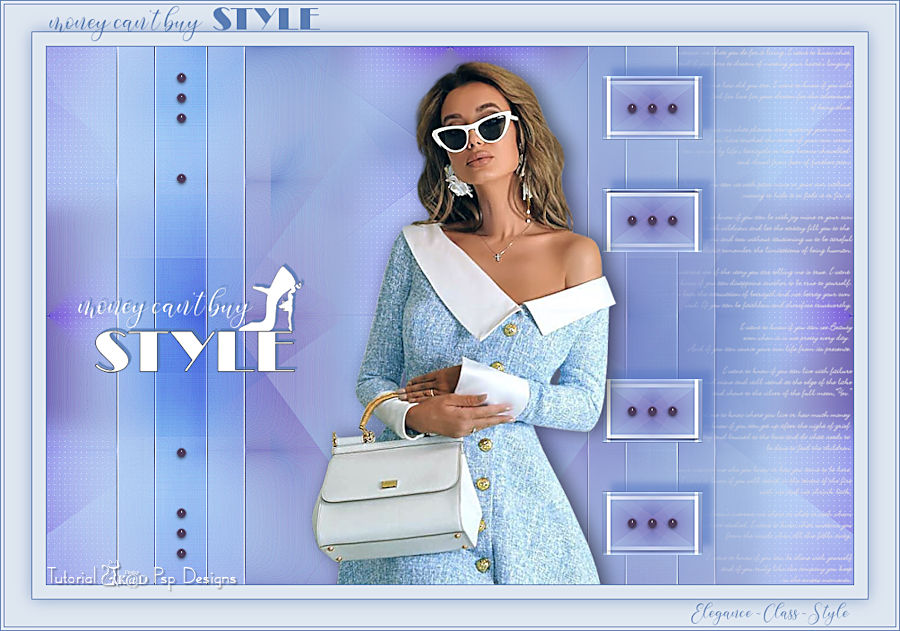
Extra example – Tube : MR

Click on the banner below to go to the galllery.


