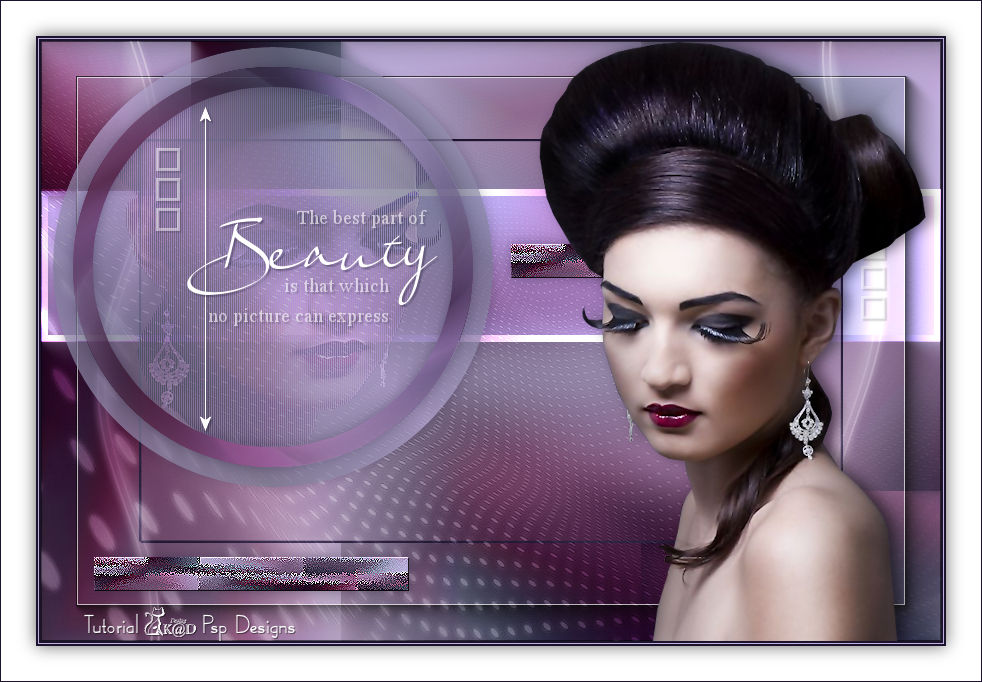
Materials for the tutorial :
Disclaimer:
Each Graphic is the property of the original artist to whom the copyright
belongs and may not be placed in a collection or offered for sale on-line or otherwise.
Tubes :
(*) If you recognize them as one of your own, please let me know, so I can add your name or remove the tube.
Open your tubes in PSP, duplicate them and close the originals.
1/ KaD_WomanFace60
2/ 472_KaD_Deco1
3/ 472_KaD_Text1
Alpha Selections : open in PSP en minimize
1/ 472_KaD_Alfakanaal (this image is not empty – it contains alpha selections)
Masks : open in PSP en minimize
1/ Narah_mask_0524
Color palette :
If you work with your own colors, make your own color palette with the alpha channel,
so you can easily switch between your colors.
There are color differences in the different versions of Psp.
Therefore, use the html codes of the color palette to be sure,
that you have the same colors. Also when merging layers, there may be color differences.

When working with your own colors, play with the Blend Mode and/or Opacity at your own discretion
Plugins :
1/ Mehdi : Wavy Lab 1.1 – Sorting Tiles
(-) Import into Filters Unlimited
------------------------------------------------
TUTORIAL
From now on I use the terms "MIRROR" and "FLIP" again.
Mirror: Mirror horizontal – Flip: Mirror vertical
Let’s get started.
Remember to save your work often
Colors :
Foreground color : Color 1 = #1b132d
Background color : Color 2 = #bfb0de
1
Open the alpha channel : 472_KaD_Alfakanaal
Window – Duplicate
Minimize the original – we continue on the copy
2
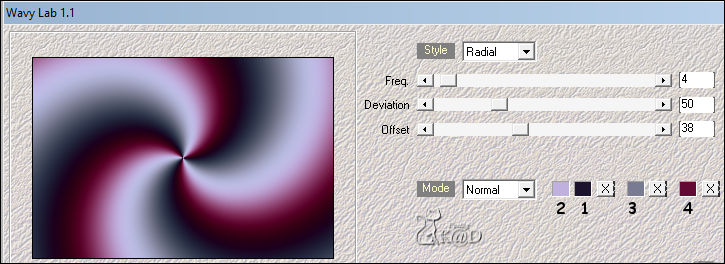
Plugins – Mehdi – Wavy Lab 1.1 – see PS
Adjust – Blur – Gaussian blur : 45
3
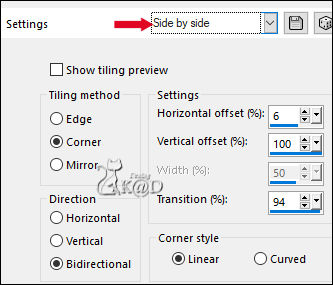
Effects – Image effects – Seamless Tiling – Side by Side – see PS
3-1
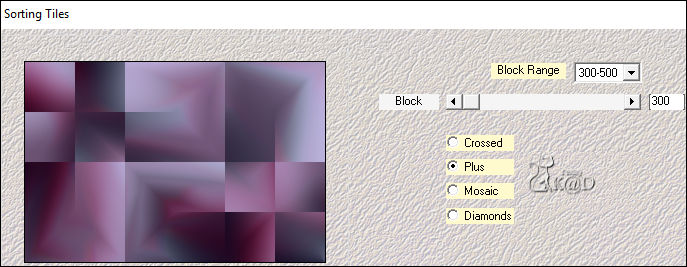
Plugins – Mehdi – Sorting Tiles – see PS
4
Selections – Load/Save Selection – Load Selection From Alpha Channel – Selectie 1 – see PS
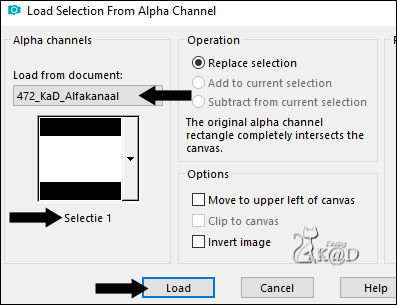
Selections – Promote selection to layer (Promoted Selection)
Adjust – Blur – Gaussian blur: 25
Selections – Edit – Select selection borders – see PS
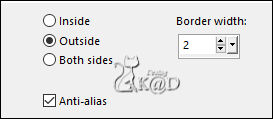
Fill with Foreground color
Select none
5
Activate Raster 1
Selections – Load/Save Selection – Load Selection From Alpha Channel – Selectie 2 – see PS
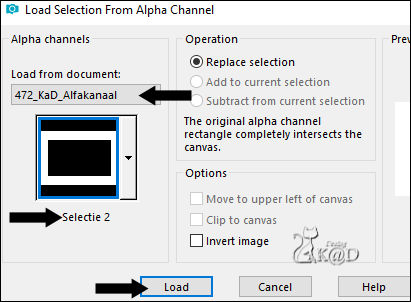
Selections – Promote selection to layer (Promoted Selection 1)
Plugins – AAA Frames – Foto Frame – see PS
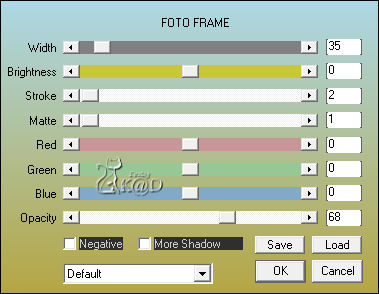
Select none
6
Set Foreground color to Gradient : Linear – see PS
(Angle – Repeat)
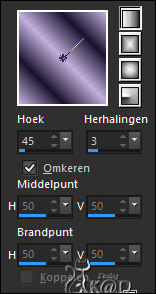
Layers – New Raster layer (Raster 2)
Layers – Move – Move to top
Selections – Load/Save Selection – Load Selection From Alpha Channel – Selectie 3 – see PS
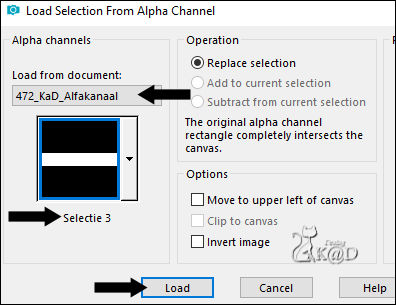
Fill with gradient
Selections – Edit – Contract selection with 7
Press Delete on the keyboard
7
Reduce Opacity of the fill tool to 40
Fill with background color
Select none
8
Change Foreground color to color 3
Foreground color to Gradient and Opacity filling tool to 70
Layers – New Raster layer (Raster 3)
Selections – Load/Save Selection – Load Selection From Alpha Channel – Selectie 4 – see PS

Fill with gradient
Change opacity of the fill tool again to 100
9
Activate Raster 1
Selections – Edit – Contract selection with 20
Selections – Promote selection to layer (Promoted Selection 2)
Layers – Move – Move to top
10
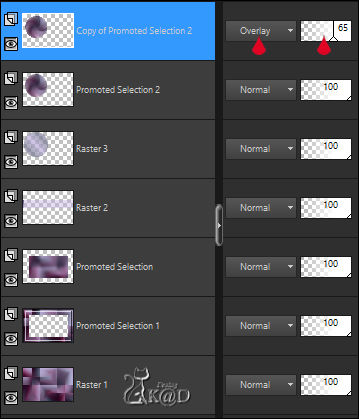
Adjust – Blur – Radiaal blur – see PS
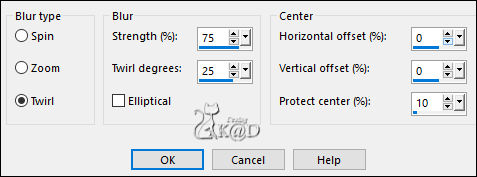
Layers – Duplicate (Copy of Promoted Selection 2)
Blend Mode : Overlay en Layer Opacity = 65
Result
11
Layers – Merge – Merge down
Selections – Edit – Contract selection with 20
Press Delete on the keyboard
Select none
Effects – 3D-effectsn – Drop Shadow : V&H 0 – 40 – 20 – Color 1
12
Layers – Merge – Merge down (Raster 3)
Effects – 3D-effectsn – Drop Shadow : V&H 0 – 40 – 20 – Color 1
13
Activate Raster 2
Effects – 3D-effects – Drop Shadow : V&H 0 – 40 – 20 – Color 1
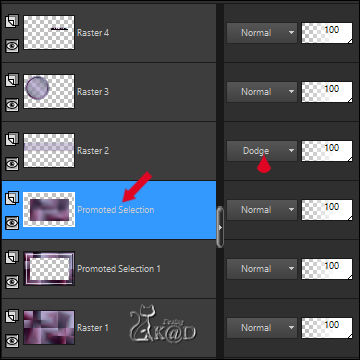
Blend mode = Dodge
14
Activate Raster 1
Edit – copy
Activate top layer (Raster 3)
Layers – New Raster layer (Raster 4)
Selections – Load/Save Selection – Load Selection From Alpha Channel – Selectie 5 – see PS
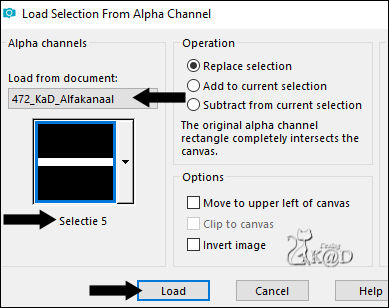
Edit – Past into selection
15
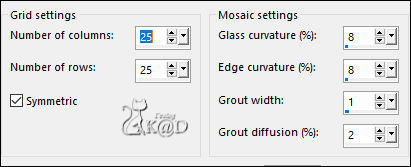
Effects – Texture effects – Mosaic-Glass – see PS
16
Effects – Edge effects – Enhance edges
17
Effects – 3D-effects – Outer bevel – see PS
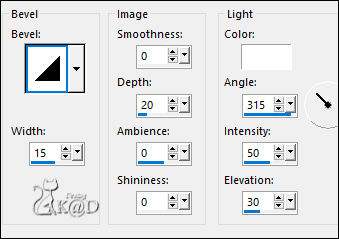
Select none
18
Effects – 3D-effectsn – Drop Shadow : V&H 0 – 40 – 20 – Color 1
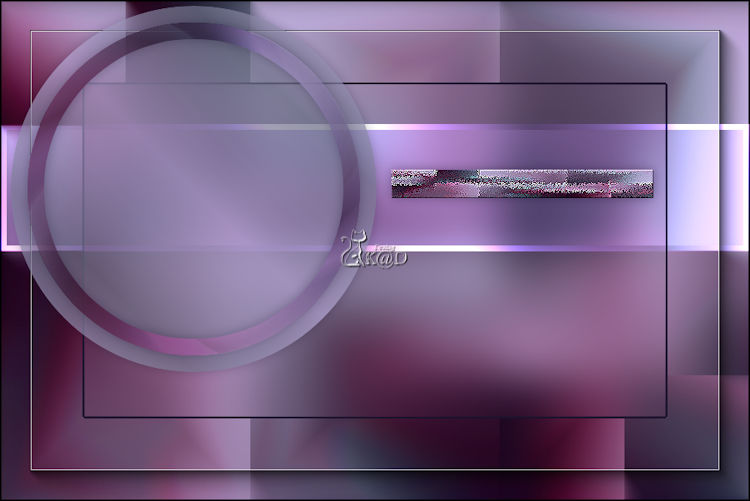
Result
19
Set foreground color to Color 5 (#ffffff)
Activate Promoted Selection (see PS above)
Layers – New Raster layer (Raster 5)
Fill with foreground color
Layers – New Mask Layers – From image “Narah_mask_0524” – see PS
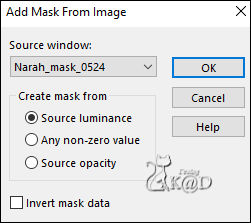
Layers – Merge – Merge Group (Group - Raster 5)
Edit – sharpen – sharpen
Blend Mode = Soft Light
20
Activate & copy : KaD_WomanFace60
Edit – past as new layer
Press K – Pos X : -19 – Pos Y : -143 – Press M HELP
(K : activate the Move Tool – M : deactivate the Move Tool)
21
Selections – Load/Save Selection – Load Selection From Alpha Channel – Selectie 6 – see PS
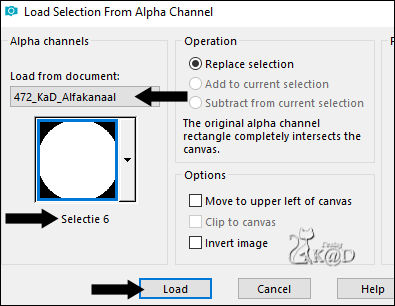
Invert selection
Press Delete on the keyboard
Invert selection
Effects – Texture effects – Blinds – see PS

Select none
Edit – sharpen – sharpen more
Blend mode = Overlay
22
Layers – New Raster layer (Raster 6)
Layers – Move – Move to top
Selections – Load/Save Selection – Load Selection From Alpha Channel – Selectie 7 – see PS
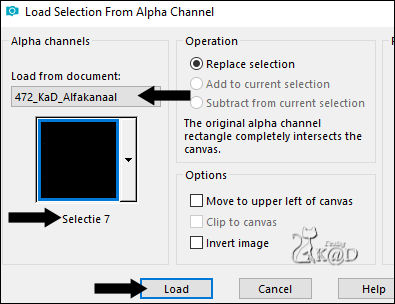
Fill with foreground color
Select none
Effects – 3D-effects – Drop shadow : V&H 2 – 35 – 2 – color 1
23
Activate & copy : 472_KaD_Text1
Edit – past as new layer (Raster 7)
Press K – Pos X : 146 – Pos Y : 169 – Press M
Effects – 3D-effects – Drop shadow : V&H 2 – 35 – 2 – color 1
24
Activate Raster 4
Layers – Duplicate (Copy of Raster 4)
Press K – Pos X : 39 – Pos Y : 501 – Press M
25
Activate & copy: KaD_WomanFace60
Edit – past as new layer (Raster 8 )
Layers – Move – Move to top
Image – mirror
Image –Resize : 82%, no check mark to all layers
Press K – Pos X : 498 – Pos Y : 0 – Press M
Effects – 3D-effects – Drop shadow : V 0 – H 7 – 50 – 20 – color #000000
26
Activate Promoted Selection
Activate & copy : 472_KaD_Deco1
Edit – past as new layer (Raster 9)
Do not move
Blend Mode = Soft Light
27
Image – Add borders :
2 pix Color 1
1 pix Color 2
2 pix Color 1
28
Select all
Image – Add borders : 35 pix kleur 5
Effects – 3D-effects – Drop shadow : V&H 0 – 60 – 25 – kleur #000000
Select none
29
Add your name or watermark,
Add my watermark to your creation HERE
30
Image – Add borders : 1 pix Color 1
Image – Resize: 900 pix
Adjust – Sharpen – Unsharp Mask : 2 – 30 – 2 – no check marks
Save as JPG file and you're done!
I hope you enjoyed this tutorial
Karin
17/05/2019
This tutorial has been tested by myself
Email your result 

Click on banner below to go to the gallery


