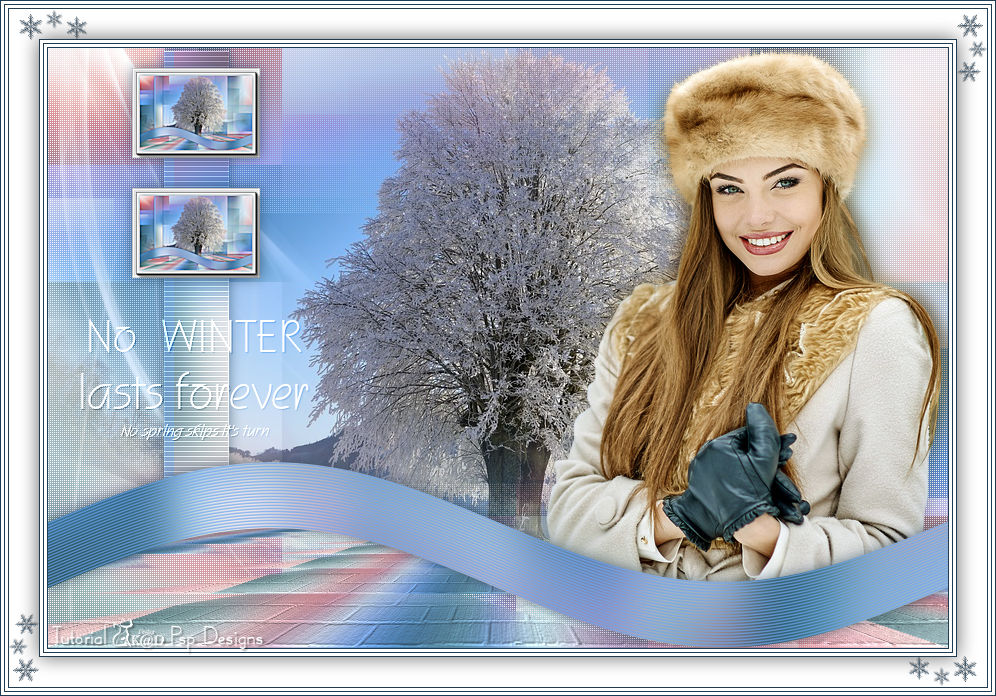
Materials for the tutorial :
Disclaimer:
Each Graphic is the property of the original artist to whom the copyright
belongs and may not be placed in a collection or offered for sale on-line or otherwise.
Tubes :
(*) If you recognize them as one of your own, please let me know, so I can add your name or remove the tube.
1/ KaD_WinterWoman27
2/ KaD_WinterScenery20
3/ 473_KaD_Deco1
4/ 473_KaD_Text1
Alpha Selections : open in PSP and minimize
1/ 473_KaD_Alfakanaal (this image is not empty – it contains alpha selections)
Masks : open in PSP and minimize
1/ Narah_Mask_1337
Texture : put in in your texture folder
1/ Corel_15_032 (bakstenen)
Scripts : put it in your folder scripts limited
1/ 473_KaD_Randen
Color palette :
If you work with your own colors, make your own color palette with the alpha channel,
so you can easily switch between your colors.
There are color differences in the different versions of Psp.
Therefore, use the html codes of the color palette to be sure,
that you have the same colors. Also when merging layers, there may be color differences.

Plugins :
1/ Mehdi : Wavy Lab 1.1 – Sorting Tiles
2/ MuRa’s Meister : Perspective Tiling
3/ Carolaine & Sensibility : CS-Texture
4/ AAA Frames : Foto frame
5/ Unlimited 2.0 – [AFS IMPORT] : sqborder 2 (-)
(-) Import into Filters Unlimited
---------------------------------------
THE TUTORIAL
When working with your own colors, play with the Blend Mode and/or Opacity at your own discretion
From now on I use the terms "MIRROR" and "FLIP" again.
Mirror: Mirror horizontal - Flip: Mirror vertical
Let’s get started.
Remember to save your work often
Colors :
Foreground color : Color 1 ( #e1f5fc)
Background color : Color 2 (#6ea6f0)
1
Open the alpha channel : 473_KaD_Alfakanaal
Window – Duplicate
Minimize the original – we continue on the copy
2
Plugins – Mehdi – Wavy Lab 1.1 – see PS
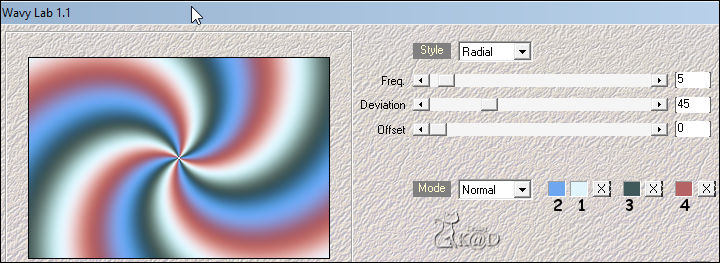
Adjust – Blur – Gaussian blur : 30
3
Plugins – Mehdi – Sorting Tiles – see PS
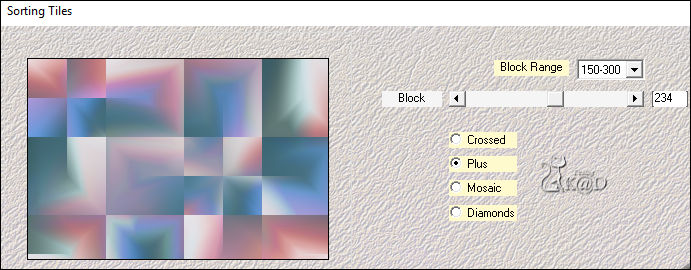
4
Layers – Duplicate
Plugins – Mehdi – Sorting Tiles – see PS
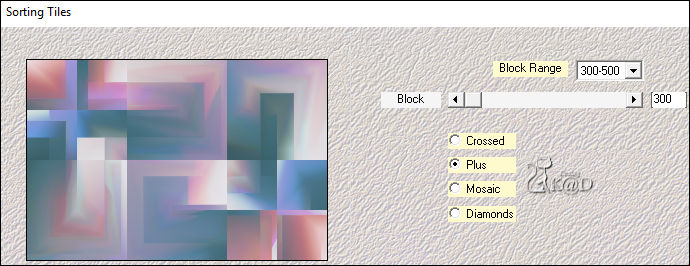
Blend Mode : Hard Light – Opacity : 53
Layers – Merge – Merge down
5
Selections – Load/Save Selection – Load Selection From Alpha Channel – Selectie 1 – see PS
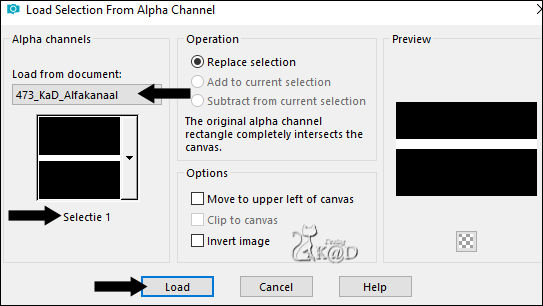
Selections – Promote selection to layer (Promoted Selection)
Adjust – Blur – Gaussian blur : 20
Effects – Texture effects – Blinds – see PS

Select none
6
Effects – Distortion effects – Wave – see PS

Objects – Align – Vector Align Bottom (X : 0 – Y : 414)
7
Activate layer 1
Selections – Load/Save Selection – Load Selection From Alpha Channel – Selectie 2 – see PS
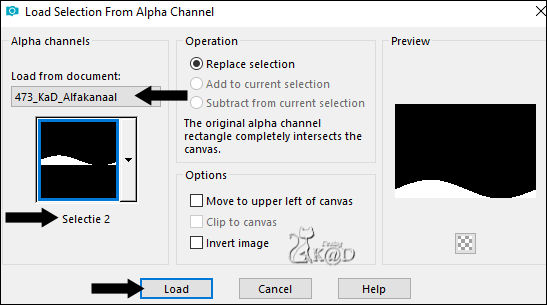
Selections – Promote selection to layer (Promoted Selection 1)
Adjust – Blur – Gaussian blur : 20
Effects – Texture Effects – Texture – Corel_15_032 (Brick Wall) – see PS
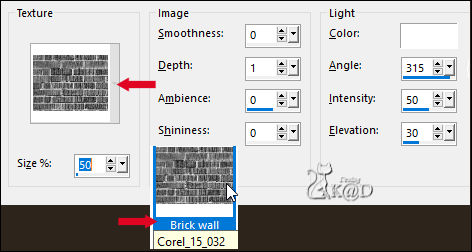
Select none
8
Plugins – MuRa’s Meister – Perspective Tiling – see PS
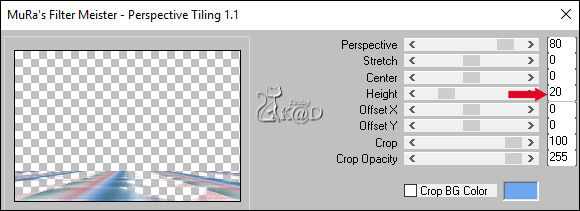
9
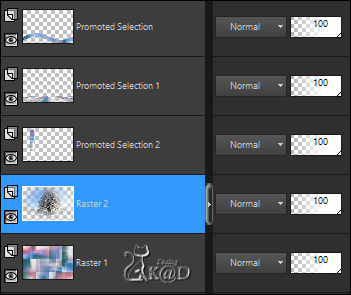
Activate top layer (Promoted Selection)
Effects – 3D-effects – Drop Shadow : V&H 0 – 60 – 20 – Color : 5
10
Activate layer 1
Selections – Load/Save Selection – Load Selection From Alpha Channel – Selectie 3 – see PS
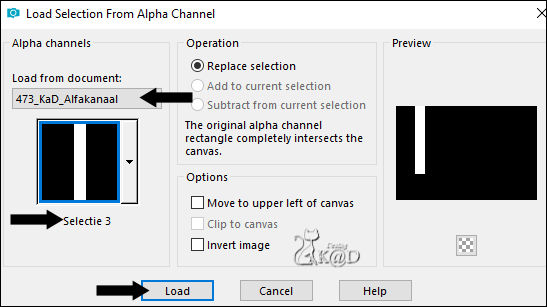
Selections – Promote selection to layer (Promoted Selection 1)
Adjust – Blur – Gaussian blur : 20
Select none
11
Plugins – Carolaine & Sensibility – CS-Texture – see PS

12
Effects – Image effects – Offset : H 0 – V -3 – Transparant
Adjust – Sharpen – Sharpen
Effects – 3D-effects – Drop Shadow : V&H 0 – 60 – 20 – Color : 5
13
Activate layer 1
Activate and copy : KaD_WinterScenery20
Edit – Paste as a new layer
Press K – Pos X : -23 – Pos Y : -68 – Press M HELP
(K : activate the Pick Tool – M : deactivate the Pick Tool)
Result
14
Edit – Copy – Copy Merged
Edit – Paste – As a New Image
Image – Resize : 25%, all layers
15
Select all
Image – Add borders : 15 pix white (#ffffff)
Effects – 3D-effects – Drop Shadow : V&H 0 – 60 – 20 – Color : 5
Select none
16
Plugins – AAA Frame – Foto Frame – see PS
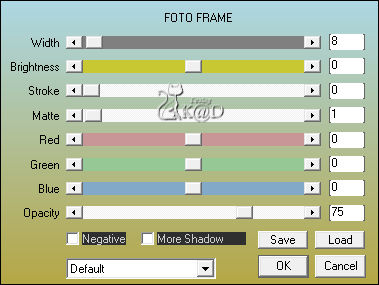
Edit – Copy
Back to your work
17
Edit – Past as a new layer (Raster 3)
Layers – Move – Bring to top
Image – Resize : 50%, all layers
Press K – Pos X : 84 – Pos Y : 20 – Press M
Adjust – Sharpen – Sharpen more
18
Layers – Duplicate
Effects – Image effects – Offset : H 0 – V -120 – Transparant
Layers – Merge – Merge Down
Effects – 3D-effects – Drop Shadow : V&H 0 – 60 – 20 – Color : 5
19
Activate en copy : 473_KaD_Text1
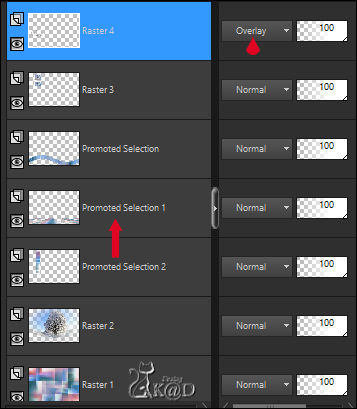
Edit – Paste as a new layer (Raster 4)
Press K – Pos X : 33 – Pos Y : 271 – Press M
Effects – 3D-effects – Drop Shadow : V&H 1 – 50 – 1 – Color : #000000
Blend Mode : Overlay
Result
20
Activate Promoted Selection 1 (see PS above)
Activate and copy : KaD_WinterWoman27
Edit – Paste as a new layer (Raster 5)
Press K – Pos X : 497 – Pos Y : -5 – Press M
21
Selections – Load/Save Selection – Load Selection From Alpha Channel – Selectie 4 – see PS
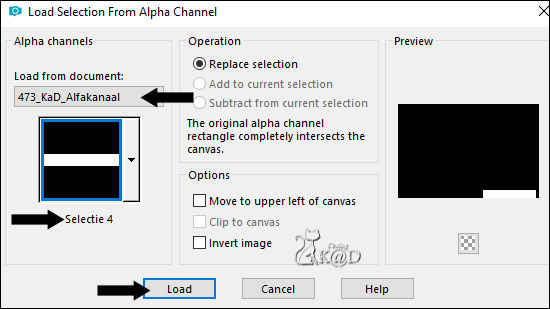
Press Delete on your keyboard
Select none
22
Layers – Duplicate (Copy of Raster 5)
Activate the layer beneath (Raster 5)
Adjust – Blur – Gaussian blur : 10
Blend Mode : Multiply
23
Set Foreground color to Color 6 (#ffffff)
Activate layer 1
Layers – New Raster layer (Raster 6)
Fill with foreground color
Layers – New Mask Layer – From Image ‘Narah_Mask_1337’ – see PS
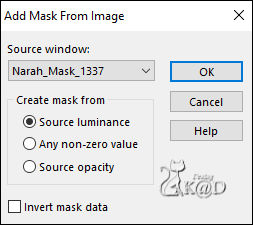
Image – Mirror
Layers – Merge – Merge group (Group - Raster 6)
Blend Mode : Screen
24
Activate layer 1
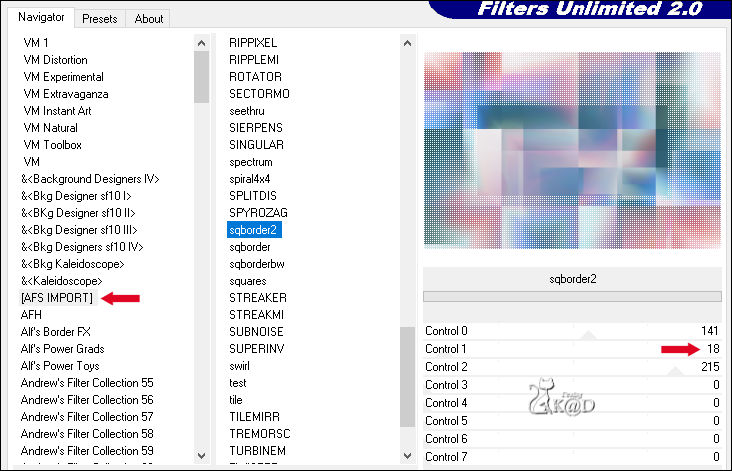
Plugins – Unlimited 2.0 – [AFS IMPORT] – sqborder2 – see PS
25
Image – Add borders :
* If you are using the same colors, you can use the script “473_KaD_Randen”
1 pix color 5
3 pix color 6
1 pix color 5
3 pix color 6
1 pix color 5
26
Select all
Image – Add borders : 30 pix color 6
Effects – 3D-effects – Drop Shadow : V&H 0 – 60 – 30 – Color : #000000
Select none
27
Image – Add borders :
* If you are using the same colors, you can use the script “473_KaD_Randen”
1 pix color 5
3 pix color 6
1 pix color 5
3 pix color 6
1 pix color 5
28
Activate en copy : 473_KaD_Deco1
Edit – Paste as a new layer
Don’t move
29
Add your name or watermark,
Add my watermark to your creation HERE
30
Layers – Merge – Merge all layers
Image – Resize - Width 900 Pixels - Resize all Layers checked
Adjust – Sharpen – Unsharp Mask : 2 – 30 – 2 – no check marks
31
Save as JPG file and you're done!
I hope you enjoyed this tutorial
Karin
08/07/2019
This tutorial has been tested by myself
Email your result 

Click on banner below to go to the gallery


