When working with your own colors, play with the Blend Mode and/or Opacity at your own discretion
From now on I use the terms "MIRROR" and "FLIP" again.
Mirror: Mirror horizontal - Flip: Mirror vertical
Let’s get started.
Remember to save your work often
Colors :
Foreground color : Color 3 (#780207)
Background color : Color 4 (#ffffff)
1
Open the alpha channel : 476_KaD_Alfakanaal
Window – Duplicate
Minimize the original – we continue on the copy
2
Select all
Activate : Criss adorno nav 15
Close top & bottom layer
Activate second layer
Edit – Copy Special – Copy Merged
Edit – Paste into selection
Select none
3
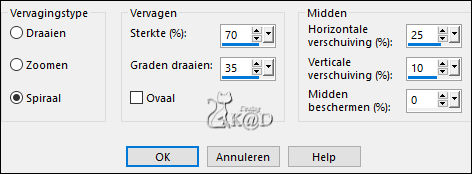
Adjust – Blur – Radial blur – see PS
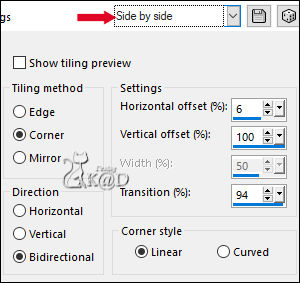
Effects – Image effects – Seamless Tiling – Side by side – see PS
4
Layers – Duplicate
Image – Flip
Layers – Merge all (Flatten)
Layers – Promote Background layer (Raster 1)
5
Adjust – Blur – Gaussian : 20
6
Layers – New Raster layer (Raster 2)
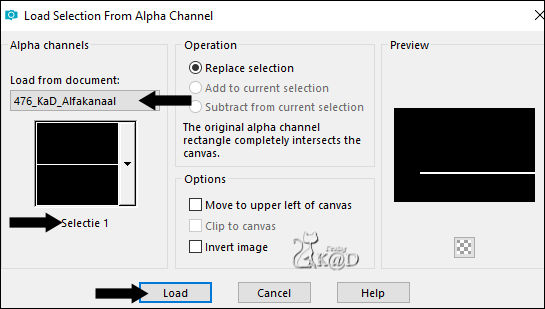
Selections – Load/Save Selection – Load Selection From Alpha Channel – Selectie 1 – see PS
Fill with background color
Select none
Effects – Distortion effects – Wave – see PS

7
Plugins – Eye Candy 4000 – Motion Trail – see PS
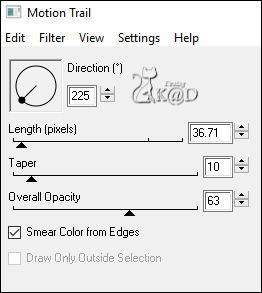
Image – Mirror
Press K – Pos X : 295 – Pos Y : 273 – Press M HELP
(K : activate the Pick Tool – M : deactivate the Pick Tool)
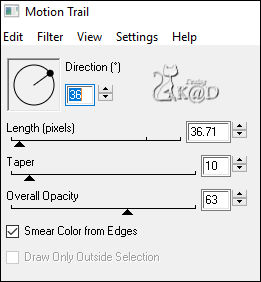
Plugins – Eye Candy 4000 – Motion Trail – see PS
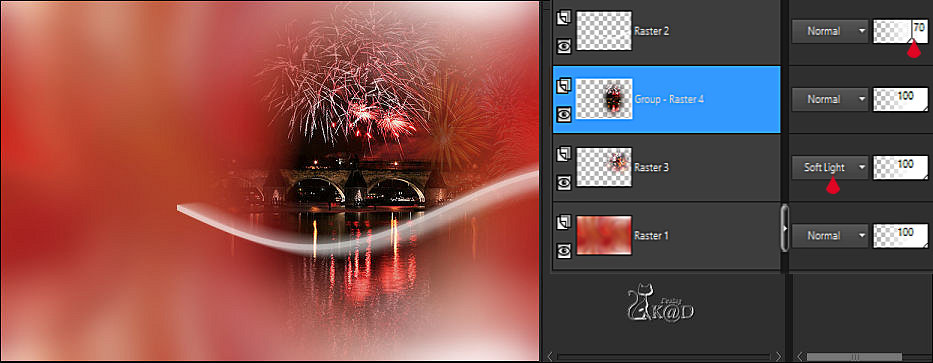
Bring Layer opacity down to 70
** Is this filter not working for you, you can use : 476_Element_MotionTrail_EyeCandy4000
** Paste as a new layer – Pos X : 295 – Pos Y : 273 – Layer opacity : 70
8
Activate Raster 1
Select all
Image – Crop to selection
9
Activate & copy : vuurwerk1@K@D (Raster 3)
Edit – Paste as a new layer
Press K – Pos X : 404 – Pos Y : -40 – Press M
Effects – Edge effects – Enhance
Set Blend mode to Soft Light
10
Activate & copy : lunapaisagem1213
Edit – Paste as a new layer (Raster 4)
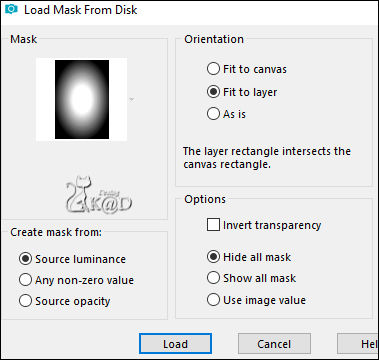
Layers – Load mask from disc : Search for Masker 20-20 – see PS
Layers – Duplicate – You have 2x the mask layer – see PS
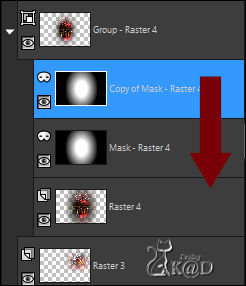
Layers – Merge – Merge group
11
Adjust – Sharpen – Sharpen more
Press K – Pos X : 318 – Pos Y : 0 – Press M
Result
12
Activate Raster 3
Layers – Duplicate
Image – Mirror
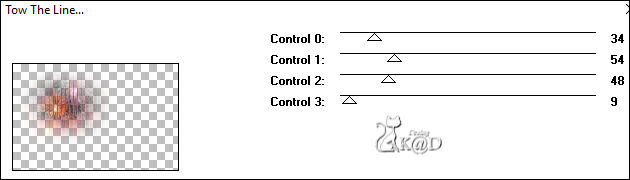
Plugins – Tramages – Tow The Line – see PS
Set Blend mode to Soft Light en bring layer opacity down to 48
Adjust – Sharpen – Sharpen more
13
Activate top layer (Raster 2)
Layers – New Raster layer (Raster 4)
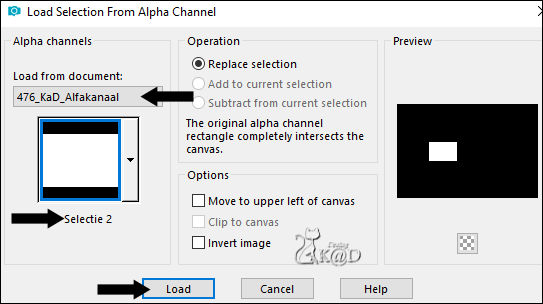
Selections – Load/Save Selection – Load Selection From Alpha Channel – Selectie 2 – see PS
Fill with background color
14
Selections – Modify – Contract : 12
Press Delete on the keyboard
Keep selection !
15
Activate & copy : MR_Sorrento in red
Edit – Paste as a new layer (Raster 5)
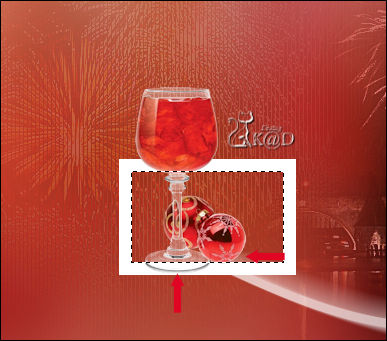
Image – Resize : 35%, No checkmarks at all layers
Move the tube into the selection – see PS
16
Selections Invert
Erase the bottom of the glass in the frame with your eraser tool – see PS
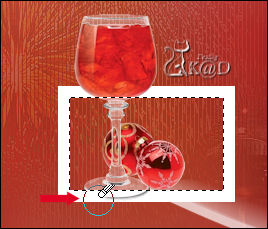
Select none
Effects – 3D-effects – Drop Shadow : V&H 0 – 40 – 20 – Color #000000
17
Activate Raster 4
Layers – Duplicate (Copy of Raster 4)
Image – Free rotate : Left – 17 – see PS
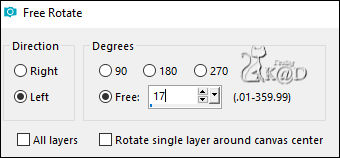
Image – Resize : 90%, No checkmarks at all layers
Press K – Pos X : 153 – Pos Y : 127 – Press M
18
Layers – Merge – Merge down
Effects – 3D-effects – Drop Shadow : V&H 0 – 40 – 20 – Color #000000
Bring layer opacity down to 80
19
Activate top layer
Activate & copy : 476_KaD_Deco1
Edit – Paste as a new layer
Press K – Pos X : 22 – Pos Y : 0 – Press M
Effects – 3D-effects – Drop Shadow : V&H 1 – 30 – 1 – Color #000000
20
Activate & copy : smArt_979 (Raster 7)
Edit – Paste as a new layer
Image – Resize : 120%, No checkmarks at all layers
Press K – Pos X : 576 – Pos Y : 33 – Press M
21
Layers – Duplicate (Copy of Raster 7)
Activate the layer just below (Raster 7)
Adjust – Blur – Gaussian : 8
Change Blend Mode to Multiply
22
Activate Raster 1
Activate & copy : 476_KaD_Element1
Edit – Paste as a new layer (Raster 8)
Image – Resize : 80%, No checkmarks at all layers
Press K – Pos X : 10 – Pos Y : -28 – Press M
Change Blend Mode to Soft Light and bring layer opacity down to 28
23
* This is not necessary when using your own tube
Activate top layer (Kopie van Raster 7)
Selections – Load/Save Selection – Load Selection From Alpha Channel – Selectie 3 – see PS
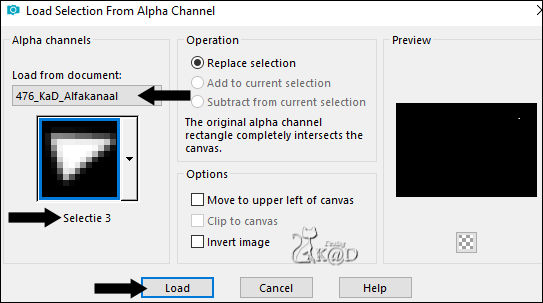
Press Delete on the keyboard
Select none
24
Activate & copy : 476_KaD_Text1
Edit – Paste as a new layer (Raster 9)
Press K – Pos X : 17 – Pos Y : 467 – Press M
Change Blend Mode to Overlay
25
Activate & copy : 476_KaD_Deco2
Edit – Paste as a new layer (Raster 10)
Press K – Pos X : 30 – Pos Y : 129 – Press M
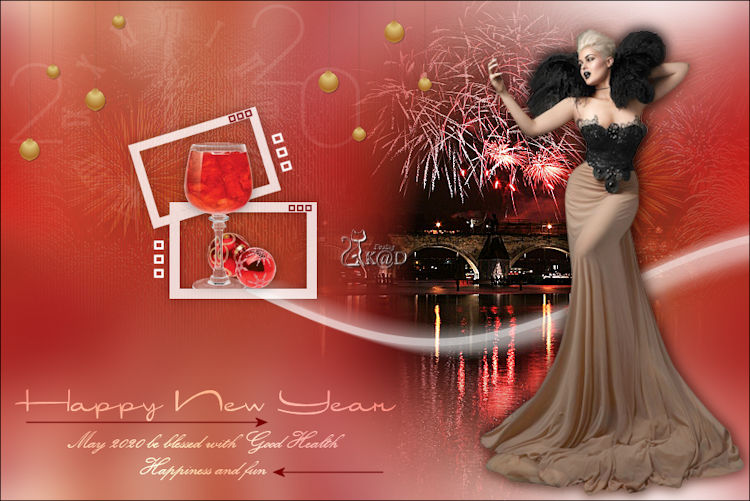
Result
25-1
Activate Raster 1
Edit – Copy
Edit – Paste as a new image
Put aside till later
Back to your work
Edit – Copy Special – Copy Merged
26
Activate : 476_KaD_Alfakanaal_Kader
Window – Duplicate
We continue on the copy
Edit – Paste as a new layer
26-1
Activate Raster 1
Zoom out your image (400%)
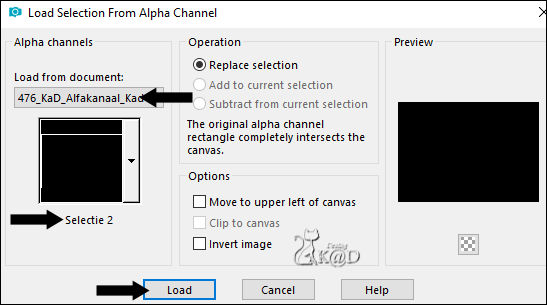
Selections – Load/Save Selection – Load Selection From Alpha Channel – Selectie 2 – see PS
Fill with your color 3
26-2
Selections – Load/Save Selection – Load Selection From Alpha Channel – Selectie 3
Fill with your color 1
26-3
Selections – Load/Save Selection – Load Selection From Alpha Channel – Selectie 4
Fill with your color 3
26-4
Selections – Load/Save Selection – Load Selection From Alpha Channel – Selectie 5
Copy the image you made at #25
Edit – Paste into Selection
26-5
Selections – Load/Save Selection – Load Selection From Alpha Channel – Selectie 6
Fill with your color 2
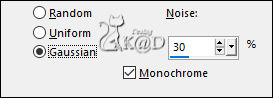
Add – Add/Remove Noise – Add Noise : 30% - see PS
26-6
Selections – Load/Save Selection – Load Selection From Alpha Channel – Selectie 7
Edit – Paste into selection (still in memory)
26-7
Selections – Load/Save Selection – Load Selection From Alpha Channel – Selectie 8
Fill with your color 3
26-8
Selections – Load/Save Selection – Load Selection From Alpha Channel – Selectie 9
Fill with your color 1
26-9
Selections – Load/Save Selection – Load Selection From Alpha Channel – Selectie 10
Effects – 3D-effects – Drop shadow : V&H 0 – 60 – 30 – Color #000000
26-10
Selections – Load/Save Selection – Load Selection From Alpha Channel – Selectie 11
Effects – 3D-effects – Drop shadow : V&H 0 – 60 – 30 – Color #000000
Select none
Zoom the image in to 100%
27
* This is not necessary when using your own tube
Activate & copy : 476_KaD_Deco3
Edit – Paste as a new layer
Layers – Arrange – Move to top
Press K – Pos X : 636 – Pos Y : 92 – Press M
28
Add your name or watermark,
Add my watermark to your creation HERE
29
Image – Add Borders: 1 pix color 3
Image – Resize – Width 900 Pixels – Resize all Layers checked
Adjust – Sharpen – Sharpen
Save as JPG file and you're done!
I hope you enjoyed this tutorial
Karin
16/08/2019
This translation has been tested by myself
Email your result 

Click on banner below to go to the gallery