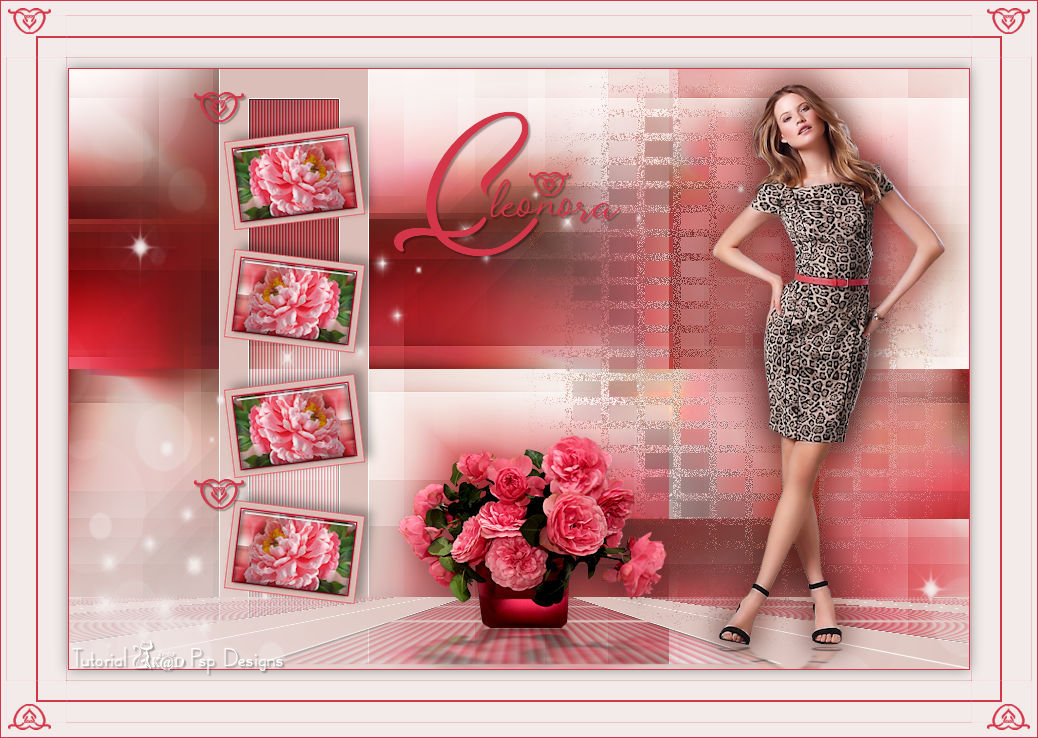
1/ KaD_Woman_211
2/ MR_Pivoine rose
3/ Mina@.vaso.13.05.15
4/ 482_KaD_Frame
Alpha Selections : open in PSP and minimize
(this image is not empty – it contains alpha selections)
1/ 482_KaD_Alfakanaal
Masks : open in PSP and minimize
1/ Narah_mask_0879
Color palette :
If you work with your own colors, make your own color palette with the alpha channel,
so you can easily switch between your colors.
There are color differences in the different versions of Psp.
Therefore, use the html codes of the color palette to be sure,
that you have the same colors. Also when merging layers, there may be color differences.

Plugins :
1/ Mehdi : Wavy Lab 1.1 – Sorting Tiles
2/ Italian Editors : Bordo con Lucci – Effetto Fantasma
3/ Alien Skin – Eye Candy 5 : Impact
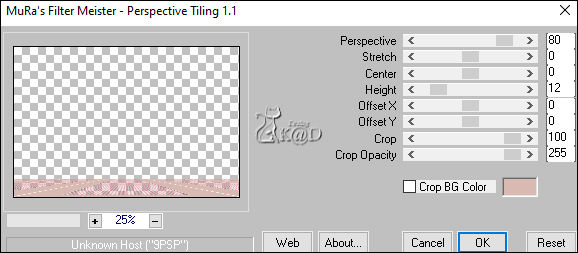
4/ MuRa’s Meister : Perspective Tiling
(-) Import into Filter Unlimited
---------------------------------------
THE TUTORIAL
When working with your own colors, play with the Blend Mode and/or Opacity at your own discretion
From now on I use the terms "MIRROR" and "FLIP" again.
Mirror: Mirror horizontal - Flip: Mirror vertical
Let’s get started.
Remember to save your work often
Some print screens have other colors than the original.
Colors :
Foreground color : Color 1
Background color : Color 2
1
Open the alpha channel : 482_KaD_Alfakanaal
Window – Duplicate
Minimize the original – we continue on the copy
2
Plugins – Mehdi – Wavy Lab 1.1 – see PS
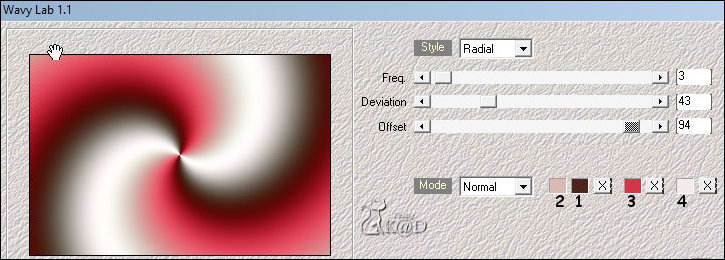
3
Effects – Image effects – Seamless tiling – see PS
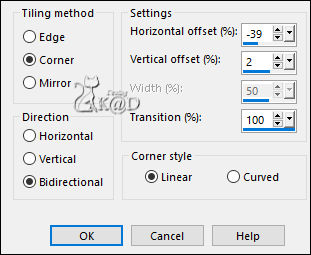
Adjust – Blur – Motion blur – see PS
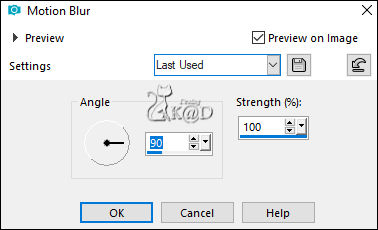
Repeat 1x
4
Plugins – Mehdi – Sorting Tiles – see PS
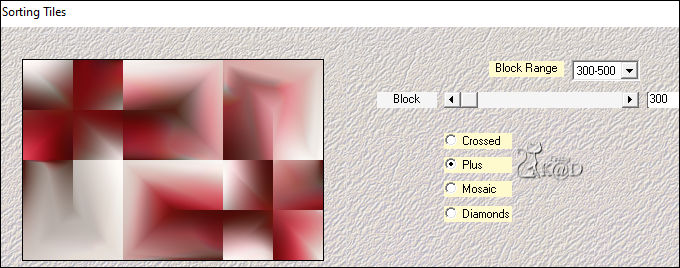
5
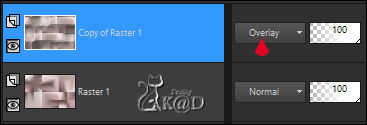
Layers – Duplicate
Plugins – Italian Editors – Bordo con Lucci – see PS

6
Effects – Image effects – Seamless tiling – same values as before
Repeat 1x
Change Blend mode to Overlay
Result
7
Plugins – Italian Editors – Effetto Fantasma : 20 – 20
Adjust – Sharpness – Sharpen
8
Window – Duplicate (Shift d)
Layers – Merge – Merge all layers
Image – Resize : 18%, all layers
8-1
Change foreground color to color 3
Select all
Layers – New Raster layer
Fill with background color
Selection – Modify – Contract : 7
Fill with foreground color
Selection – Modify – Contract : 2
Press Delete on the keyboard
8-2
Plugins – Alien Skin – Eye Candy 5 – Impact – Glass : Clear
Keep selection !
8-3
Close Raster 1 by clicking on the little eye
Activate background layer
Activate and copy : MR_Pivoine rose
Edit – Paste as a new layer
Image – Resize : 25%, no check mark all layers
8-4
Move a little bit to the left – see PS
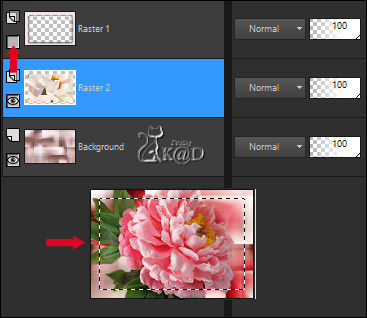
Selection – Invert
Press Delete on the keyboard
Select none
Open Raster 1
Image – Add borders : 1 pix foreground color
Edit – Copy
9
Return to your work
Edit – Paste as a new layer
Image – Resize : 80%, no check mark all layers
Image – Free rotate : Left – 7 – see PS
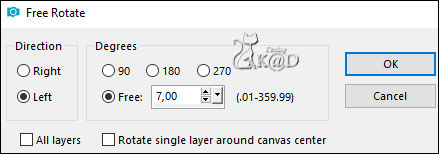
Press K – Pos X : 155 – Pos Y : 57 – Press M HELP
(K : activate the Pick Tool – M : deactivate the Pick Tool)
9-1
Layers – Duplicate
Image – Mirror
Press K – Pos X : 155 – Pos Y : 180
9-2
Layers – Duplicate
Image – Mirror
Press K – Pos X : 155 – Pos Y : 305
9-3
Layers – Duplicate
Image – Mirror
Press K – Pos X : 155 – Pos Y : 431 – Press M
Layers – Merge –Merge down 3x (Raster 2)
Adjust – Sharpness – Sharpen
Effects -3D-effects – Drop shadow : V -5 – H 7 – 35 – 15 – Color #000000
10
Layers – New Raster layer (Raster 3)
Selections – Load/Save Selection – Load Selection From Alpha Channel – Selectie 1 – see PS
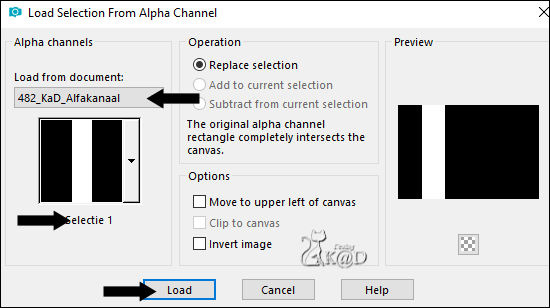
Fill with background color
Selection – Modify – Contract : 30
Press Delete on the keyboard
10-1
Change opacity of the filling tool to 40
Fill with background color
Effects – Texture effects – Blinds – see PS
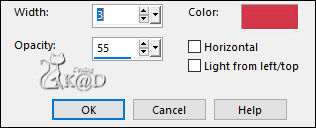
Select none
Change opacity of the filling tool to 100
11
Effects – Edge effects – Enhance
Layers – Arrange – Move down
12
Edit – Copy
Layers – New Raster layer (Raster 4)
Selections – Load/Save Selection – Load Selection From Alpha Channel – Selectie 2 – see PS
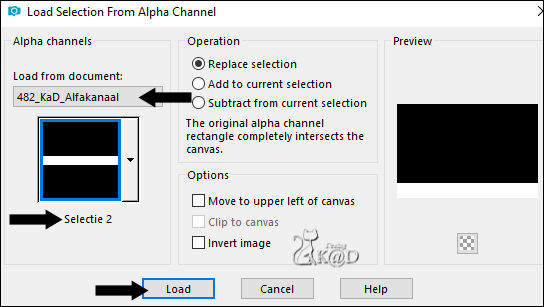
Edit – Paste into selection
Select none
Plugins – MuRa’s Meister – Perspective Tiling – see PS
13
Effects – 3D-effects – Drop shadow : V&H 0 – 15 – 30 – Color #000000
14
Layers – New Raster layer (Raster 5)
Selections – Load/Save Selection – Load Selection From Alpha Channel – Selectie 3 – see PS
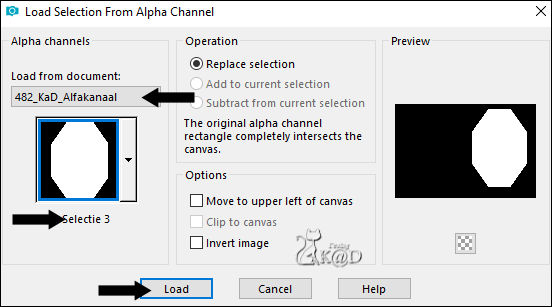
Activate and copy : MR_Pivoine rose
Edit – Paste into selection
Select none
Adjust – Blur – Gaussian Blur : 15
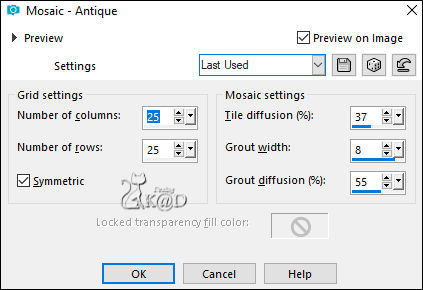
Effects – Texture effects –Mosaic Antique – see PS
Adjust – Sharpness – Sharpen
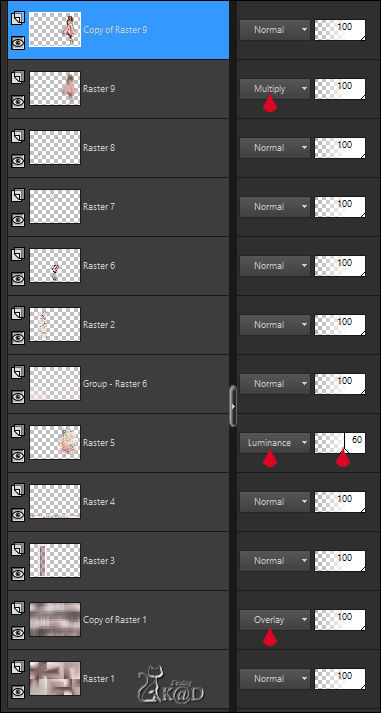
Change Blend mode to Luminance and layer opacity to 60
15
Change foreground color to color 4
Layers – New Raster layer
Fill with foreground color
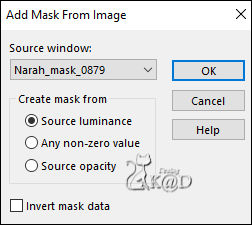
Layers – New Mask layer – From Image “Narah_mask_0879” – see PS
Layers – Merge – Merge Group (Group Raster 6)
16
Activate and copy : Mina@.vaso.13.05.15
Edit – Past as a new layer (Raster 6)
Image – Resize : 30%, no check mark all layers
Adjust –Brightness and contrast– Brightness and contrast – see PS
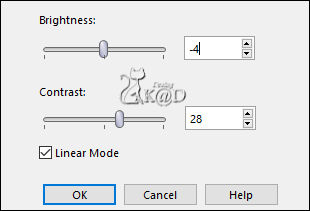
Press K – Pos X : 328 – Pos Y : 366 – Press M
Plugins – Alien Skin – Eye Candy 5 – Impact – Perspective Shadow : Reflect in Front – Faint
16-1
Effects – 3D-effects – Drop shadow : V3 & H0 – 15 – 30 – Color #000000
Layers – arrange – move to top
17
Change foreground color to color 3
Layers – New Raster layer (Raster 7)
Selections – Load/Save Selection – Load Selection From Alpha Channel – Selectie 4 – see PS
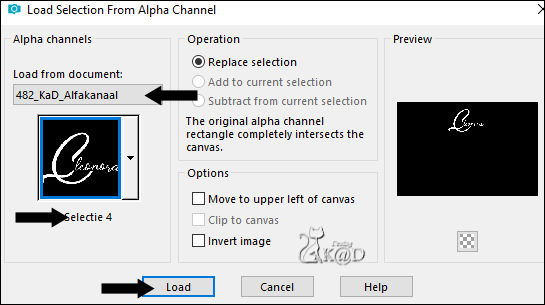
Fill with foreground color
Select none
Effects – 3D-effects – Drop shadow : V&H 2 – 35 – 2 – Color #000000
18
Layers – New Raster layer (Raster 8)
Selections – Load/Save Selection – Load Selection From Alpha Channel – Selectie 5 – see PS
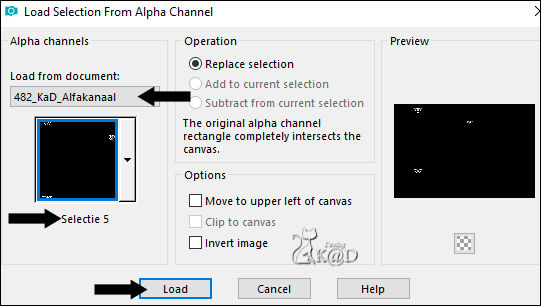
Fill with foreground color
Select none
Effects – 3D-effects – Drop shadow : V&H 2 – 35 – 2 – Color #000000
19
Activate and copy : KaD_Woman_211
Edit – Past as a new layer (Raster 9)
Image – Resize : 57%, no check mark all layers
Press K – Pos X : 643 – Pos Y : 14 – Press M
20
Layers – Duplicate (Copy of Raster 9)
Activate the layer below (Raster 9)
Adjust – Blur – Gaussian Blur: 15
Change Blend mode to Multiply
21
Activate top layer (Copy of Raster 9)
Plugins – Alien Skin – Eye Candy 5 – Impact – Perspective Shadow : Reflect in Front – Faint
Result
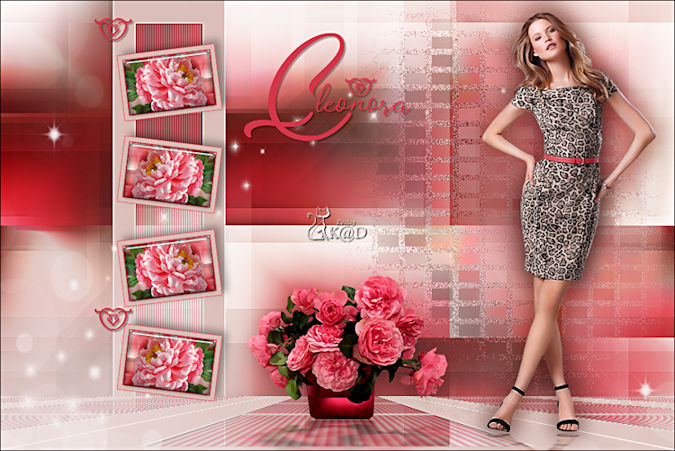
22
Image – Add borders : 1 pix color 3
Edit – Copy
23
Activate : 482_KaD_Frame
Window – duplicate – we work on the copy*
Edit – Past as a new layer
*TIP : You can change the color of the border with the tool “Change to target”
24
Add your name or watermark,
Add my watermark to your creation HERE
25
Image – Add Borders : 1 pix color 3
Image – Resize – Width 900 Pixels – Resize all Layers checked
Adjust – Sharpen – Unsharp Mask : 2 – 30 – 2 – no check marks
Save as JPG file and you're done!
I hope you enjoyed this tutorial
Karin
03/04/2020
Mail me your version 
Extra example – Tubes smArt & Isa & LaManouche


Click on banner below to go to the gallery


