1/ 486_KaD_Element1
2/ 486_KaD_Element2
3/ 486_KaD_Element3
4/ 486_KaD_Snowman1
5/ 486_KaD_Snowman2
6/ 486_KaD_WordArts
Frames : Open in Psp and minimize
1/ pngfuel2.com (*)
Alpha Selections : open in PSP and minimize
(this image is not empty – it contains alpha selections)
1/ 486_KaD_Alfakanaal
Color palette :
If you work with your own colors, make your own color palette with the alpha channel,
so you can easily switch between your colors.
There are color differences in the different versions of Psp.
Therefore, use the html codes of the color palette to be sure,
that you have the same colors. Also when merging layers, there may be color differences.

Plugins :
1/ Mehdi : Wavy Lab 1.1
2/ Simple : Blintz – Pizza Slice Mirror (Can also be used in Unlimited 2.0 = same result)
3/ Vanderlee : Snowflakes (or VDL - Adrenalina)
4/ MuRa’s Meister : Copies
5/ Carolaine & Sensibilites : CS-LDots
(-) Import into Filters Unlimited
------------------------------------------------
THE TUTORIAL
When working with your own colors, play with the Blend Mode and/or Opacity at your own discretion
From now on I use the terms "MIRROR" and "FLIP" again.
Mirror: Mirror horizontal - Flip: Mirror vertical
 People who are visually impaired, contact me and I will send you a word document.
Let’s get started.
Remember to save your work often
Some print screens have other colors than the original.
Colors :
Foreground color : Color 1
Background color : Color 3
1
Open the alpha channel : 486_KaD_Alfakanaal
Window – Duplicate
Minimize the original – we continue on the copy
2
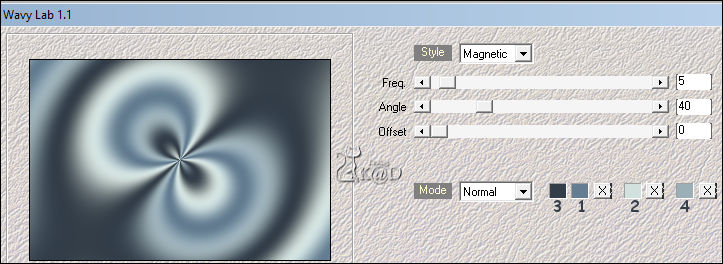
Plugins – Mehdi – Wavy Lab 1.1 – see PS
3
Effects – Image effects – Seamless Tiling – Default but Transition : 100
Adjust – Blur – Gaussian Blur : 25
4
Plugins – Simple – Blintz
5
Plugins – Simple – Pizza Slice Mirror
Repeat 1x
Layers – Duplicate
Image – Mirror
Change Blend mode to Hard Light and Layer opacity to 50
Layers – Merge down
6
Change Foreground color to Color 5 (#ffffff)
Layers – New Raster layer
Fill with foreground color
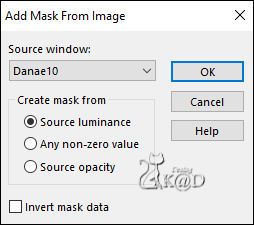
Layers – New Mask Layers – From image “Danae10” – see PS
Layers – Duplicate– You now have 2x de mask layer – see PS
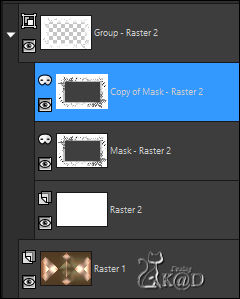
Layers – Merge – Merge Group (Group Raster 2)
6-1
Adjust – Sharpness – Sharpen
Change Blend mode to Soft Light
7
Activate Raster1
Selections – Load/Save Selection – Load Selection From Alpha Channel – Selectie 1 – see PS
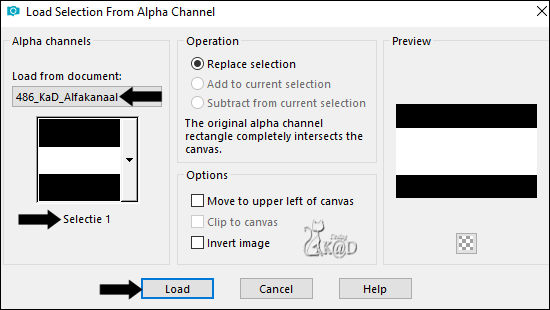
Selections – Promote selection to layer (Promoted selection)
Adjust – Blur – Gaussian Blur: 25
Layers – Arrange – Bring to top
8
Change Background color to Color 2
Layers – New Raster layer (Raster 2)
Fill with Background color
Selection – Modify – Contract : 3
Press Delete on the keyboard
9
Activate the layer just below (Promoted selection)
Plugins – Vanderlee – Snowflakes – see PS
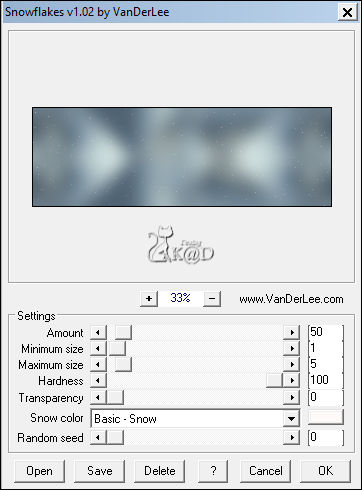
(Or You can use VDL Adrenaline – Snowflakes)
Select none
10
Activate top layer (Raster 2)
Effects – 3D-effects – Drop shadow : V&H 2 – 35 – 2 – Color #000000
11
Activate and copy : pngfuel2.com
Edit – Paste as a new layer (Raster 3)
Image –Resize : 55%, all layers NOT checked
Press K – Pos X : 5 – Pos Y : 171 – Press M HELP
(K : activate the Pick Tool – M : deactivate the Pick Tool)
12
Activate and copy : 486_KaD_Snowman1
Edit – Paste as a new layer (Raster 4)
Image – Mirror
Selections – Load/Save Selection – Load Selection From Alpha Channel – Selectie 2 – see PS
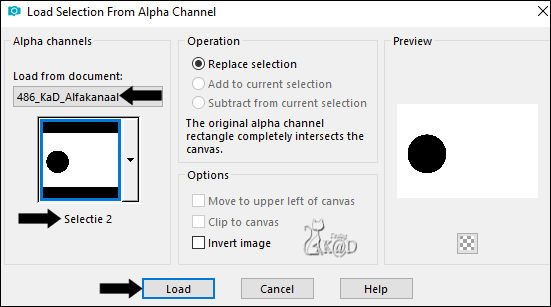
Move the tube into the frame
Press Delete on the keyboard
Select none
Layers – Arrange – Move Down
13
Activate top layer (Raster 3)
Layers – Merge down
Adjust – Sharpness – Sharpen
14
Activate and copy : 486_KaD_Element1
Edit – Paste as a new layer (Raster 3)
Adjust – Blur – Gaussian Blur : 25
Layers – Arrange – Move Down 3x
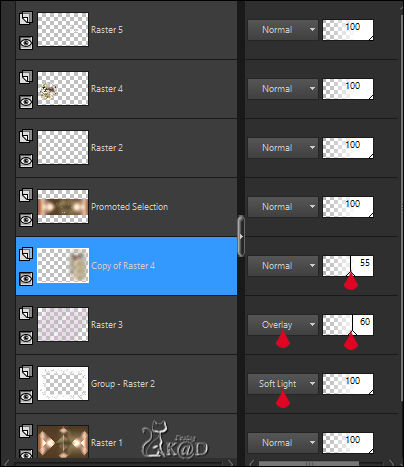
Change Blend mode to Overlay and Layer opacity to 60
15
Activate top layer (Raster 4)
Activate 486_KaD_WordArts and choose the layer “Kindness”
Edit – Copy and Past as a new layer (Raster 5)
Press K – Pos X : 522 – Pos Y : 204 – Press M
Effects – 3D-effects – Drop shadow : V&H 1 – 25 – 1 – Color #000000
16
Activate Raster 4 (frame)
Layers – Duplicate
Image – Mirror
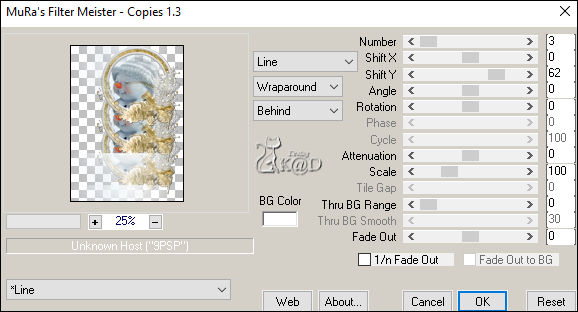
Objects – Align – Top *
Plugins – MuRa’s Meister – Copies – see PS
*TIP : If the filter does not work, manually place it up against the top
16-1
Adjust – Blur – Gaussian Blur : 25
Plugins – Carolaine & Sensibility – CS-LDots – see PS
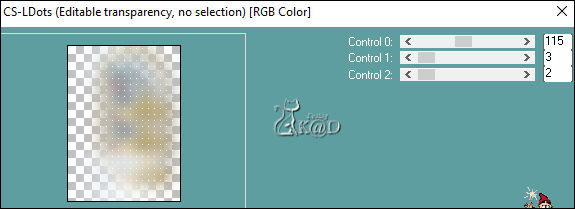
Layers – Arrange – Move Down 3x
Change Layer opacity to 55
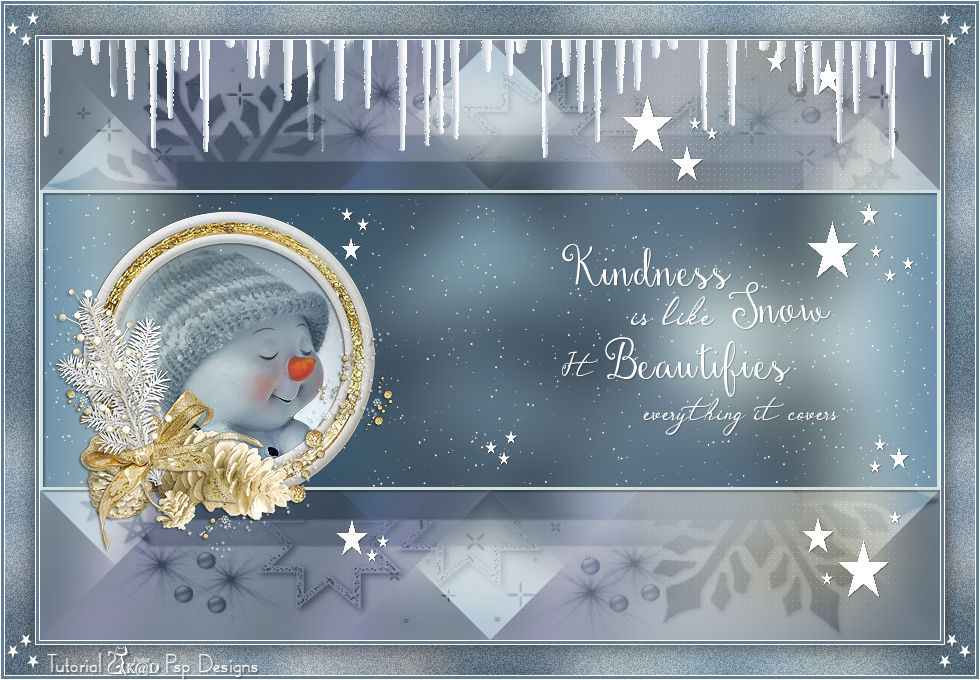
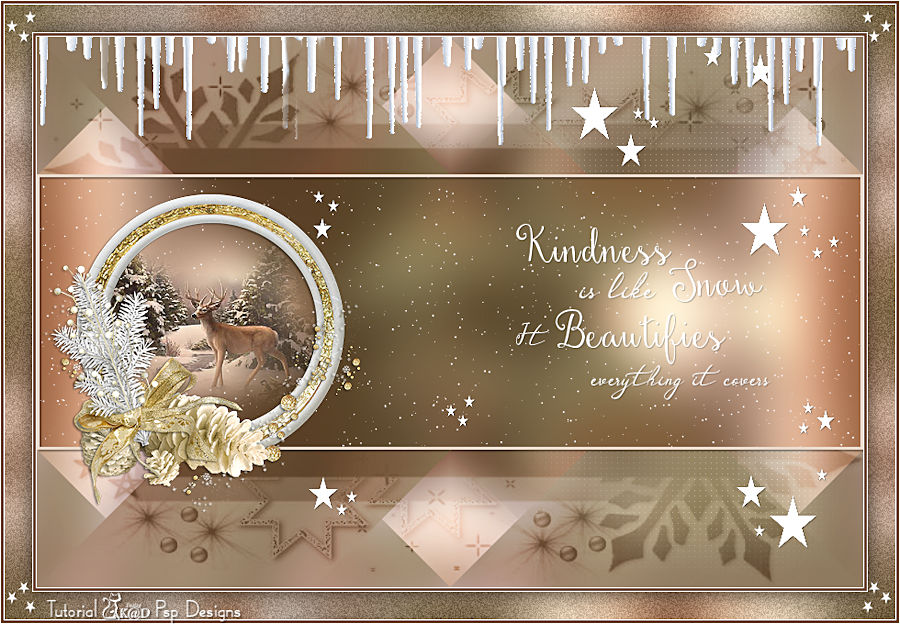
Result
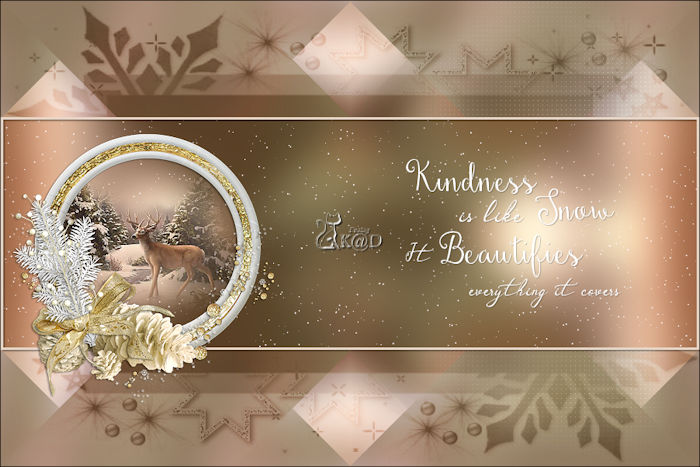
17
Layers – New Raster layer (Raster 6)
Layers – Arrange – Bring to top
Selections – Load/Save Selection – Load Selection From Alpha Channel – Selectie 3 – see PS
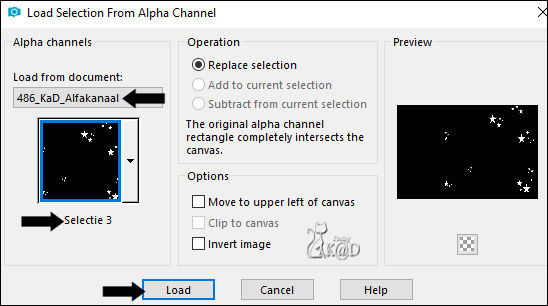
Fill selection with foreground color
Select none
Effects – Edge effects – Enhance
17-1
Effects – 3D-effects – Drop shadow : V&H 1 – 25 – 1 – Color #000000
18
Activate and copy : 486_KaD_Element2
Edit – Paste as a new layer (Raster 7)
Objects – Align – Top
19
Image – Add borders :
1 pix Color 5
3 pix Color 1
1 pix Color 5
Select all
20
Image – Add borders : 30 pix Color 1
Selection Invert
Plugins – Simple – Zoom out and Flip
Adjust – Blur – Gaussian Blur : 25
21
Adjust – Add/Remove Noise– Add Noise – see PS
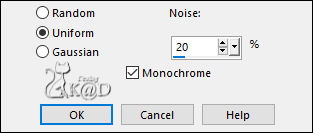
Selection Invert
Effects – 3D-effects – Drop shadow : V&H 0 – 60 – 30 – Color #000000
Select none
22
Image – Add borders :
1 pix Color 5
3 pix Color 1
1 pix Color 5
23
Activate and copy : 486_KaD_Element3
Edit – Paste as a new layer
Don’t move
24
Add your name or watermark,
Add my watermark to your creation HERE
25
Layers – Merge – Merge all (Flatten)
Image – Resize – Width 900 Pixels – Resize all Layers checked
Adjust – Sharpen – Unsharp Mask : 2 – 30 – 2 – no check marks
Save as JPG file and you're done!
I hope you enjoyed this tutorial
Karin
08/09/2020
Mail me your version 
Extra example – Tube Unknow

Click on banner below to go to the gallery


