1/ donnaK_accents
2/ _k@rine_ dreams _Misted _Christmas_2381_Decembre_2012
3/ 488_KaD_Snowflakes
4/ 488_KaD_Tekst
Pattern : place in your folder “Pattern”
1/ arguld4
Alpha Selections : open in PSP and minimize
(this image is not empty – it contains alpha selections)
1/ 488_KaD_Alfakanaal
Filter Preset : Double click to install
1/ 488_KaD_Extrude1
Jac’s Animation Shop
Color palette :
If you work with your own colors, make your own color palette with the alpha channel,
so you can easily switch between your colors.
There are color differences in the different versions of Psp.
Therefore, use the html codes of the color palette to be sure,
that you have the same colors. Also when merging layers, there may be color differences.

Plugins :
1/ Simple – Top Left Mirror
2/ Graphics Plus – Cross Shadow
3/ Alien Skin – Eye Candy 5 – Impact
(-) Import into Filters Unlimited
------------------------------------------------
THE TUTORIAL
When working with your own colors, play with the Blend Mode and/or Opacity at your own discretion
From now on I use the terms "MIRROR" and "FLIP" again.
Mirror: Mirror horizontal - Flip: Mirror vertical
Let’s get started.
Remember to save your work often
Some print screens have other colors than the original.
 People who are visually impaired, contact me and I will send you a word document.
Colors :
Foreground color : 1
Background color : 2
Gradient foreground : Linear – see PS
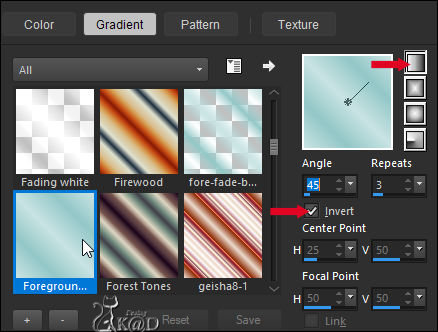
1
Open the alpha channel : 488_KaD_Alfakanaal
Window – Duplicate
Minimize the original – we continue on the copy
2
Fill with Gradient
Select all
Layers – New Raster layer
Activate and copy : _k@rine_ dreams _Misted _Christmas_2381_Decembre_2012
Edit – Paste into selection
Select none
3
Effects – Image effects – Seamless Tiling – Default but Transition on 100
Adjust – Blur – Gaussian blur : 30
Layers – Merge – Merge down
4
Edit – Past as a new layer (tube still in memory) (Raster 2)
Image – Resize : 70%, NO checkmark to all layers
Adjust – Sharpness – Sharpen
5
Change background color to pattern – see PS
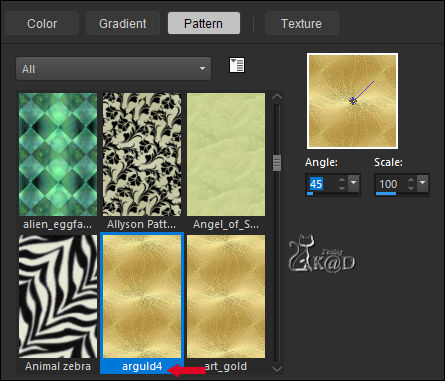
Layers – New Raster layer (Raster 3)
Select all
Selection – Modify – Contract : 2
Fill with pattern
Selection – Modify – Contract : 3
Press Delete on the keyboard
5-1
Selection – Modify – Contract : 7
Fill with pattern
Selection – Modify – Contract : 1
Press Delete on the keyboard
Select none
5-2
Layers – Duplicate
Layers – Merge – Merge down
Effects – 3D-effects – Drop shadow : V&H 2 – 35 – 2 – Color #000000
5-3
Window – Duplicate
Minimize till later
6
Activate and copy : donnaK_accents_2011-3001-6
Edit – Past as a new layer (Raster 4)
Image – Free rotate : Right – 90 – No checkmarks
Image – Resize : 12%, NO checkmark to all layers
Press K – Pos X : 15 – Pos Y : 16 – Press M HELP
(K : activate the Pick Tool – M : deactivate the Pick Tool)
Plugins – Simple – Top Left Mirror
6-1
Effects – 3D-effects – Drop shadow : V&H 2 – 35 – 2 – Color #000000
Adjust – Sharpness – Sharpen
7
Layers – New Raster layer (Raster 5)
Selections – Load/Save Selection – Load Selection From Alpha Channel – Selectie 2 – see PS
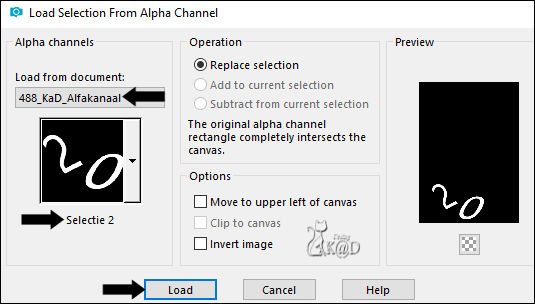
Fill with Gradient
Plugins – Graphics Plus – Cross Shadow – see PS
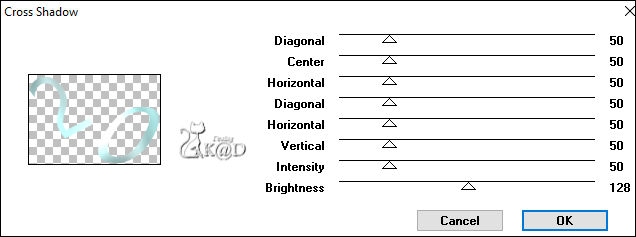
Select none
7-1
Plugins – Alien Skin – Eye Candy 5 – Impact – Extrude :
Use the preset on the left: 488_KaD_Extrude1 or enter the values manually – see PS
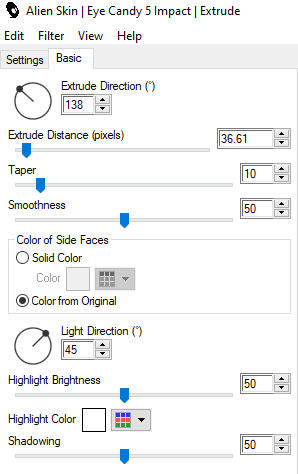
7-2
Effects – 3D-effects – Drop shadow : V 0 – H 2 – 35 – 2 – Color #000000
8
Layers – New Raster layer (Raster 6)
Selections – Load/Save Selection – Load Selection From Alpha Channel – Selectie 3 – see PS
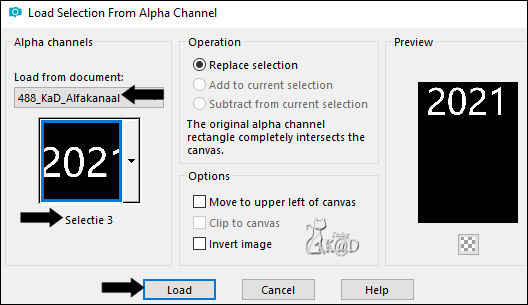
Fill with Gradient
Plugins – Graphics Plus – Cross Shadow – same values
Select none
8-1
Plugins – Alien Skin – Eye Candy 5 – Impact – Extrude – same values
8-2
Effects – 3D-effects – Drop shadow : V 0 – H 2 – 35 – 2 – Color #000000
Press K – Pos X : 61 – Pos Y : 15 – Press M
Result
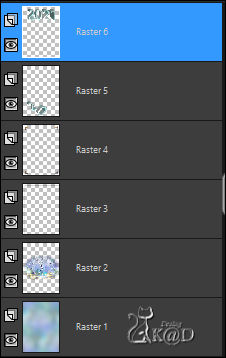
Save your work as "Front" as a PSP Animation Shop file
Minimize until later
9
Open the copy that we have set aside at point 5-3
Activate Raster 2
Right click in your layer palette – Delete
Activate Raster 3
Left click in your layer palette – Change the 3 to 2
Result
10
Activate: 488_KaD_Tekst
Choose the layer of the language you want to use
Edit – Copy
Edit – Paste as a New layer (Raster 3)
Press K – Pos X : 94 – Pos Y : 32 – Press M
11
Select all – Selection float – Selection Defloat
Layers – New Raster layer (Raster 4)
Fill with pattern
Select none
Effects – 3D-effects – Drop shadow : V&H 1 – 50 – 1 –Color #000000
Delete Raster 3
12
Change background color to Color 3
Activate your text tool with Font Script MT Bolt font (standard in PSP)
size 36 pixels and rest of the settings as follows – see PS

Enter your personal New Year wish and your name
Layers – Promote to Raster layer (Raster 3)
Effects – 3D-effects – Drop shadow : V&H 1 – 50 – 1 –Color #000000
13
Activate and copy : 488_KaD_Snowflakes
Edit – Paste as a New layer (Raster 5) – do not move
14
Add your name or watermark,
Add my watermark to your creation HERE
14-1
Save your work as “Backside” as a PSP Animation Shop file
15
Window – Duplicate
Minimize “Backside”
We work on the copy
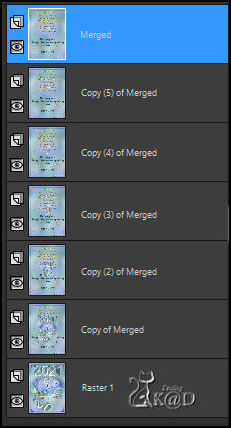
Layers – Merge – Merge visible (Merged)
Duplicate 5x
Activate bottom layer (Merged)
Close the rest of the layers by clicking on the eye
16
Activate "Front"
Edit – Copy merged
Back to your work
Edit – Paste as a New layer (Raster 1)
17
Layers – Duplicate (Copy of Raster 1)
Layers – Arrange – Move up
Image –Resize : 55%, NO checkmark to all layers
Layers – Duplicate (Copy (2) of Raster 1)
17-1
Activate the layer just below (Copy of Raster 1)
Open (click on the eye) the layer just below (Copy of Merged)
but stay on the layer Copy of Raster 1 – see PS
Attention : all layers are not on the PS
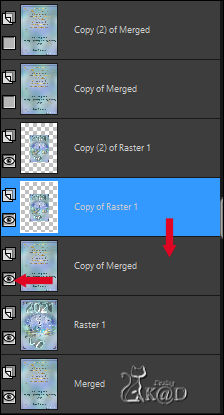
Layers – Merge – Merge down
17-2
Activate Copy (2) of Raster 1
Layers – Arrange – Move up
Image –Resize : 55%, NO checkmark to all layers
Layers – Duplicate (Copy (3) of Raster 1)
17-3
Activate the layer just below (Copy (2) of Raster 1)
Open (click on the eye) the layer just below (Copy (2) of Merged)
but stay on the layer Copy (2) of Raster 1
Layers – Merge – Merge down
17-4
Activate Copy (3) of Raster 1
Layers – Arrange – Move up
Image –Resize : 55%, NO checkmark to all layers
Layers – Duplicate (Copy (4) of Raster 1)
17-5
Activate the layer just below (Copy (3) of Raster 1)
Open (click on the eye) the layer just below (Copy (3) of Merged)
but stay on the layer Copy (3) of Raster 1
Layers – Merge – Merge down
17-6
Activate Copy (4) of Raster 1
Layers – Arrange – Move up
Image –Resize : 55%, NO checkmark to all layers
Layers – Duplicate (Copy (5) of Raster 1)
17-7
Activate the layer just below (Copy (4) of Raster 1)
Open (click on the eye) the layer just below (Copy (4) of Merged)
but stay on the layer Copy (4) of Raster 1
Layers – Merge – Merge down
17-8
Activate Copy (5) from Raster 1
Layers – Arrange – Move up
Image –Resize : 55%, NO checkmark to all layers
17-9
Open (click on the eye) the layer just below (Copy (5) of Merged)
but stay on the layer Copy (5) of Raster 1
Layers – Merge – Merge down
Tip :
Copy of Raster 1 merge with Copy of Merged
Copy (2) of Raster 1 merge with Copy (2) of Merged
Copy (3) of Raster 1 merge with Copy (3) of Merged
Copy (4) of Raster 1 merge with Copy (4) of Merged
Copy (5) of Raster 1 merge with Copy (5) of Merged
17-10
Activate bottom layer (Merge)
Layers – Arrange – Bring to top
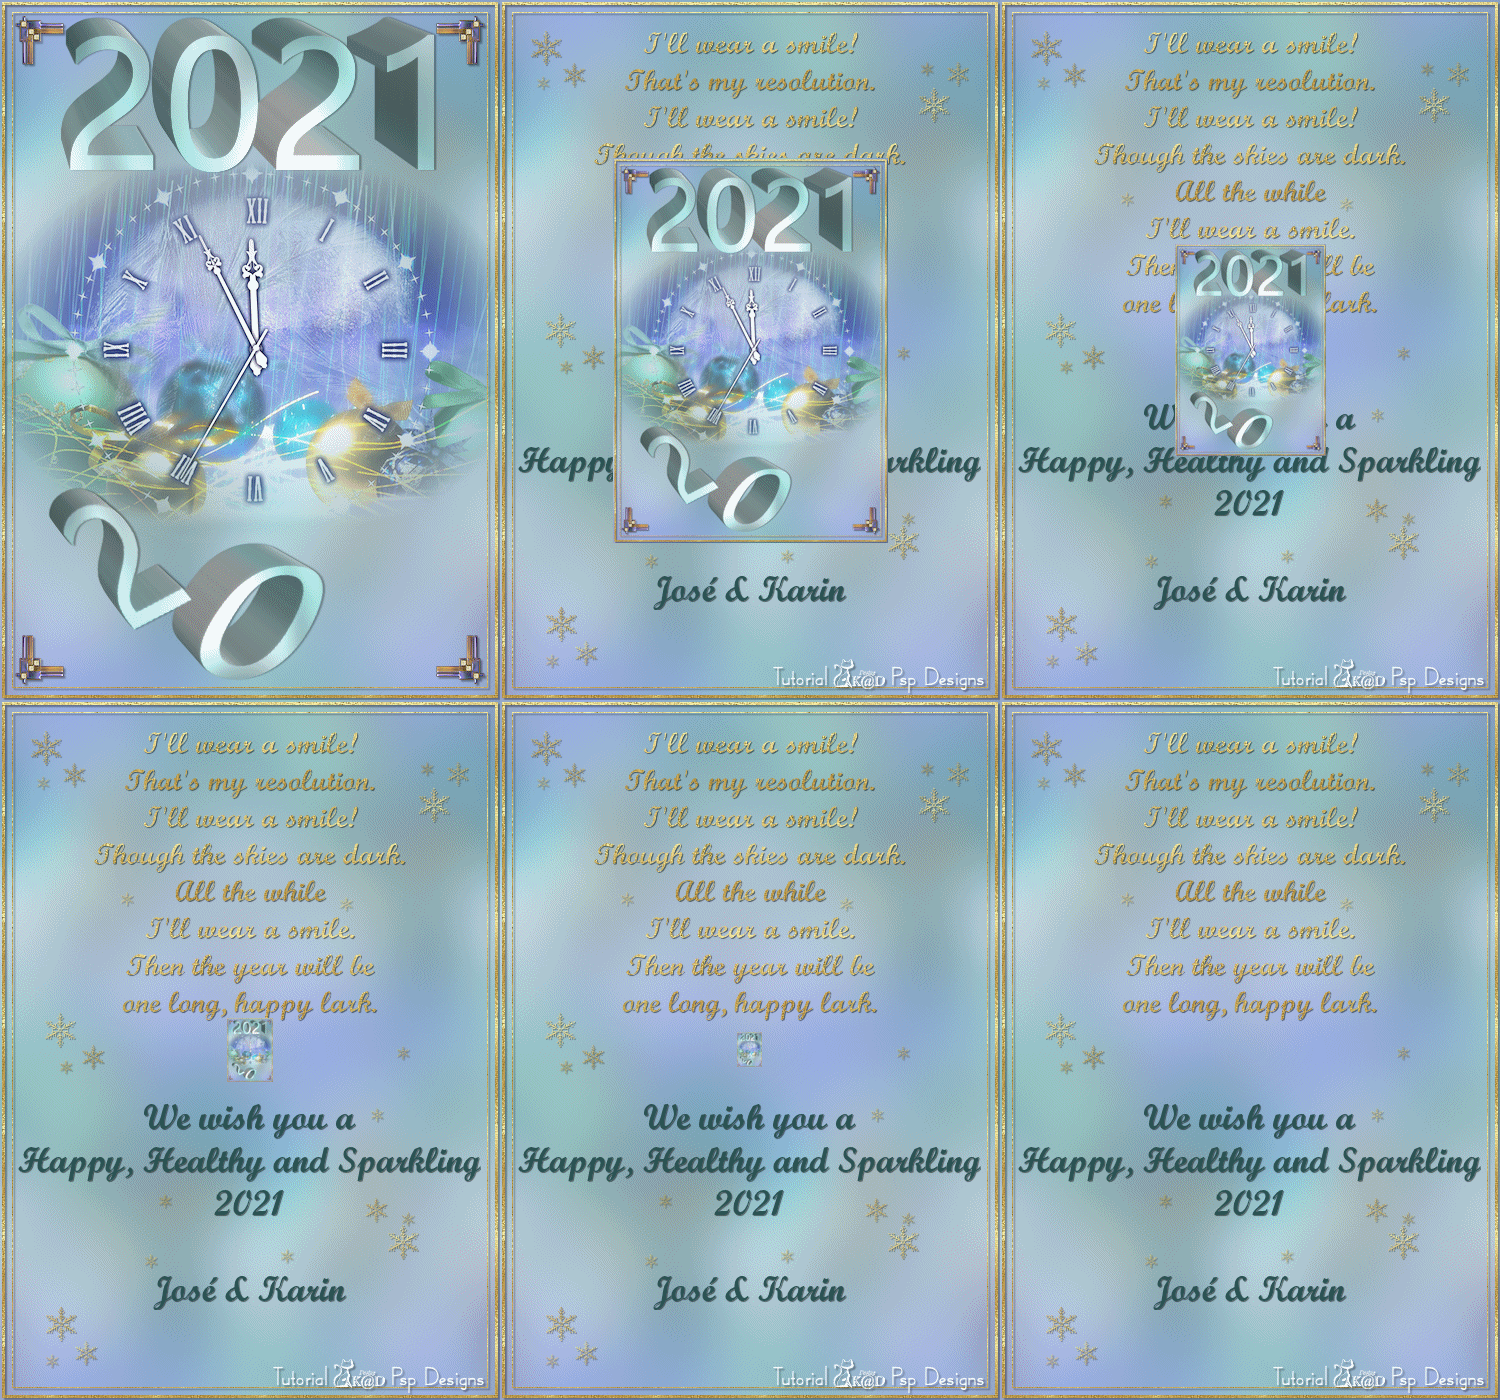
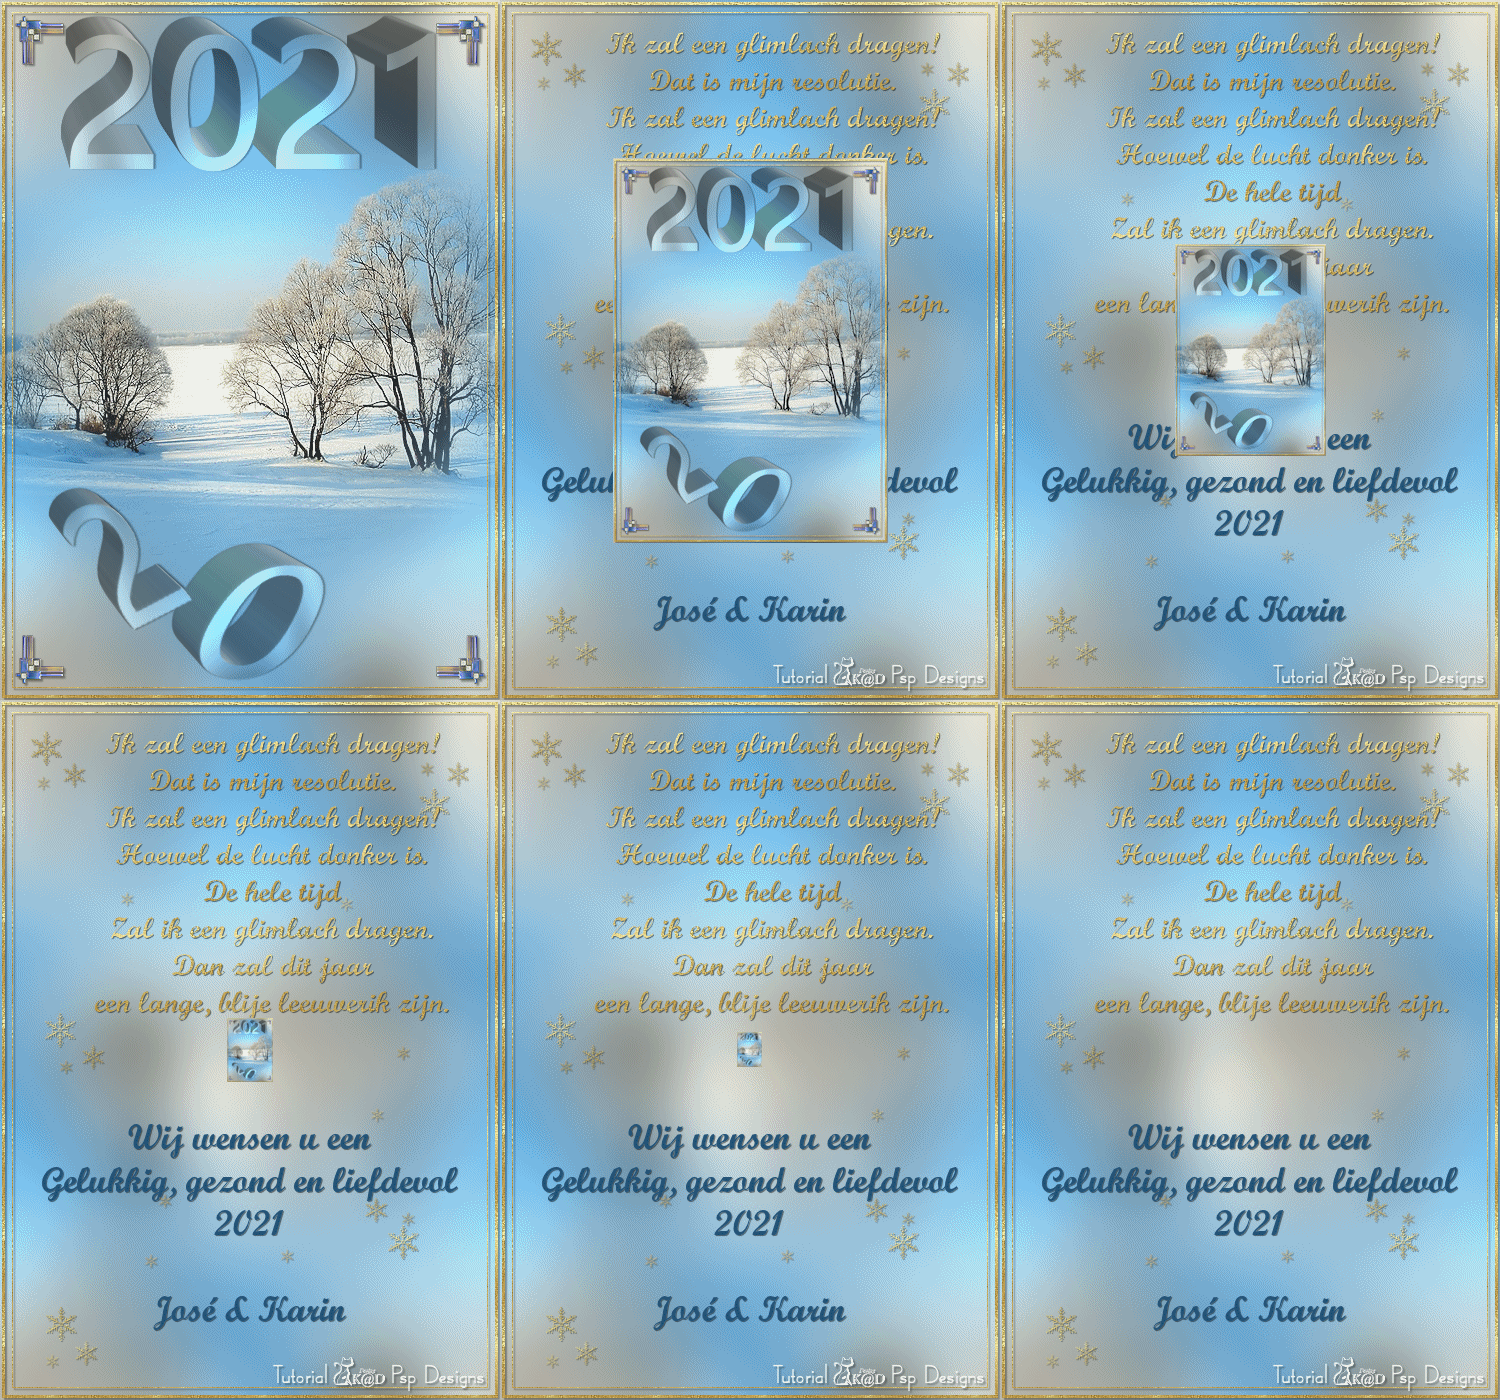
Result

Save your work as "Card" as a PSP Animation Shop file
18
Open Jac’s Animation Shop
File – open – Look for “Card”
Animation – Frame Properties – Display – see PS
Frame 1 = 150
Frame 2 + 3 + 4 + 5 + 6 = 30
Frame 7 = 500

18-1
Click on the filmstrip to view your animation

You can always play with the display time of the frames to your liking.
Are you satisfied ? Then save your work as a Gif file
19
Your card is done
I hope you enjoyed this tutorial
Karin
01/10/2020
Mail me your version 
Extra example – Tube SvB

Click on banner below to go to the gallery


