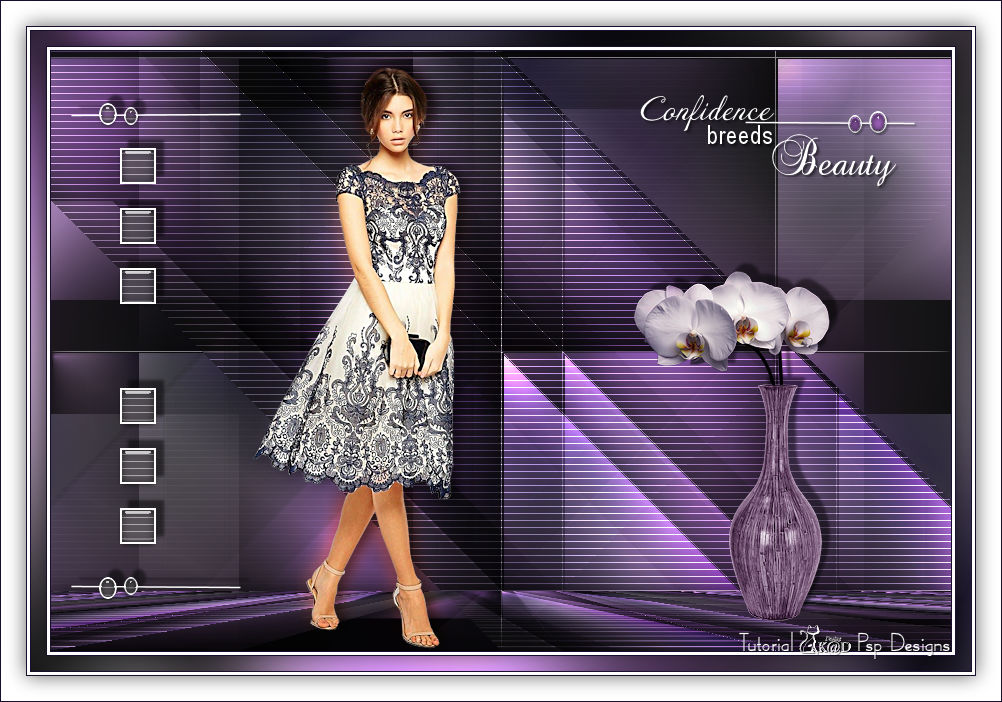
1/ KaD_Woman_216
2/ vase_9_bycrealineavril2012
3/ 489_KaD_Element1 + 489_KaD_Element2
Alpha Selections : open in PSP and minimize
(this image is not empty – it contains alpha selections)
1/ 489_KaD_Alfakanaal
Filter Preset : double click to install
1/ 489_KaD_Glass
Color palette :
If you work with your own colors, make your own color palette with the alpha channel,
so you can easily switch between your colors.
There are color differences in the different versions of Psp.
Therefore, use the html codes of the color palette to be sure,
that you have the same colors. Also when merging layers, there may be color differences.

Plugins :
1/ Mehdi – Wavy Lab 1.1
2/ Unlimited 2.0 – VM Toolbox – Zoom Blur (-)
3/ °V° Kiwi’s Oelfilter – Videowand
4/ Mock – Windo
5/ Carolaine & Sensibility – cs_texture
6/ Alien Skin – Eye Candy 5 – Impact
7/ MuRa’s Meister – Perspective Tiling
8/ Tramages – Pool Shadow
(-) Import into Filters Unlimited
------------------------------------------------
THE TUTORIAL
When working with your own colors, play with the Blend Mode and/or Opacity at your own discretion
From now on I use the terms "MIRROR" and "FLIP" again.
Mirror: Mirror horizontal - Flip: Mirror vertical
Let’s get started.
Remember to save your work often
Some print screens have other colors than the original.
 People who are visually impaired, contact me and I will send you a word document.
Colors :
Foreground color : 1
Background color : 2
1
Open : 489_KaD_Alfakanaal
Window – Duplicate
Minimize the original – we work on the copy
2
Plugins – Mehdi – Wavy Lab 1.1 – see PS
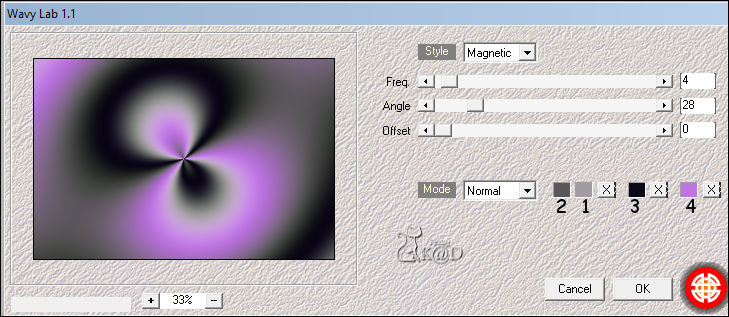
Adjust – Blur – Gaussian Blur : 40
3
Plugins – Unlimited 2.0 – VM Toolbox – Zoom Blur – see PS
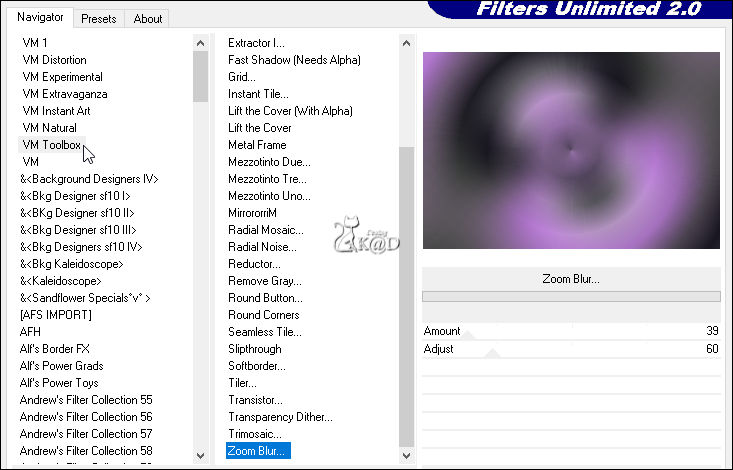
4
Layers – Duplicate (Copy of Raster 1)
Plugins – °V° Kiwi’s Oelfilter – Videowand – see PS
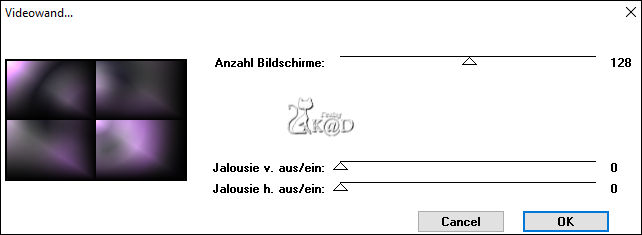
5
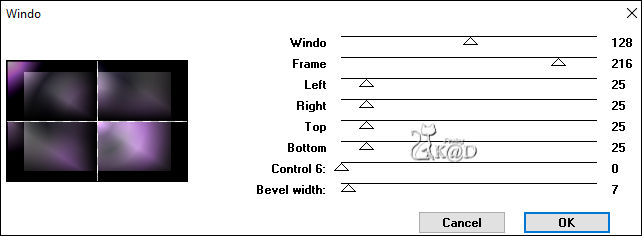
Plugins – Mock – Windo – see PS
(You can ignore the bottom two values)
Selections – Load/Save Selection – Load Selection From Alpha Channel – Selectie 1 – see PS
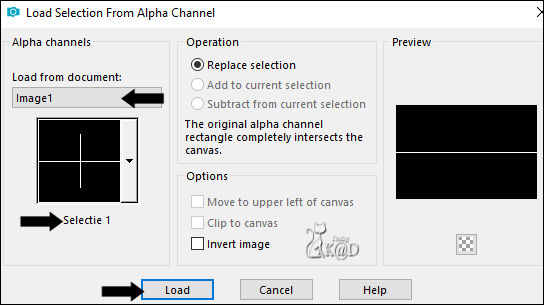
Zoom out your work and fill the selection with foreground color
Select none
5-1
Effects – Image effects – Seamless Tiling – see PS
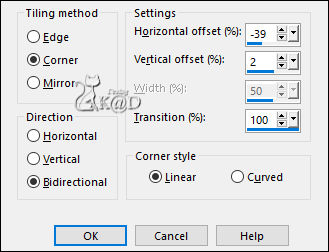
Change Blend mode to Hard Light and Layer opacity to 75
6
Layers – Duplicate (Copy (2) of Raster 1)
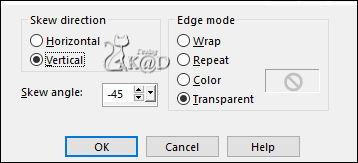
Effects – Geometric Effects –Skew – see PS
6-1
Plugins – Carolaine & Sensibility – cs_texture – see PS
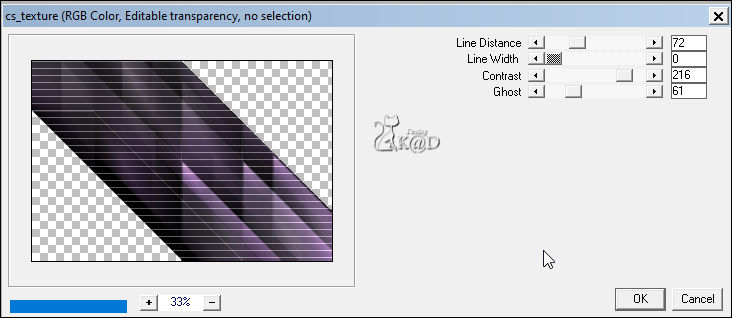
Keep Blend mode to Hard Light and Layer opacity to 75
6-2
Layers – Duplicate (Copy (3) of Raster 1)
Change Blend mode to Dodge and Layer opacity to 42
6-3
Layers – Duplicate (Copy (4) of Raster 1)
Image – Mirror
Change Blend mode to Dodge and Layer opacity to 30
6-4
Close Raster 1 by clicking on the eye but stay on this layer – see PS
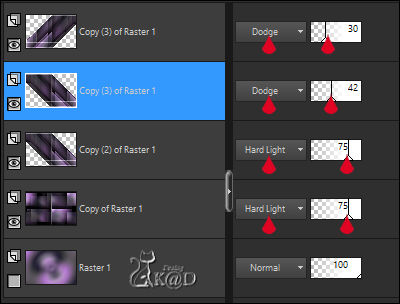
Layers – Merge – Merge Visible (Merged)
Open Raster 1
7
Activate and copy : 489_KaD_Element1
Edit – Paste as a new layer (Raster 2)
Press K – Pos X : 20 – Pos Y : 52 – Press M HELP
(K : activate the Pick Tool – M : deactivate the Pick Tool)
8
Activate Raster 1
Selections – Load/Save Selection – Load Selection From Alpha Channel – Selectie 2 – see PS
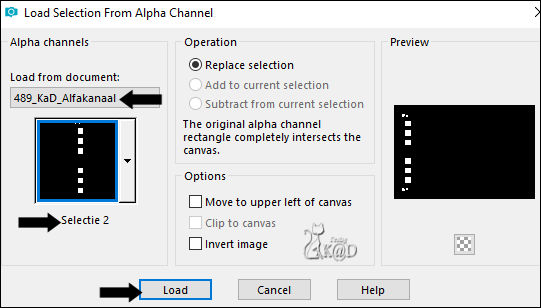
Selections– Promote selection to layer (Promoted selection)
Layers – Arrange – Move up
Plugins – Carolaine & Sensibility – cs_texture – same values
8-1
Plugins – Alien Skin – Eye Candy 5 – Impact – Glass :
Choose the preset on the left: 489_KaD_Glass
At Basic you can change the Glass color to your color 3
Select none
8-2
Activate top layer (Raster 2)
Layers – Merge – Merge down (Promoted selection)
Effects – 3D-effects – Drop Shadow : V -8 – H 8 – 50 – 4 – Color #000000
9
Activate de layer ‘Merged’
Layers – Duplicate
Plugins – MuRa’s Meister – Perspective Tiling – Default, but Height to 10
9-1
Effects – 3D-effects – Drop Shadow : V&H 0 – 60 – 30 – Color #000000
10
Activate and copy : vase_9_bycrealineavril2012
Edit – Paste as a new layer (Raster 2)
Layers – Arrange – Bring to top
Image –Resize : 60%, all layers NOT checked.
Image – Mirror
Press K – Pos X : 583 – Pos Y : 220 – Press M
Effects – 3D-effects – Drop Shadow : V -8 – H 8 – 50 – 4 – Color #000000
Adjust – Sharpness – Sharpen
11
Activate and copy : 489_KaD_Element2
Edit – Paste as a new layer (Raster 3)
Press K – Pos X : 589 – Pos Y : 44 – Press M
11-1
Change background color to color 4
Click with magic wand in both ovals
Fill selection with background color
Plugins – Alien Skin – Eye Candy 5 – Impact – Glass : see #8-1
Select none
11-2
Effects – 3D-effects – Drop Shadow : V&H 2 – 35 – 2 – Color #000000
12
Activate and copy : KaD_Woman_216
Edit – Paste as a new layer (Raster 4)
Image –Resize: 53%, all layers NOT checked.
Press K – Pos X : 202 – Pos Y : 15 – Press M
13
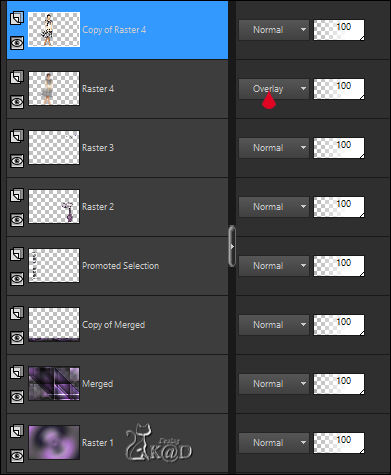
Layers – Duplicate (Copy of Raster 4)
Activate the layer just below (Raster 4)
Adjust – Blur – Gaussian Blur : 10
Change Blend mode to Overlay
14
Activate top layer
Effects – 3D-effects – Drop Shadow: V 0– H 7 – 50 – 15 – Color #000000
Adjust – Sharpness – Unsharp Mask : 2 – 30 – 2 – no check marks
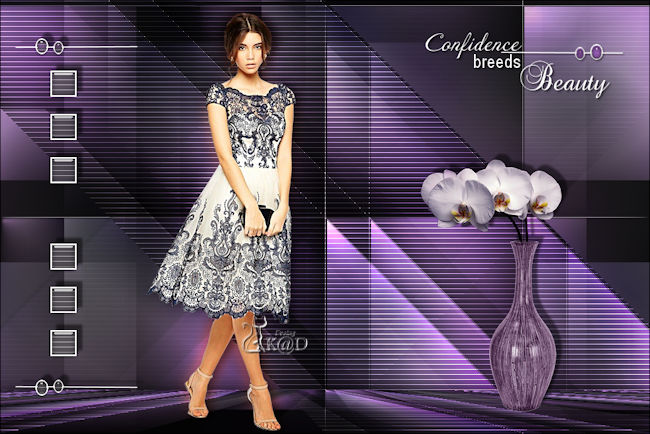
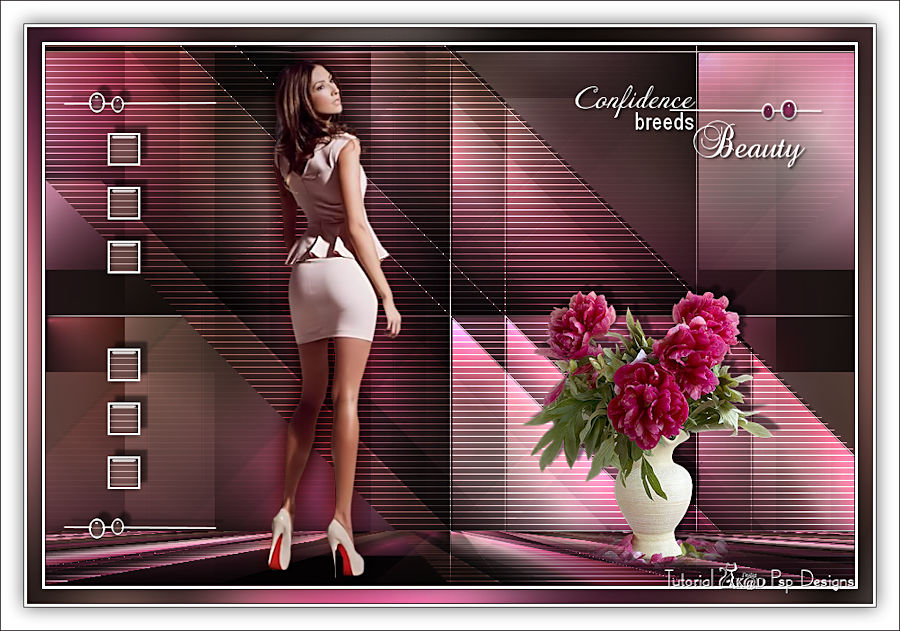
Result
15
Activate Raster 1
Edit – Copy
Image – Add borders :
1 pix color 3
3 pix color 5
1 pix color 1
16
Select all
Image – Add borders : 15 pix color 5
Selection Invert
Edit – Paste into selection
Plugins – Tramages – Pool Shadow – Default
16-1
Selection Invert
Effects – 3D-effects – Drop Shadow : V&H 0 – 60 – 30 – Color #000000
Select none
17
Image – Add borders :
1 pix color 3
3 pix color 5
1 pix color 1
18
Select all
Image – Add borders : 25 pix color 5
Effects – 3D-effects – Drop Shadow : V&H 0 – 60 – 30 – Color #000000
Select none
19
Add your name or watermark,
Add my watermark to your creation HERE
Image – Add borders : 1 pix color 3
20
Image –Resize : 900 pix
Adjust – Sharpness – Unsharp Mask : 2 – 30 – 2 – no check marks
Save as JPG file and you're done!
I hope you enjoyed this tutorial
Karin
27/10/2020
Mail me your version 
Extra example – Tubes Roby2765 & MR

Click on banner below to go to the gallery


