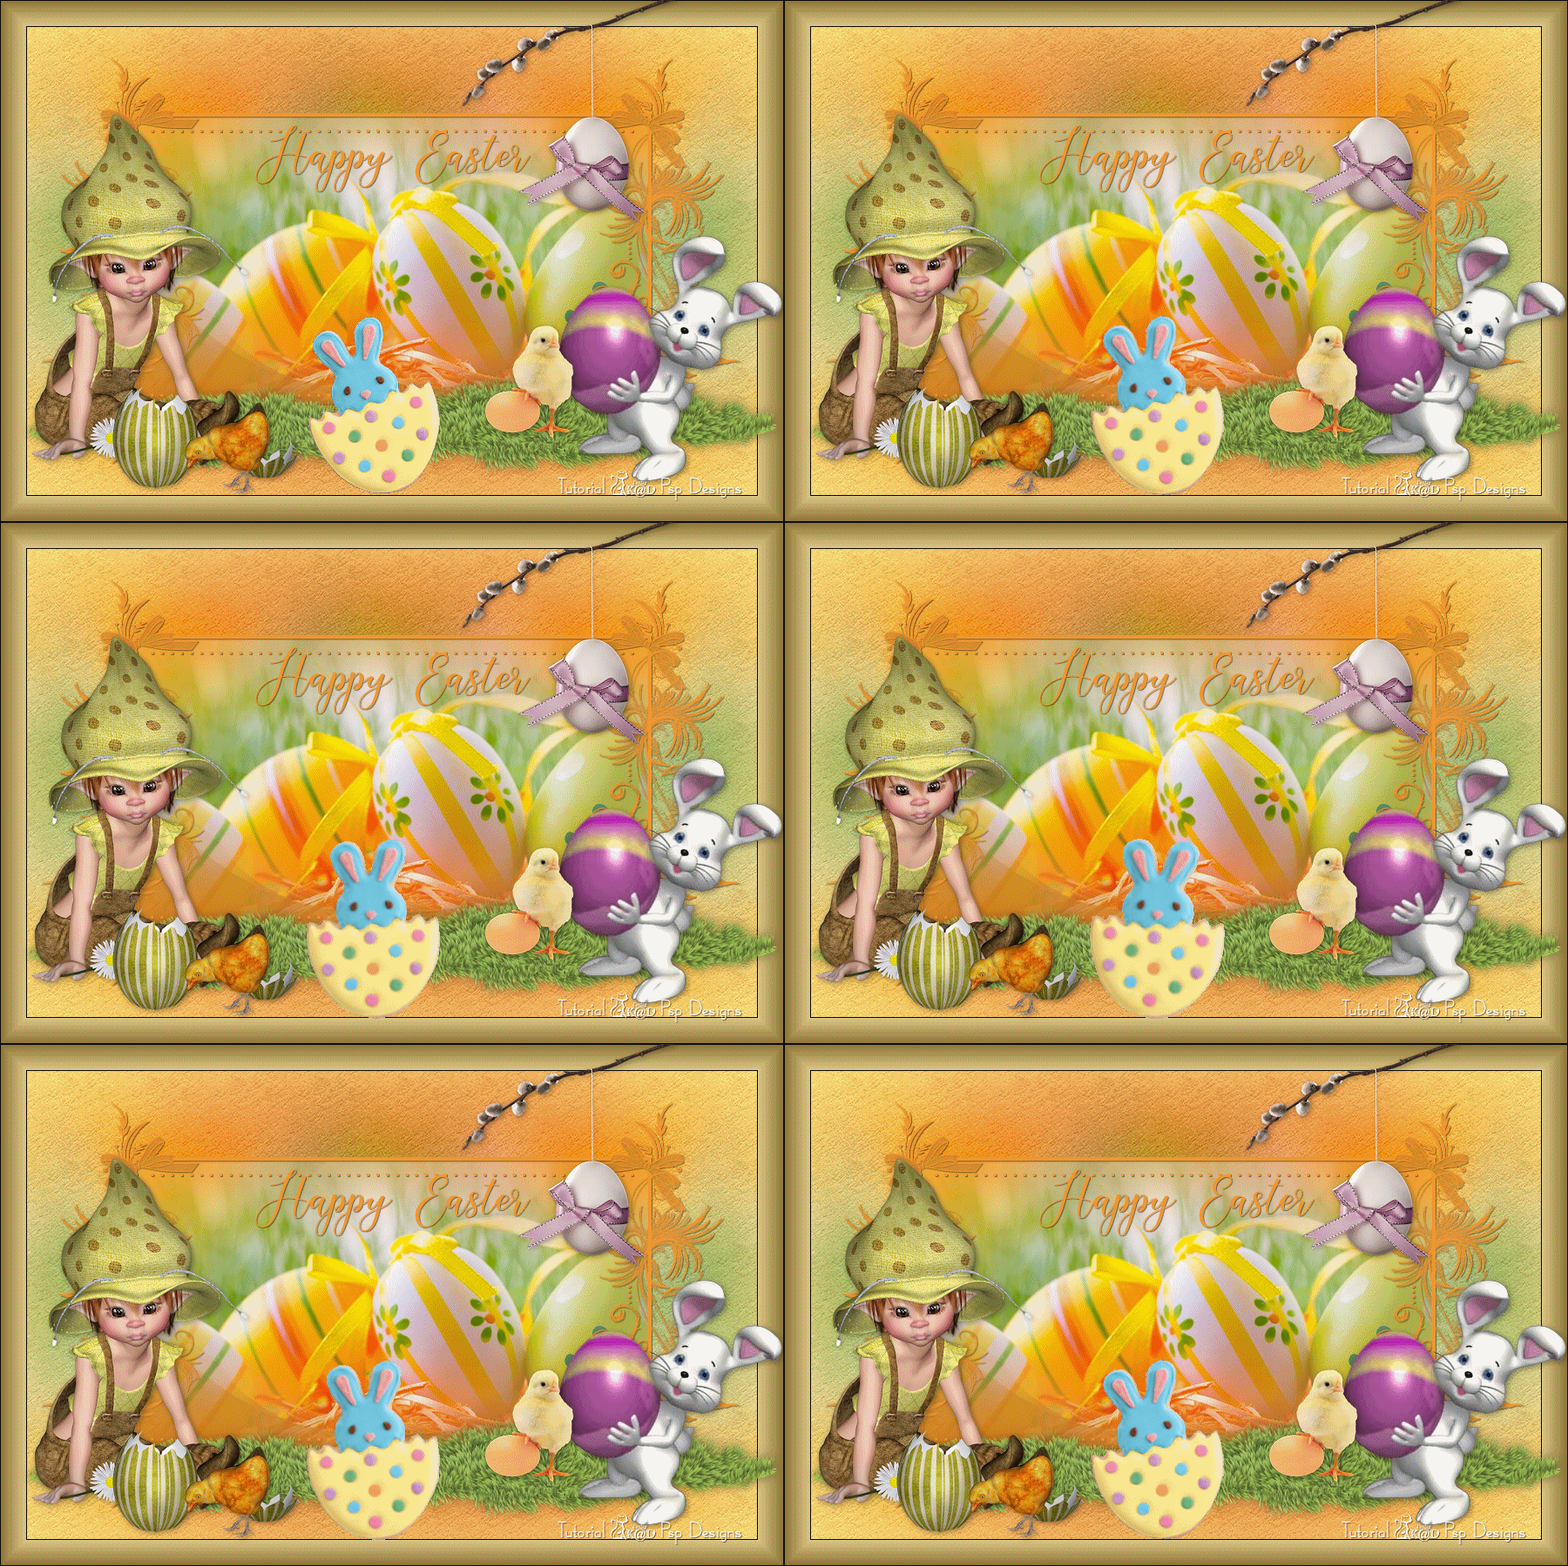
1/ _k@rine_ Dreams_Misted_Easter_2923_Avril_2014
2/ Alies 816-Paaseitje met strik-20032012
3/ KBD_Pasen_kuikentje_1
4/ tubtatie_2427086
5/ Yoka-Mini-Easterbunny-31032013
6/ 16 (*)
Alpha Selections : open in PSP and minimize
(this image is not empty – it contains alpha selections)
1/ 491_KaD_Alfakanaal
Masks : open in PSP and minimize
1/ 491_KaD_Mask_HappyEaster
Animation :
1/ 491_KaD_MovingBunny
Filter preset : double click to install
1/ 491_KaD_Textures
For the animation : Jac’s Animation Shop (AS)
Color palette :
If you work with your own colors, make your own color palette with the alpha channel,
so you can easily switch between your colors.
There are color differences in the different versions of Psp.
Therefore, use the html codes of the color palette to be sure,
that you have the same colors. Also when merging layers, there may be color differences.

Plugins :
1/ Alien Skin – Eye Candy 5 – Textures
2/ Unlimited 2.0 – Paper Textures (-)
3/ AAA Frames – AAA Frame Works
(-) Import into Filters Unlimited
------------------------------------------------
THE TUTORIAL
When working with your own colors, play with the Blend Mode and/or Opacity at your own discretion
From now on I use the terms "MIRROR" and "FLIP" again.
Mirror: Mirror horizontal - Flip: Mirror vertical
Let’s get started.
Remember to save your work often
Some print screens have other colors than the original.
 People who are visually impaired, contact me and I will send you a word document.
Colors :
Foreground color : Color 1
Background color : Color 2
1
Open the alpha channel :
Window – Duplicate
Minimize the original – we continue on the copy
2
Fill with foreground color
Activate and copy : _k@rine_ Dreams_Misted_Easter_2923_Avril_2014
Edit – Paste as a new layer
Press K – Pos X : -124 – Pos Y : 104 – Press M HELP
Layers – Duplicate
Image – Mirror
Layers – Merge – Merge down
2-1
Layers – Duplicate
Image – Flip
Layers – Merge – Merge visible (Merged)
2-2
Adjust – Blur – Gaussian blur : 30
3
Layers – New Raster layer
Fill with background color
Layers – New Mask layer – From image “491_KaD_Mask_HappyEaster” – see PS
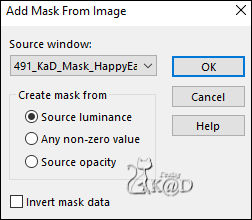
Layers – Merge – Merge Group (Group Raster 1)
Effects – 3D-effects – Drop shadow : V&H 1 – 50 – 1 – Color #000000
4
Activate bottom layer (Merged)
Selections – Load/Save Selection – Load Selection From Alpha Channel – Selectie 1 – see PS
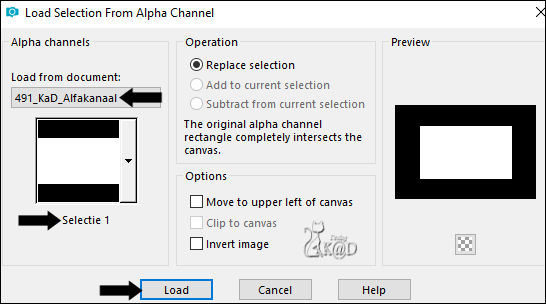
Selections – Promote selection to layer
Activate and copy : _k@rine_ Dreams_Misted_Easter_2923_Avril_2014
Edit – Paste as a new layer
4-1
Selection – Invert
Press Delete on the keyboard
Select none
Adjust – Sharpness – Sharpen
Layers – Merge – Merge Down (Promoted Selection)
5
Activate top layer (Group - Raster 1)
Change background color to color 3
5-1
Layers – New Raster layer (Raster 1)
Selections – Load/Save Selection – Load Selection From Alpha Channel – Selectie 2 – see PS
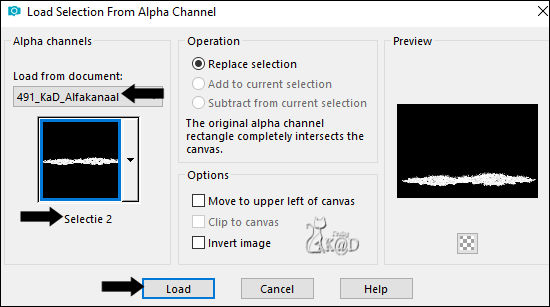
Fill with background color
Plugins – Alien Skin – Eye Candy 5 – Textures – Animal Fur :
On the left, choose the preset “481_KaD_Textures” or fill in manually – see PS
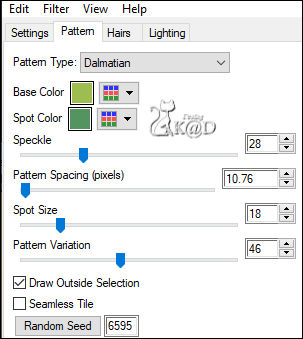
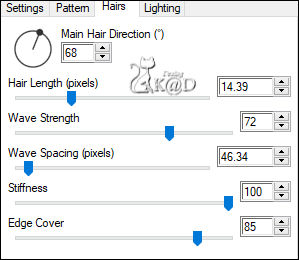
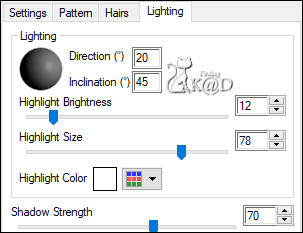
Select none
Effects – 3D-effects – Drop shadow : V&H 0 – 40 – 20 – Color #000000
Press K – Pos X : 20 – Pos Y : 420 – Press M
6
Activate and copy : KBD_Pasen_kuikentje_1
Edit – Paste as a new layer
Image – Resize : 40%, no checkmarks
Press K – Pos X : 551 – Pos Y : 369 – Press M
Effects – 3D-effects – Drop shadow : V&H 2 – 35 – 10 – Color #000000
Adjust – Sharpness – Sharpen
7
Activate and copy : Yoka-Mini-Easterbunny-31032013
Edit – Paste as a new layer
Layers – Arrange – Move down
Press K – Pos X : 641 – Pos Y : 270 – Press M
Effects – 3D-effects – Drop shadow : V&H 2 – 35 – 10 – Color #000000
8
Activate and copy : tubtatie_2427086
Edit – Paste as a new layer
Image – Resize : 45%, no checkmarks
Press K – Pos X : 37 – Pos Y : 131 – Press M
Effects – 3D-effects – Drop shadow : V&H 2 – 35 – 10 – Color #000000
9
Activate and copy : Alies 816-Paaseitje met strik-20032012
Edit – Paste as a new layer
Image – Resize : 50%, no checkmarks
Press K – Pos X : 529 – Pos Y : -5 – Press M
Effects – 3D-effects – Drop shadow : V&H 2 – 35 – 10 – Color #000000
Adjust – Sharpness – Sharpen
10
Activate Raster 1
Plugins – Unlimited 2.0 – Paper Textures – see PS
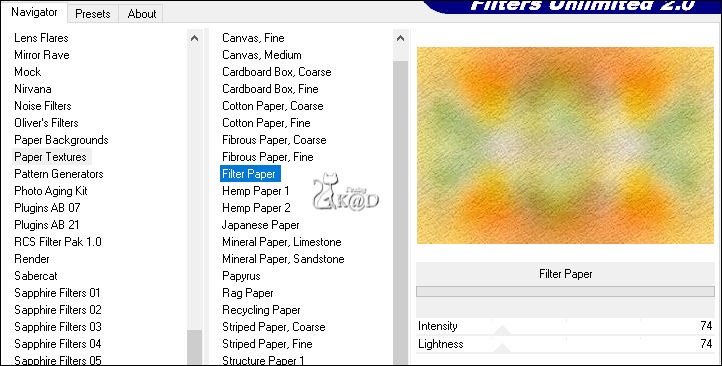
10-1
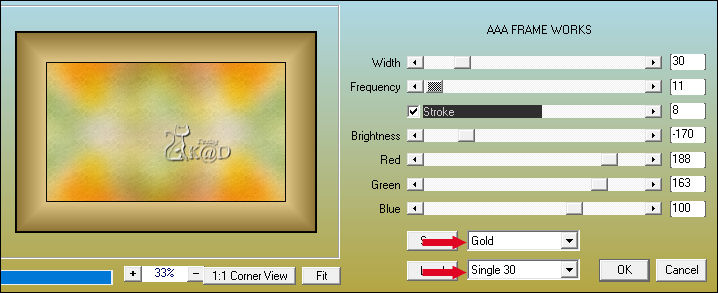
Plugins – AAA Frames – AAA Frame Works – see PS
11
Add your name or watermark,
Add my watermark to your creation HERE
Layers – Merge – Merge visible
Save your work as “Crea” as PSP Animation Shop (*.psp)
Now, we make the animation
Open Jac’s Animation Shop (AS)
12
Open “Crea” in AS
Duplicate your frames until you have 13 frames in total - see PS

Ctrl A to select all
12-1
Open : “491_KaD_MovingBunny” in AS
Ctrl A to select all
12-2
Click on the button at the top at the red arrow. (propagate)
Make sure that Frame 1 of your “Crea” is clearly visible and that both your images have everything selected - see PS
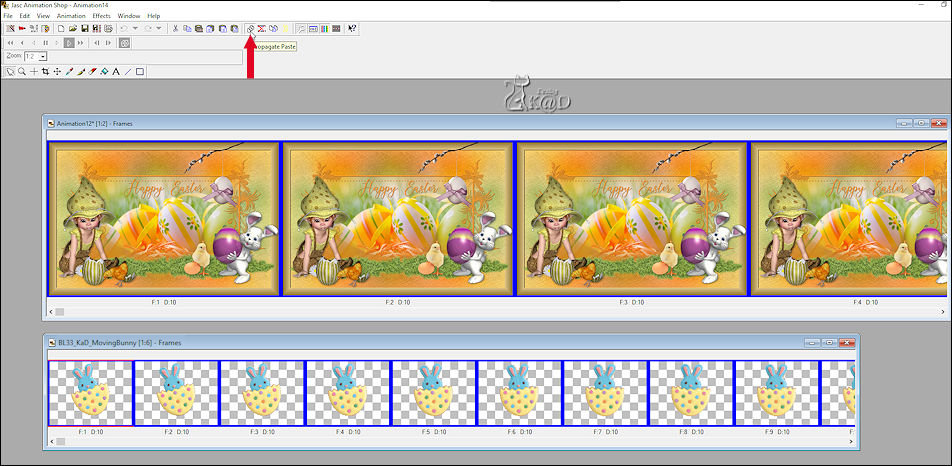
Edit – copy
12-3
Activate“Crea”
Edit – Paste into selected Frame
Put your animation in your Frame 1 in the right place - see PS
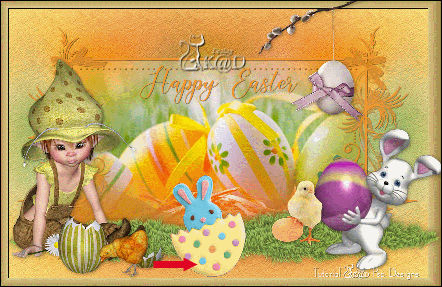
Click on the filmstrip to view your animation.
If everything is correct - save the image as a .gif file
Your done
I hope you enjoyed this tutorial
Karin
17/11/2020
Mail me your version 
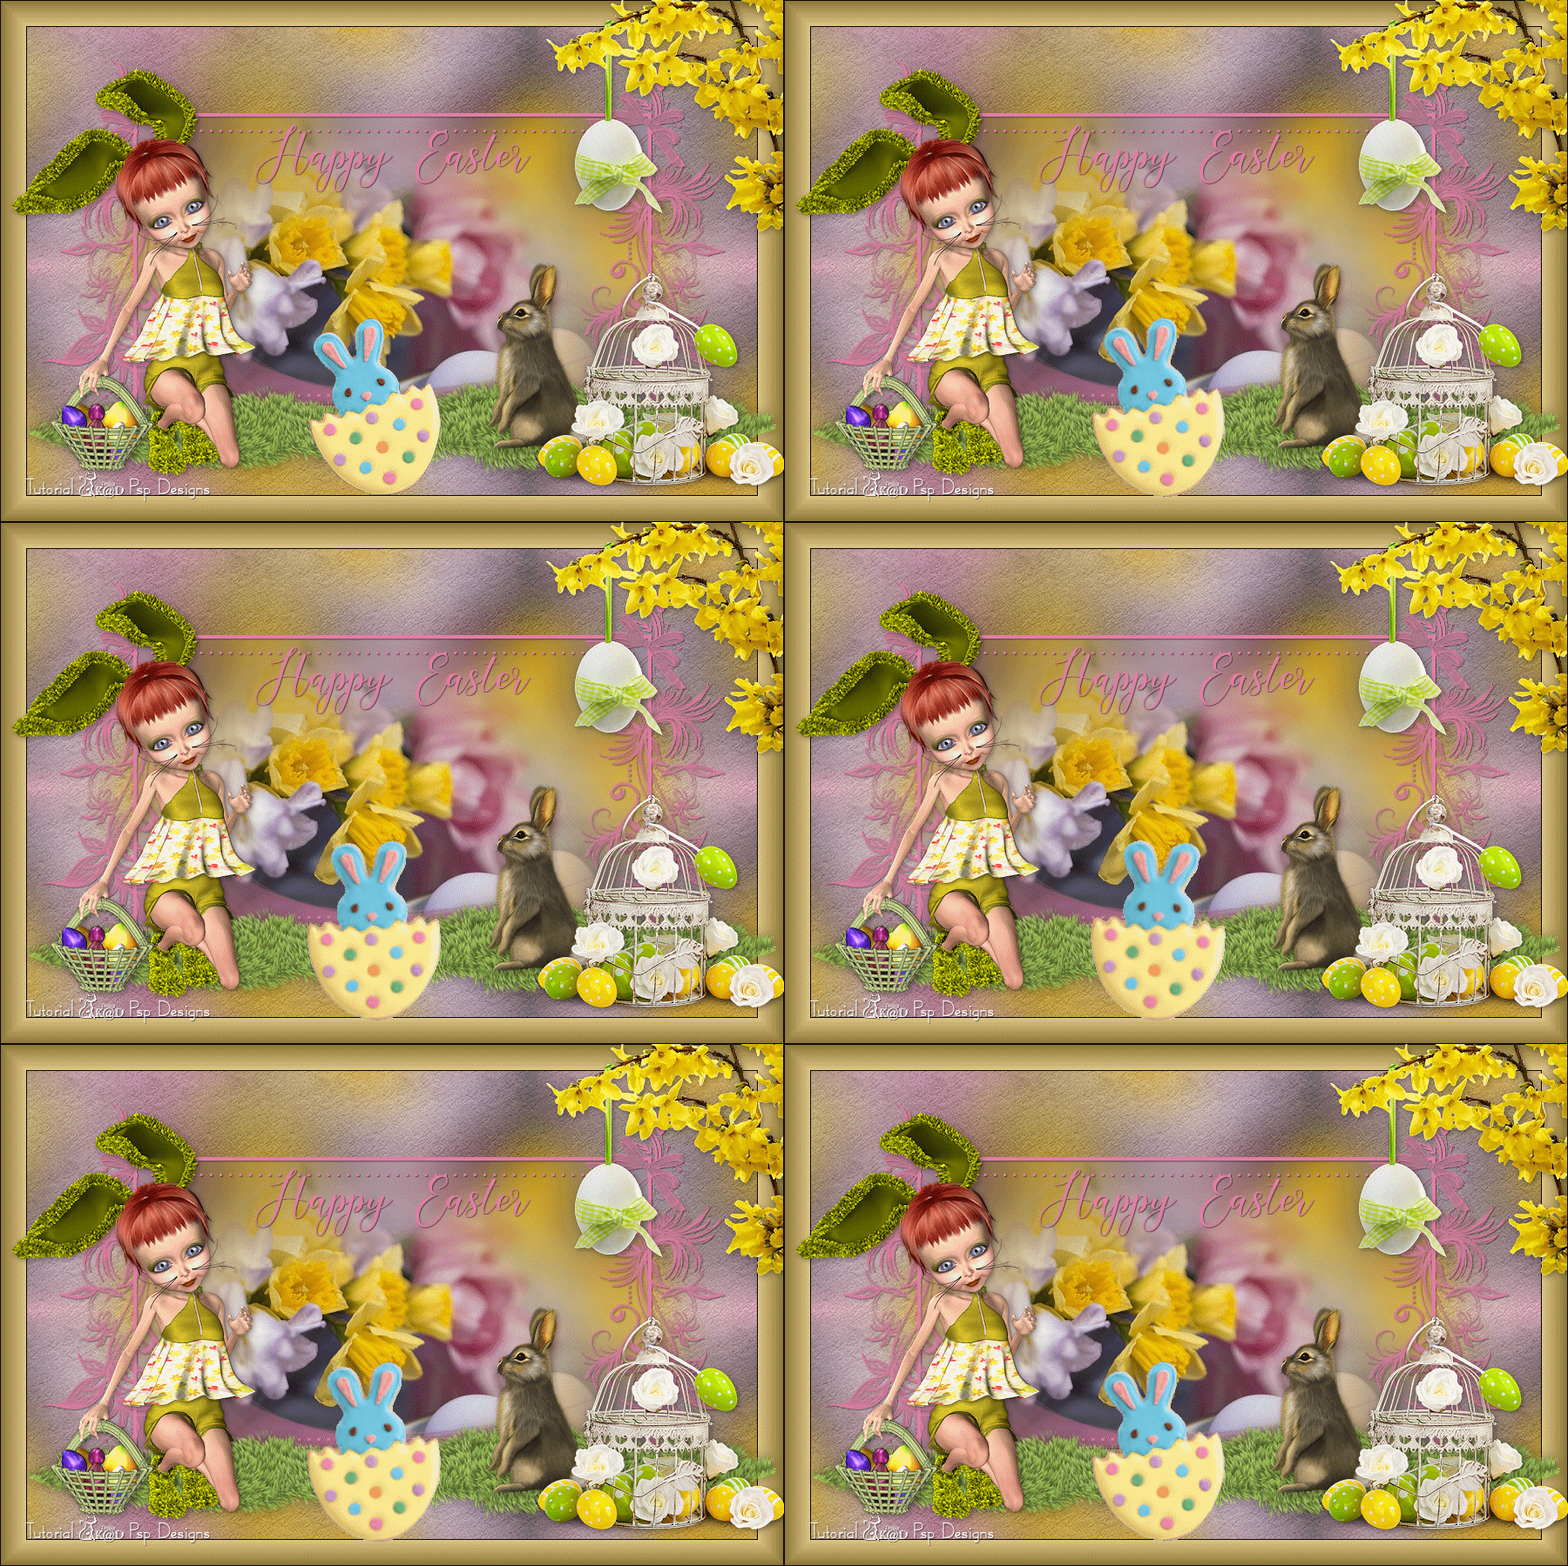
Extra example - Tubes BellesGraphics - jewel - Riet - justanotherbunny

Click on banner below to go to the gallery


