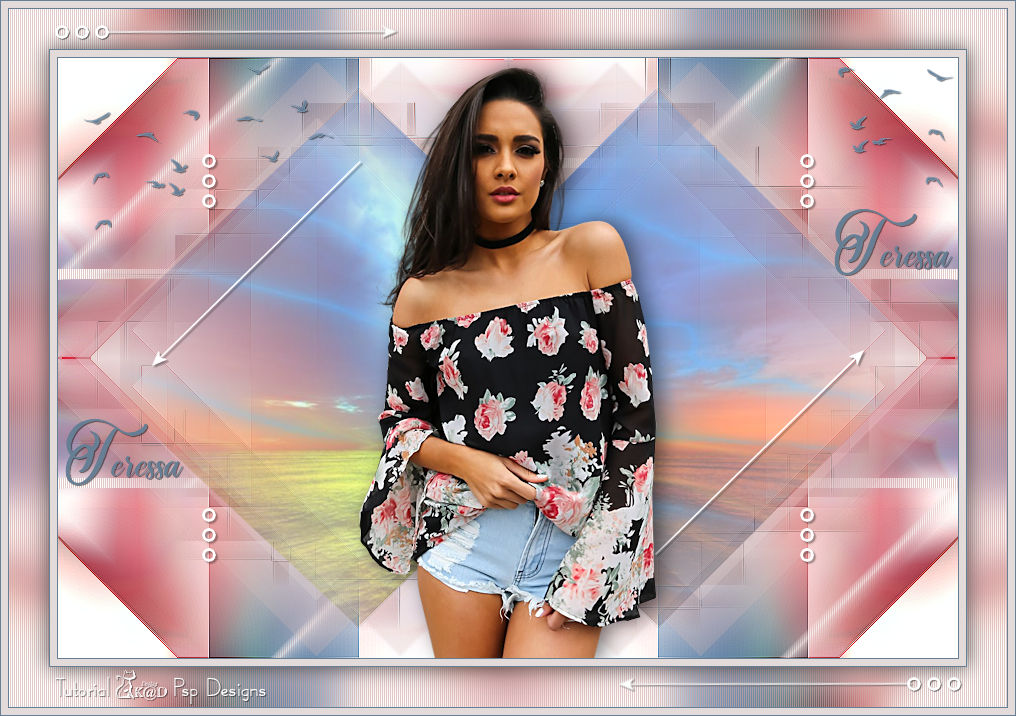
1/ KaD_Woman_219
2/ SvB Zee misted
3/ 494_KaD_Element1 + 494_KaD_Element2 + 494_KaD_Element3
Alpha Selections : open in PSP and minimize
(this image is not empty – it contains alpha selections)
1/ 494_KaD_Alfakanaal
Color palette :
If you work with your own colors, make your own color palette with the alpha channel,
so you can easily switch between your colors.
There are color differences in the different versions of Psp.
Therefore, use the html codes of the color palette to be sure,
that you have the same colors. Also when merging layers, there may be color differences.

Plugins :
1/ Mehdi : Wavy Lab 1.1 – Sorting Tiles
2/ VanDerLee : Unplugged-X
3/ Tramages : Pool Shadow
4/ Unlimited 2.0 : &<Sandflower Special °v° – Color White Out (-)
5/ Toadies : Weaver
6/ Italian Editors effect : Effetto Fantasma
(-) Import into Filters Unlimited
------------------------------------------------
THE TUTORIAL
When working with your own colors, play with the Blend Mode and/or Opacity at your own discretion
From now on I use the terms "MIRROR" and "FLIP" again.
Mirror: Mirror horizontal - Flip: Mirror vertical
Let’s get started.
Remember to save your work often
Some print screens have other colors than the original.
 People who are visually impaired, contact me and I will send you a word document.
Colors :
Foreground color : Color 1
Background color : Color 2
1
Open : 494_KaD_Alfakanaal
Window – Duplicate
Minimize the original – we continue on the copy
2
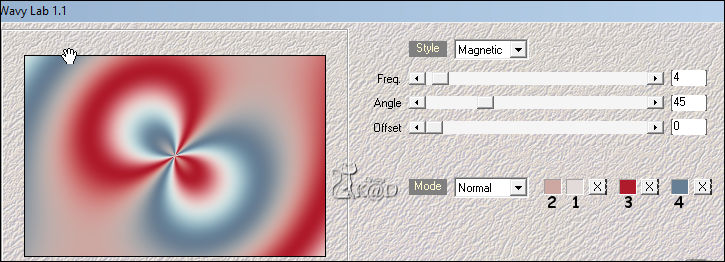
Plugins – Mehdi – Wavy Lab 1.1 – see PS
3
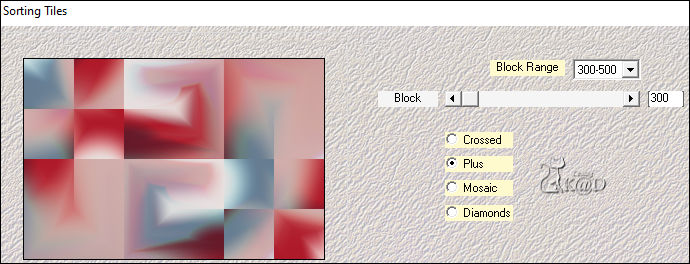
Plugins – Mehdi – Sorting Tiles – see PS
4
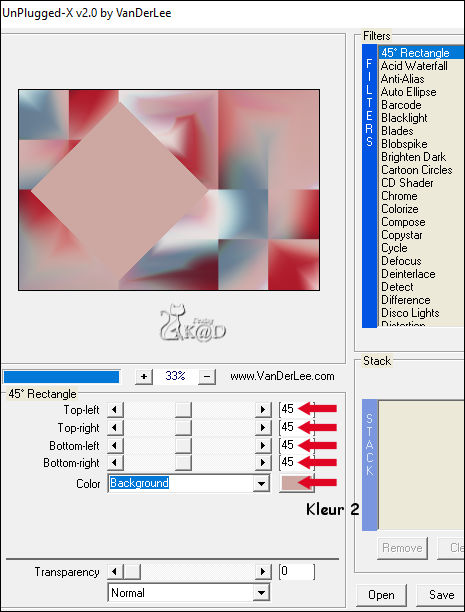
Plugins – VanDerLee – Unplugged-X – 45°Rectangle – see PS
Selections – Load/Save Selection – Load Selection From Alpha Channel – Selectie 1 – see PS
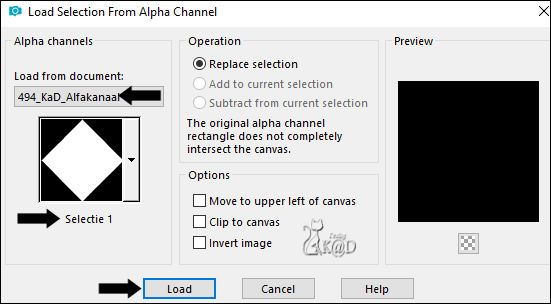
4-1
Plugins – Tramages – Pool Shadow – DEFAULT
Select none
5
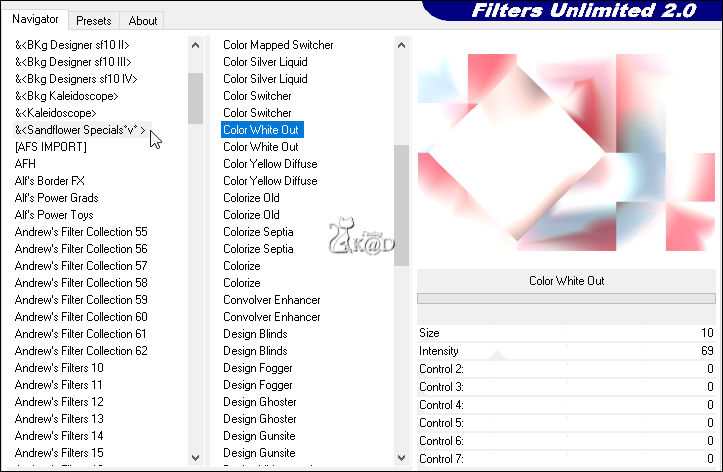
Plugins – Unlimited 2.0 – &<Sandflower Special °v° – Color White Out – see PS
* If you get a circle on your square (45 ° Rectangle), change top value to 0
6
Effects – Image effects – Seamless Tiling – Default but transition to 100
7
Effects – Edge effects – Enhance
8
Selections – Load/Save Selection – Load Selection From Alpha Channel – Selectie 1 – see #4
Selections – Promote selection to layer (Promoted selection)
Select none
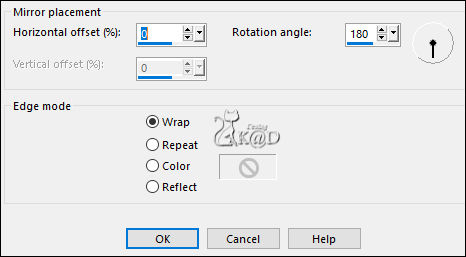
Effects – Reflection effects – Rotating Mirror – see PS
9
Layers – Duplicate (Copy of Promoted selection)
Plugins – Toadies – Weaver – see PS

Change Blend mode to Multiply
9-1
Effects – Edge effects – Enhance
Layers – Arrange – Move down
10
Activate top layer (Promoted selection)
Plugins – Italian Editors effect – Effetto Fantasma : 24 – 24
10-1
Effects – 3D-effects – Drop Shadow : V&H 0 – 60 – 30 – Color #ffffff
Adjust – Sharpness – Sharpen
11
Activate Raster 1
Effects – Reflection effects – Rotating Mirror – same values
Layers – Duplicate
Image – Flip
Change Blend mode to Multiply
Result
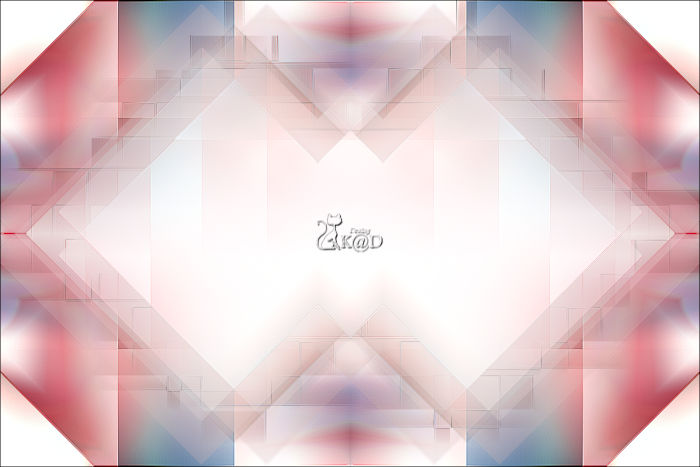
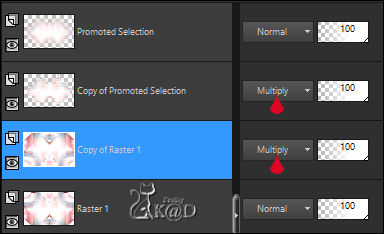
Layers – Merge down (Raster 1)
12
Change Foreground Color to Color 5 (White)
Layers – New Raster layer (Raster 2)
Layers – Arrange – Bring to top
Selections – Load/Save Selection – Load Selection From Alpha Channel – Selectie 2 – see PS
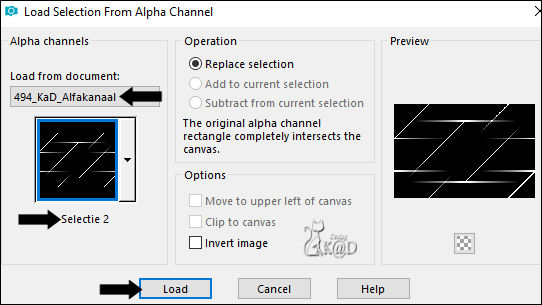
Fill selection with foreground color
Select none
Effects – Distortion effects – Wind – see PS
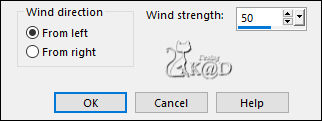
12-1
Effects – Texture effects – Blinds – see PS
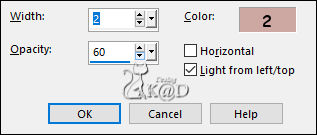
12-2
Effects – 3D-effects – Drop Shadow : V&H 0 – 60 – 30 – Color #ffffff
Layers – Arrange – Move down
13
Activate top layer
Selections – Load/Save Selection – Load Selection From Alpha Channel – Selectie 3 – see PS
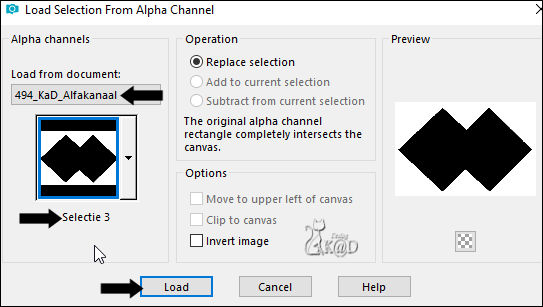
Activate and copy : SvB Zee misted
Edit – Paste as a new layer (Raster 3)
Press Delete on the keyboard
Change layer opacity to 60
Select none
14
Activate and copy : 494_KaD_Element1
Edit – Paste as a new layer (Raster 4)
Do not move
Effects – 3D-effects – Drop Shadow : V&H 2 – 35 – 2 – Color #000000
15
Activate and copy : KaD_Woman_219
Edit – Paste as a new layer (Raster 5)
Image – Resize : 60% all layers NOT checked
Press K – Pos X : 301 – Pos Y : 7 – Press M
Effects – 3D-effects – Drop Shadow : V 0 – H 7 – 50 – 30 – Color #000000
Adjust – Sharpness – Unsharp Mask : 2 – 30 – 2 – no check marks
16
Activate and copy : 494_KaD_Element2
Edit – Paste as a new layer (Raster 4)
Press K – Pos X : 24 – Pos Y : 5 – Press M
Effects – 3D-effects – Drop Shadow: V&H 1 – 50 – 1 – Color #000000
Adjust – Sharpness – Sharpen
17
Change Background Color to Color 4
Layers – New Raster layer (Raster 7)
Selections – Load/Save Selection – Load Selection From Alpha Channel – Selectie 4 – see PS
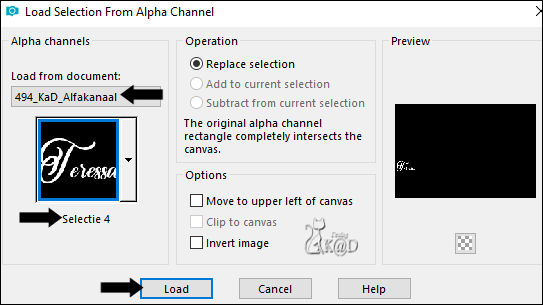
Fill with background color
Select none
Effects – 3D-effects – Drop Shadow : V&H 1 – 50 – 1 – Color #000000
18
Layers – Duplicate
Press K – Pos X : 776 – Pos Y : 151 – Press M
Activate Raster 1
Edit – Copy
19
Image – Add borders :
1 pix Color 4
7 pix Color 1
1 pix Color 4
Select all
20
Image – Add borders : 40 pix Color 5
Selection – Invert
Edit – Paste into selection
Adjust – Blur – Gaussian blur : 15
Effects – Texture effects – Blinds – same values
Selection – Invert
20-1
Effects – 3D-effects – Drop Shadow: V&H 0 – 60 – 30 – Color #000000
Select none
21
Image – Add borders :
1 pix Color 4
7 pix Color 1
1 pix Color 4
22
Activate and copy : 494_KaD_Element3
Edit – Paste as a new layer – Do not move
Effects – 3D-effects – Drop Shadow : V&H 1 – 50 – 1 – Color #000000
23
Add your name or watermark,
Add my watermark to your creation HERE
Layers – Merge – Merge all (Flatten)
24
Image – Resize: 900 pix
Adjust – Sharpness – Unsharp Mask : 2 – 30 – 2 – no check marks
Save as JPG file and you're done!
I hope you enjoyed this tutorial
Karin
05/03/2021
Mail me your version 
Extra example – MR & CRISS

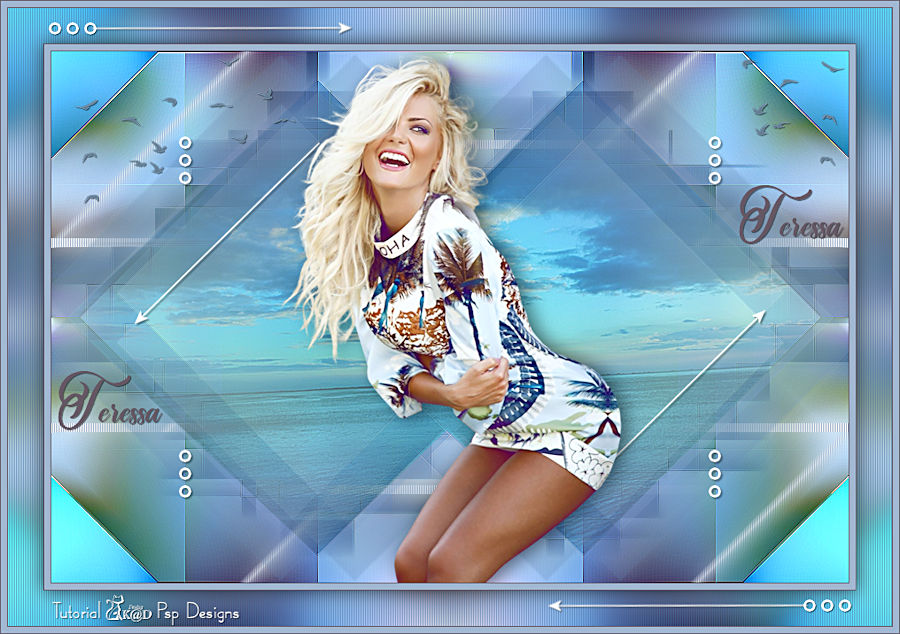

Click on banner below to go to the gallery


