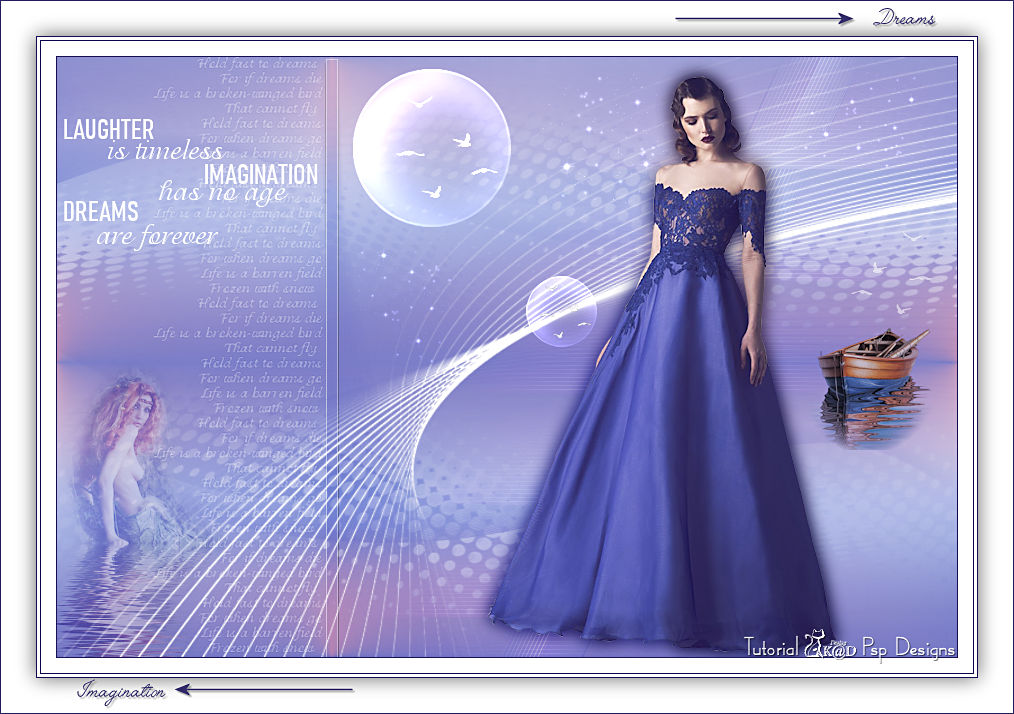
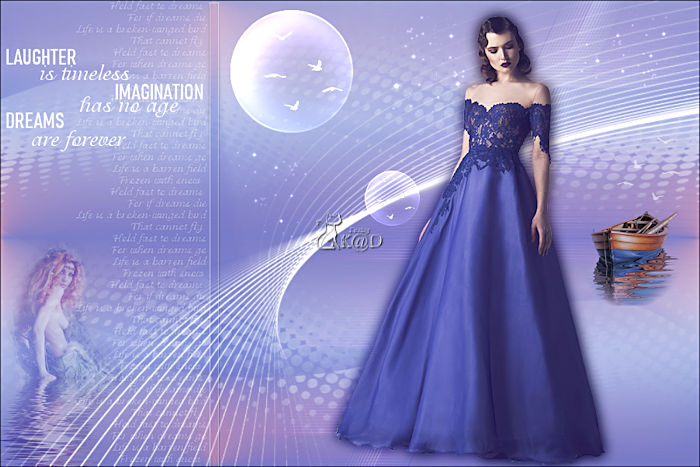
1/ KaD_Woman_220
2/ 496_KaD_Deco1 + 2 + 3 + 4 + 5
3/ anna.br-1116_nature
4/ Boot852019es
Alpha Selections : open in PSP and minimize
(this image is not empty – it contains alpha selections)
1/ 496_KaD_Alfakanaal
Masks : open in PSP and minimize
1/ Narah_Mask_1166
2/ Narah_Mask_1175
Filter Presets : double click to install
1/ 496_KaD_Flood
Color palette :
If you work with your own colors, make your own color palette with the alpha channel,
so you can easily switch between your colors.
There are color differences in the different versions of Psp.
Therefore, use the html codes of the color palette to be sure,
that you have the same colors. Also when merging layers, there may be color differences.
Plugins :
1/ Mehdi : Wavy Lab
2/ Eye Candy 4000 : Motion Trail
3/ AP 01 [Innovations] : Lines Silverlining
4/ Toadies : Weaver
5/ Flaming Pear : Flood
(-) Import into Filters Unlimited
------------------------------------------------
THE TUTORIAL
When working with your own colors, play with the Blend Mode and/or Opacity at your own discretion
From now on I use the terms "MIRROR" and "FLIP" again.
Mirror: Mirror horizontal - Flip: Mirror vertical
Let’s get started.
Remember to save your work often
Some print screens have other colors than the original.
 People who are visually impaired, contact me and I will send you a word document.
Colors :
Foreground color : Color 1
Background color : Color 4
1
Open the alpha channel : 496_KaD_Alfakanaal
Window – Duplicate
Minimize the original – we continue on the copy
2
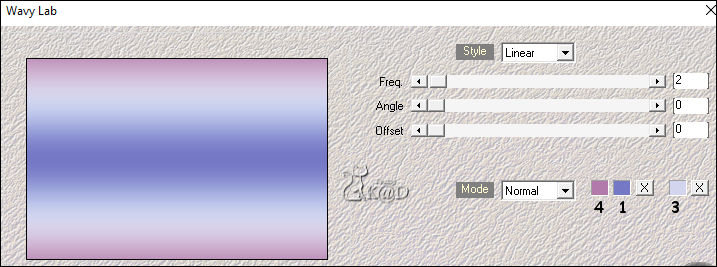
Plugins – Mehdi – Wavy Lab – see PS
3
Layers – New Raster layer
Fill with foreground color
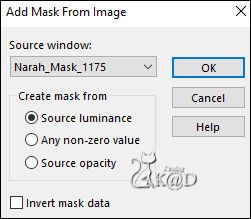
Layers – New Mask layer – From image “Narah_Mask_1175” – see PS
Layers – Merge – Merge Group (Group Raster 2)
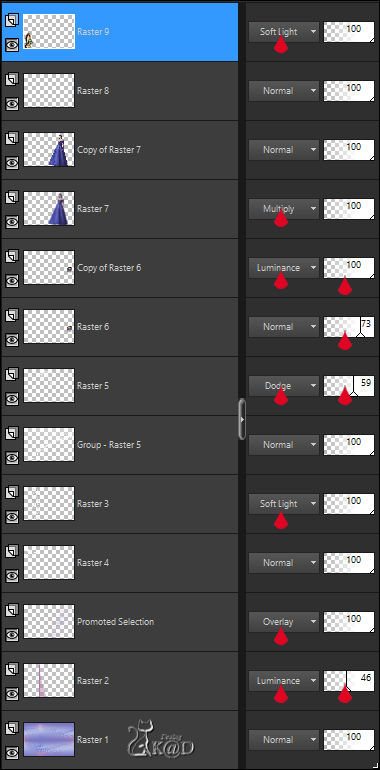
Change Blend mode to Luminance
Layers – Merge – Merge down
4
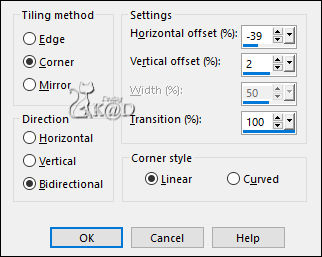
Effects – Image effects – Seamless Tiling – see PS
5
Layers – New Raster layer (Raster 2)
Selections – Load/Save Selection – Load Selection From Alpha Channel – Selectie 1 – see PS
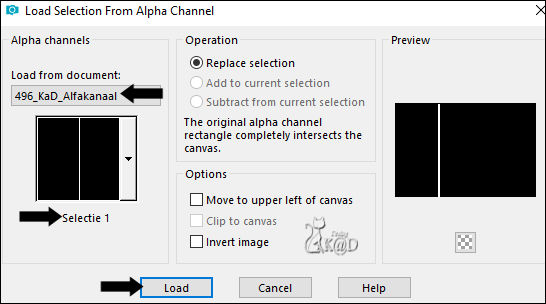
Fill selection with background color (Color 4)
Select none
Plugins – Eye Candy 4000 – Motion Trail – see PS
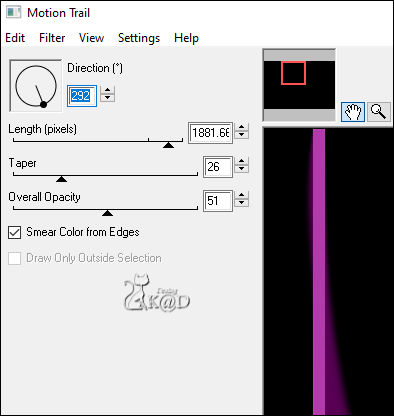
Change Blend mode to Luminance and Layer opacity to 46
5-1
Effects – Egde effects – Enhance
Repeat if necessary
6
Activate and copy : 496_KaD_Deco1
Edit – Paste as a new layer (Raster 3)
Press K – Pos X : 97 – Pos Y : 0 – Press M UITLEG
Change Blend mode to Soft Light
Adjust – Sharpness – Sharpen
7
Activate Raster 1
Selections – Load/Save Selection – Load Selection From Alpha Channel – Selectie 1 – see Punt 5
Selections – Promote selection to layer (Promoted selection)
Select none
Image – Mirror
Adjust – Blur – Gaussian Blur : 15
7-1
Plugins – AP 01 [Innovations] – Lines Silverlining – Dotty Grid – see PS
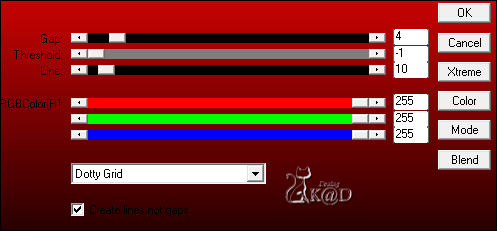
7-2
Plugins – Toadies – Weaver – STANDAARD – see PS
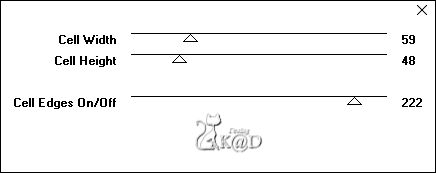
7-3
Effects – Geometric Effects – Skew – see PS
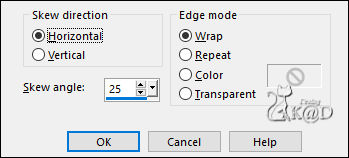
Change Blend mode to Overlay
Layers – Arrange – Move up
8
Activate and copy : 496_KaD_Deco2
Edit – Paste as a new layer (Raster 4)
Press K – Pos X : 7 – Pos Y : 62 – Press M
9
Change foreground color to Color 5 (wit)
Layers – New Raster layer
Fill with foreground color
Layers – New Mask layer – From image “Narah_Mask_1166” – see PS
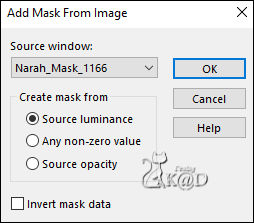
Layers – Merge – Merge Group (Group Raster 5)
Layers – Arrange – Bring to top
10
Activate and copy : 496_KaD_Deco3
Edit – Paste as a new layer (Raster 5)
Press K – Pos X : 296 – Pos Y : 12 – Press M
Change Blend mode to Dodge and Layer opacity to 59
11
Activate and copy : Boot852019es
Edit – Paste as a new layer (Raster 6)
Image – Mirror
Image – Resize : 20%, all layers NOT checked
Press K – Pos X : 745 – Pos Y : 271 – Press M
Change Layer opacity to 73
11-1
Layers – Duplicate (Copy of Raster 6)
Change Blend mode to Luminance and Layer opacity 100
12
Activate and copy : KaD_Woman_220
Edit – Paste as a new layer (Raster 7)
Image – Resize : 55%, all layers NOT checked
Press K – Pos X : 430 – Pos Y : 19 – Press M
Adjust – Sharpness – Unsharp Mask : 2 – 30 – 2 – no check marks
13
Layers – Duplicate (Copy of Raster 7)
Activate the layer just below (Raster 7)
Adjust – Blur – Gaussian Blur : 8
Change Blend mode to Multiply
14
Activate and copy : 496_KaD_Deco4
Edit – Paste as a new layer (Raster 8)
Layers – Arrange – Bring to top
Press K – Pos X : 323 – Pos Y : 39 – Press M
15
Activate and copy : anna.br-1116_nature
Edit – Paste as a new layer (Raster 9)
Image – Resize: 40%, all layers NOT checked
Press K – Pos X : -2 – Pos Y : 295 – Press M
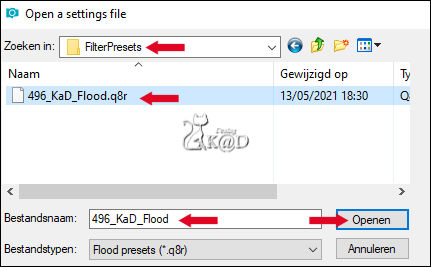
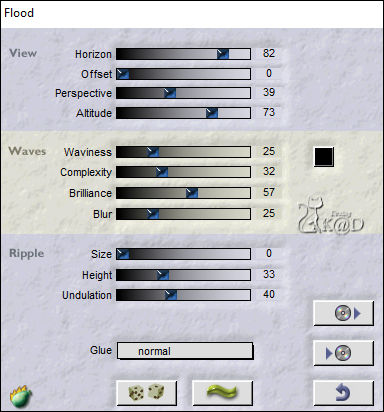
Plugins – Flaming Pear – Flood :
Use the preset “496_KaD_Flood” or enter manually - see PS
Change Blend mode to Soft Light
Result
16
Image – Add Borders :
1 pix Color 2
15 pix Color 5
1 pix Color 2
3 pix Color 5
1 pix Color 2
Select all
17
Image – Add Borders : 35 pix Color 5
Effects – 3D-effects – Drop Shadow : V&H 0 – 60 – 30 – Color #000000
Select none
18
Activate and copy : 496_KaD_Deco5
Edit – Paste as a new layer (Raster 10)
Don’t move
Effects – 3D-effects – Drop Shadow : V&H 2 – 35 – 2 – Color #000000
19
Add your name or watermark,
Add my watermark to your creation HERE
20
Image – Add Borders : 1 pix Color 2
Image – Resize – Width 900 Pixels - Resize all Layers checked
Adjust – Sharpness – Unsharp Mask : 2 – 30 – 2 – no check marks
Save as JPG file and you're done!
I hope you enjoyed this tutorial
Karin
14/05/2021
Mail me your version 
Extra example – luzcristina

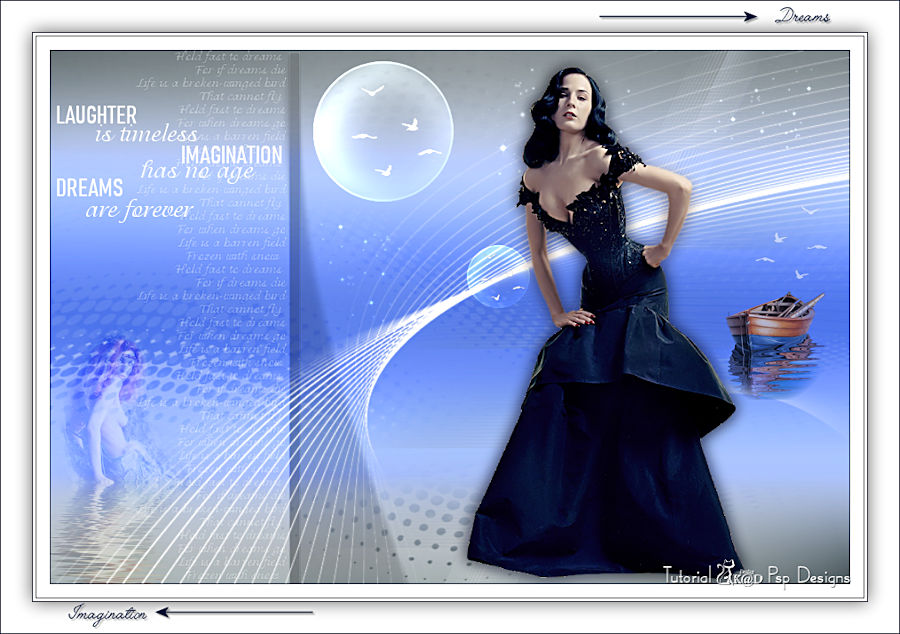
Extra vb tubes : Katjoes & LoriRhae

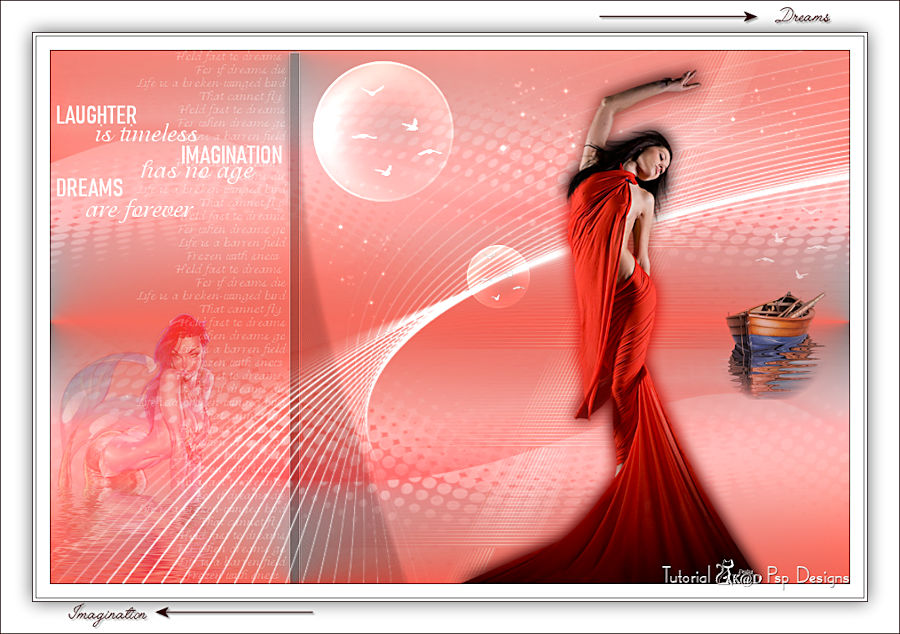

Click on banner below to go to the gallery


