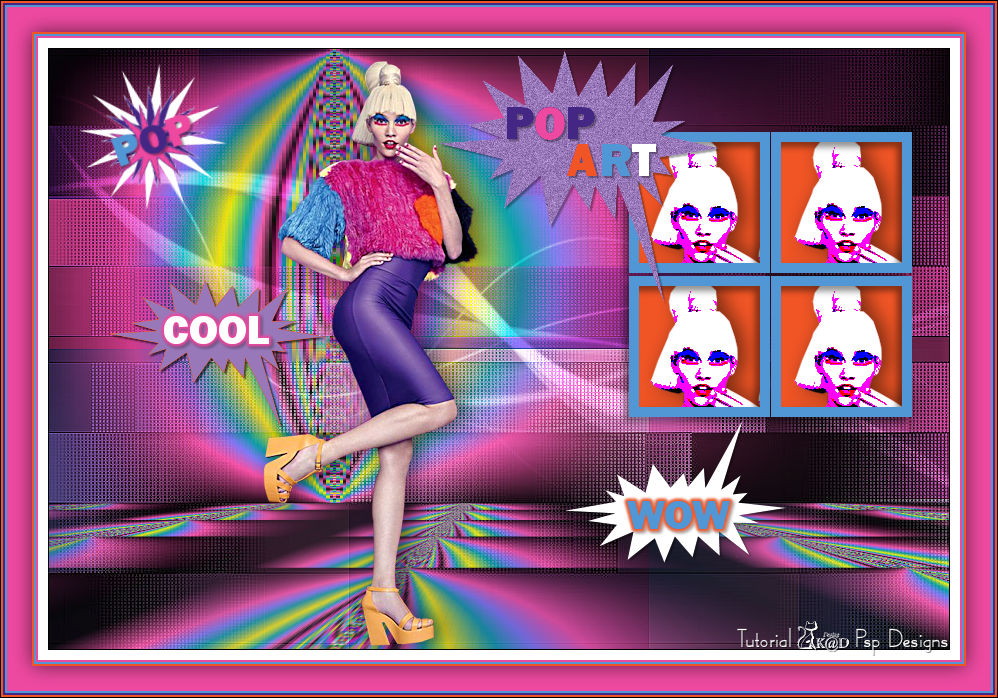
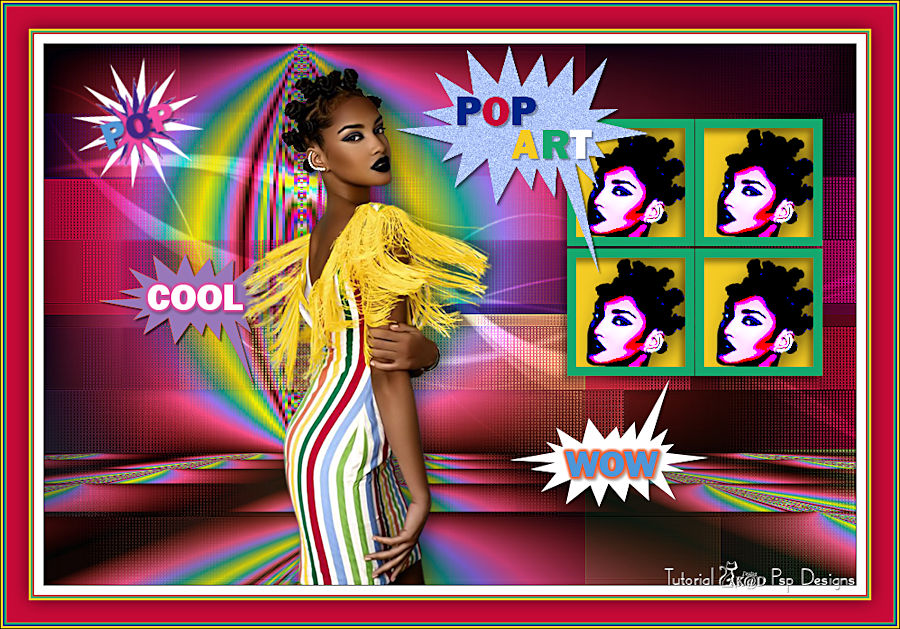
1/ KaD_Woman_231 (If you take your own tube, use a colorful tube!)
2/ 508_KaD_Element1
Alpha Selections : open in PSP and minimize
(this image is not empty – it contains alpha selections)
1/ 508_KaD_Alfakanaal
Masks : open in PSP and minimize
Masks :
1/ lbdm-masque-222
2/ NarahsMasks_1559
Color palette :
If you work with your own colors, make your own color palette with the alpha channel,
so you can easily switch between your colors.
There are color differences in the different versions of Psp.
Therefore, use the html codes of the color palette to be sure,
that you have the same colors. Also when merging layers, there may be color differences.

Plugins :
1/ Mehdi : Wavy Lab 1.1, Sorting Tiles
2/ VanderLee : Pop-Art
3/ Unlimited 2.0 : Sabercat – Sabers Mitoisis HERE
4/ MuRa’s Meister : Perspective Tiling
(-) Import into Filters Unlimited
------------------------------------------------
THE TUTORIAL
When working with your own colors, play with the Blend Mode and/or Opacity at your own discretion
From now on I use the terms "MIRROR" and "FLIP" again.
Mirror: Mirror horizontal - Flip: Mirror vertical
Let’s get started.
Remember to save your work often
Some print screens have other colors than the original.
Colors :
Foreground color : Color 1
Background color : Color 2
1
Open the alpha channel : 508_KaD_Alfakanaal
Window – Duplicate
Minimize the original – we continue on the copy
2
Plugins – Mehdi – Wavy Lab 1.1 – see PS
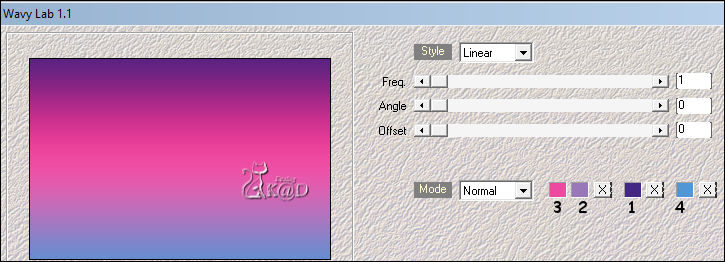
Layers – Duplicate
3
Plugins – Mehdi – Sorting Tiles – see PS
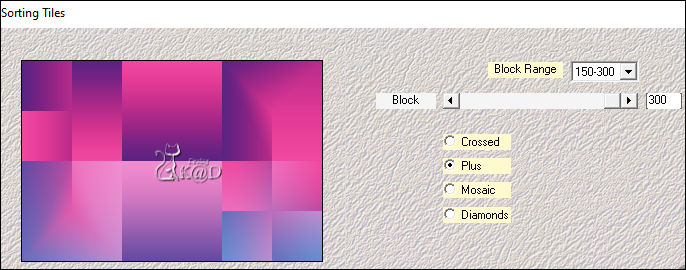
4
Layers – New Mask Layers– From image “lbdm-masque-222” – see PS
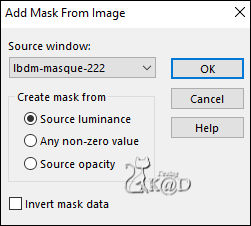
Layers – Merge – Merge group (Group - Copy van Raster 1)
Effects – Edge effects – Enhance
5
Effects – 3D- Effects – Drop Shadow : V 5 – H -5 – 45 – 10 – Color #000000
6
Change background color to Color 4
Layers – New Raster Layer (Raster 2)
Selections – Load/Save Selection – Load Selection From Alpha Channel – Selectie 1 – see PS
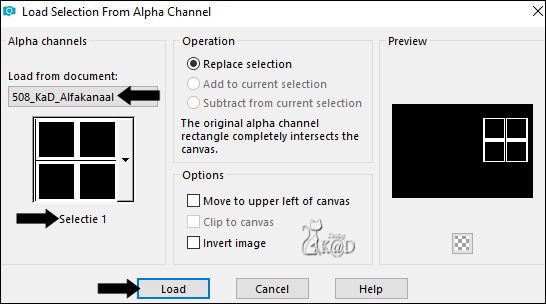
Fill selection with background color
Effects – 3D- Effects – Drop Shadow : V 5 – H -5 – 45 – 10 – Color #000000
7
Selections – Load/Save Selection – Load Selection From Alpha Channel – Selectie 2 – see PS
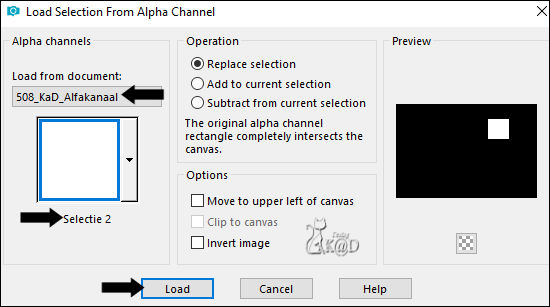
Layers – New Raster Layer (Raster 3)
Layers – Arrange – Move Down
Change background color to Color 5
Fill selection with background color
8
Activate and copy : KaD_Woman_231
Edit – Paste as a new layer
Image – Resize : 93%, all layers NOT checkedMove head into selection
Selection invert
Press delete on the keyboard
Selection invert
9
Plugins – VanderLee – Pop-Art – see PS
TIP : Play around with the settings to adjust the colors
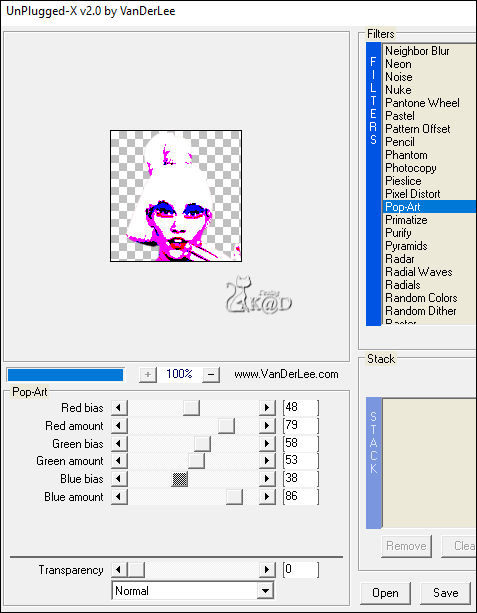
Select none
Effects – 3D- Effects – Drop Shadow : V 0 – H 7 – 50 – 30 – Color #000000
Layers – Merge – Merge down
10
Layers – Duplicate
Effects – Image effects – Offset : H 144 – V 0 – Transparent
Layers – Merge – Merge down
11
Layers – Duplicate
Effects – Image effects – Offset : H 0 – V -144 – Transparent
Layers – Merge – Merge down
11-1
Activate top layer (Raster 2)
Layers – Merge – Merge down (Raster 3)
12
Change background color to Color 2
Layers – New Raster Layer (Raster 2)
Selections – Load/Save Selection – Load Selection From Alpha Channel – Selectie 3 – see PS
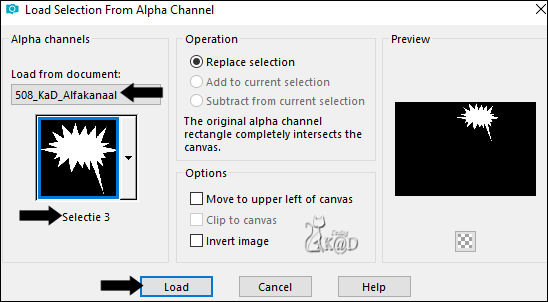
Fill selection with background color
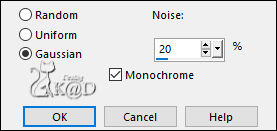
Adjust – Add/Remove noise – Add noise – see PS
13
Layers – New Raster Layer (Raster 4)
Selections – Load/Save Selection – Load Selection From Alpha Channel – Selectie 4 – see PS
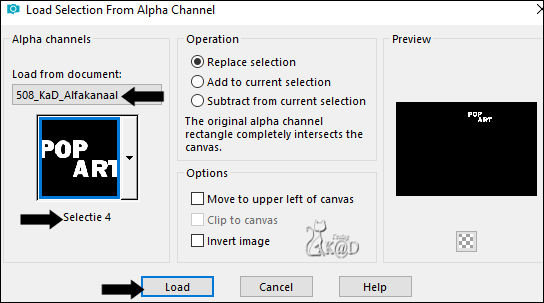
Fill selection with Foreground color (Color 1)
14
Activate tool selection (s) – Delete mode – see PS

Delete the P’s from selection
Fill selection with Color 3
15
Activate tool selection (s)
Delete the O from selection
Fill selection with Color 5
16
Repeat until you have colored all the letters
Select none
Effects – 3D- Effects – Drop Shadow : V&H 2 – 35 – 2 – Color #000000
Layers – Merge – Merge down
16-1
Effects – 3D- Effects – Drop Shadow : V&H 2 – 35 – 2 – Color #000000
Result
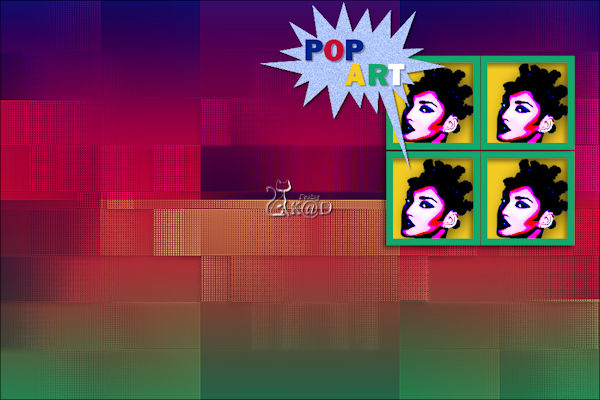
17
Change Foreground color to Color 6a
Layers – New Raster Layer
Fill with foreground color
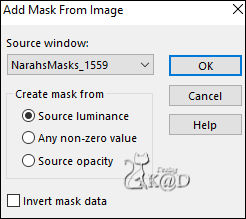
Layers – New Mask Layers– From image “NarahsMasks_1559” – see PS
Layers – Merge – Merge group (Group - Raster 4)
Change Blend mode to Overlay
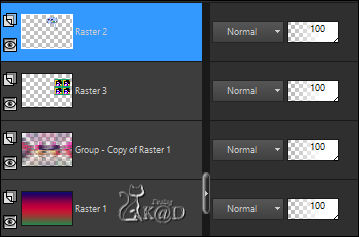
Layers – Arrange – Move Down 2x
18
Activate and copy : KaD_Woman_231
Edit – Paste as a new layer (Raster 4)
Layers – Arrange – Bring to top
Image – Resize : 70%, all layers NOT checked
Press K – Pos X : 214 – Pos Y : 11 – Press M HELP
Effects – 3D- Effects – Drop Shadow : V 0 – H 7 – 50 – 30 – Color #000000
Adjust – Sharpness – Unsharp Mask : 2 – 30 – 2 – no check marks
19
Activate and copy : 508_KaD_Element1
Edit – Paste as a new layer (Raster 5)
Press K – Pos X : 30 – Pos Y : 14 – Press M
Arrange layer down if necessary
20
Activate Raster 1
Layers – Duplicate
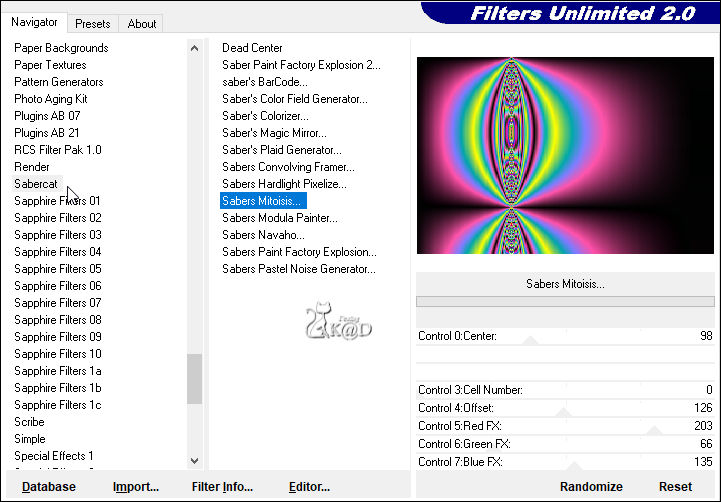
Plugins – Filters Unlimited 2.0 – Sabercat – Sabers Mitoisis – see PS
Optionally : apply filter Adjust – Variations to adjust Color a bit
21
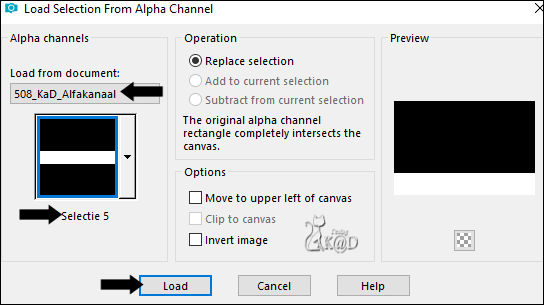
Selections – Load/Save Selection – Load Selection From Alpha Channel – Selectie 5 – see PS
Selections – Promote selection to layer
Plugins – MuRa’s Meister – Perspective Tiling – DEFAULT
Select none
22
Image – Add borders :
1 pix Color 6b
10 pix Color 6a
2 pix Color 3
2 pix Color 4
2 pix Color 5
Select all
23
Image – Add borders : 25 pix Color 3
Effects – 3D- Effects – Drop Shadow : V&H 0 – 60 – 30 – Color #000000
Select none
24
Image – Add borders :
2 pix Color 4
2 pix Color 1
2 pix Color 5
25
Add your name or watermark,
Add my watermark to your creation HERE
26
Image – Add Borders : 1 pix color 6b
Image – Resize – Width 900 Pixels - Resize all Layers checked
Adjust – Sharpness – Unsharp Mask : 2 – 30 – 2 – no check marks
27
Save as JPG file and you're done!
I hope you enjoyed this tutorial
Karin
27/07/2022
Mail me your version 
Extra Ex with tube by NP

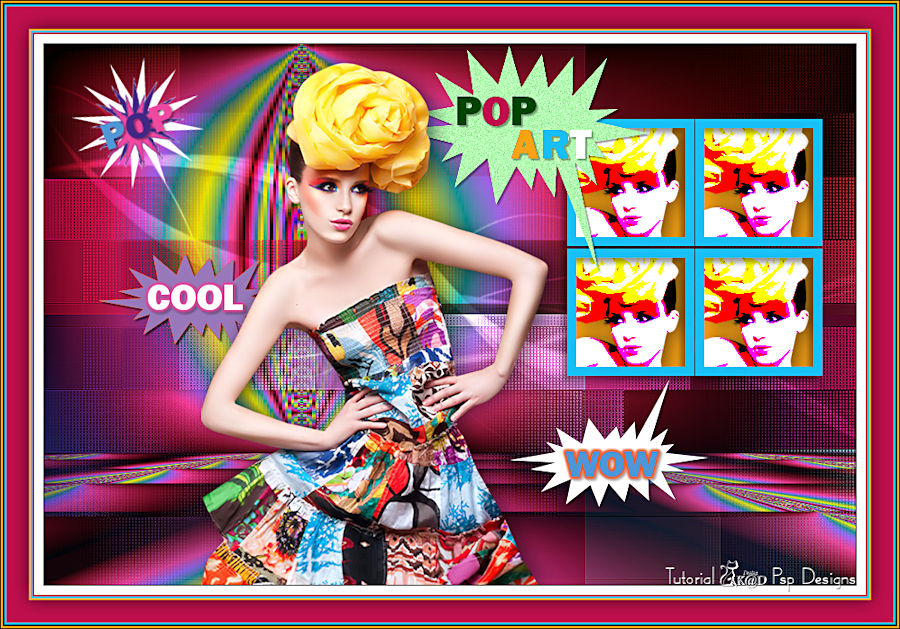
Extra Ex with tube by LB


Click on banner below to go to the gallery


![]()
