1/ KaD_Woman_236
2/ 515_KaD_Element1 + 515_KaD_Element2 + 515_KaD_Element3 + 515_KaD_Element4
Alpha Selections : open in PSP and minimize
(this image is not empty – it contains alpha selections)
1/ 515_KaD_Alfakanaal
Masks : open in PSP and minimize
1/ Narah_mask_0478
2/ Narah_Mask_1142
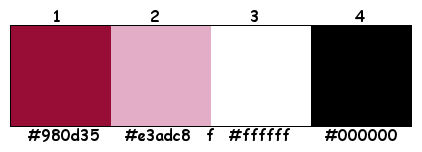
Color palette :
If you work with your own colors, make your own color palette with the alpha channel,
so you can easily switch between your colors.
There are color differences in the different versions of Psp.
Therefore, use the html codes of the color palette to be sure,
that you have the same colors. Also when merging layers, there may be color differences
Plugins :
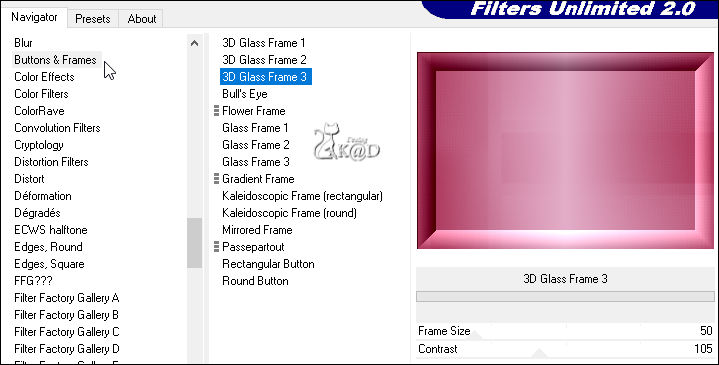
1/ Unlimited 2.0 – Buttons & Frames – 3D Glass Frame 3 (-)
2/ Simple – Top Lef Mirror
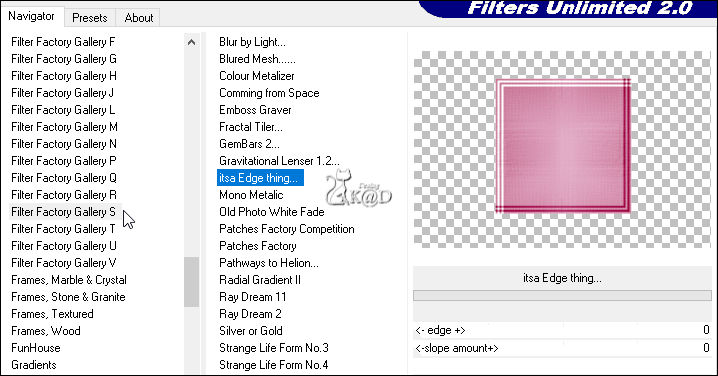
3/ Unlimited 2.0 – Filter Factory Gallery S – Itsa Edge Thing (-)
4/ MuRa’s Meister – Copies
5/ Alien Skin – Eye Candy 5 – Impact
6/ Tramages – Pool Shadow
(-) Import into Filters Unlimited
------------------------------------------------
THE TUTORIAL
When working with your own colors, play with the Blend Mode and/or Opacity at your own discretion
From now on I use the terms "MIRROR" and "FLIP" again.
Mirror: Mirror horizontal - Flip: Mirror vertical
Let’s get started.
Remember to save your work often
Some print screens have other colors than the original.
Colors :
Foreground color : Color 1
Background color : Color 2
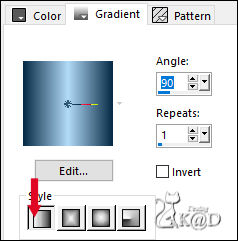
Foreground gradient – Linear – see PS
1
Open the alpha channel : 515_KaD_Alfakanaal
Window – Duplicate
Minimize the original – we continue on the copy
2
Fill with gradient
3
Layers – New Raster layer
Fill with background color
Layers – New Mask layers – From image “Narah_Mask_1142” – see PS
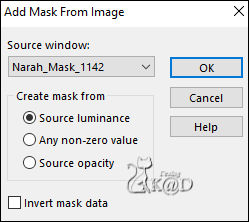
Layers – Merge – Merge group (Group - Raster 2)
Layers – Merge – Merge down
4
Plugins – Unlimited 2.0 – Buttons & Frames – 3D Glass Frame 3 – see PS
5
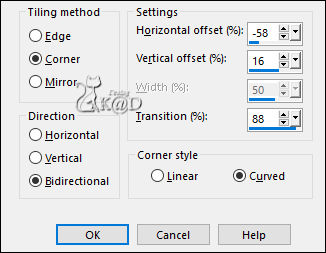
Effects – Image effects – Seamless Tiling – see PS
6
Effects – Edge effects – Enhance
7
Plugins – Simple – Top Left Mirror
8
Change Foreground color to Color 3
Selections – Load/Save Selection – Load Selection From Alpha Channel – Selectie 1 – see PS
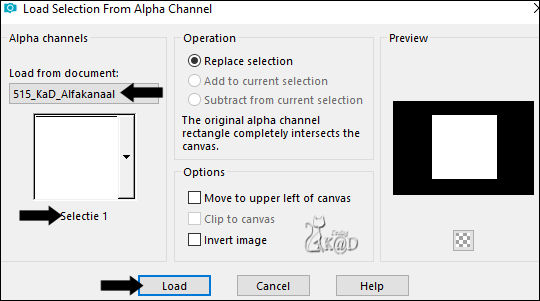
Selections – Promote selection to layer (Promoted selection)
Select none
Plugins – Unlimited 2.0 – FFGS – Itsa Edge Thing – see PS
9
Image – Free rotate – see PS
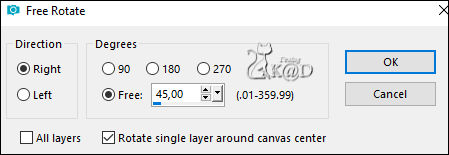
Image – Resize: 80%, all layers NOT checked
10
Layers – Duplicate (Copy of Promoted selection)
Image – Resize : 25%, all layers NOT checked
Effects – 3D-effects – Drop shadow : V&H 0 – 40 – 20 – Color #000000
11
Activate the layer below (Promoted selection)
Repeat drop shadow
12
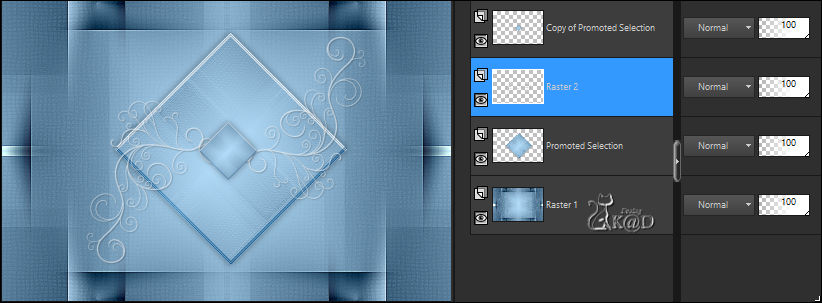
Activate and copy : 515_KaD_Element1
Edit – Paste as a new layer (Raster 2)
Don’t move
13
Activate and copy : 515_KaD_Element2
Edit – Paste as a new layer (Raster 3)
Don’t move
14
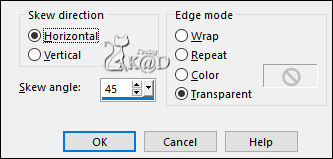
Layers – Duplicate (Copy of Raster 3)
Effects – Geometric effects – Skew – see PS
15
Selections – Load/Save Selection – Load Selection From Alpha Channel – Selectie 2 – see PS
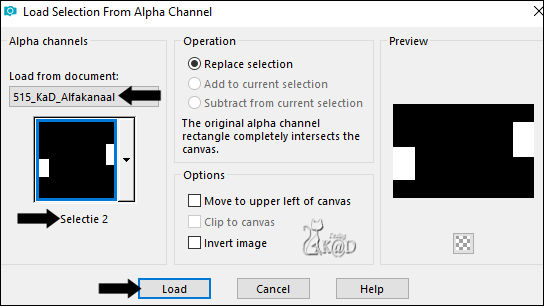
Press Delete on the keyboard
Select none
16
Activate and copy : 515_KaD_Element3
Edit – Paste as a new layer (Raster 4)
Colorize with your color 1 with the “Move to target” tool
Press K – Pos X : 4 – Pos Y : 238 – Press M HELP
Effects – 3D-effects – Drop shadow : V&H 2 – 35 – 2 – Color #000000
17
Activate top layer (Copy of Promoted selection)
Layers – Duplicate (Copy (2) of Promoted selection)
Image – Resize : 25%, all layers NOT checked
Press K – Pos X : 118 – Pos Y : 94 – Press M
18
Plugins – MuRa’s Meister – Copies – see PS
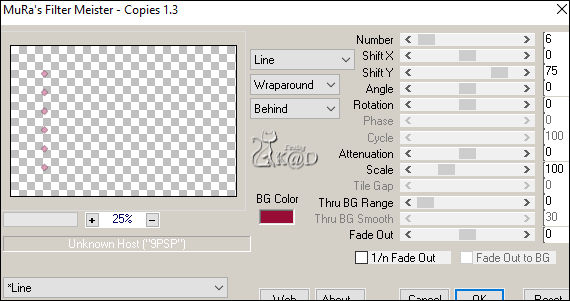
19
Layers – Duplicate
Image – Mirror
Layers – Merge – Merge down
20
Layers – Duplicate
Change Blend mode to Multiply
Layers – Merge – Merge down (Copy (2) of Promoted selection)
21
Window – Duplicate (Shift + D)
Image – Add borders :
1 pix Color 1
Select all
15 pix Color 3
Effects – 3D-effects – Drop shadow : V&H 0 – 40 – 20 – Color #000000
Select none
Image – Resize : 10%, all layers
Edit – Copy
22
Return to your work
Edit – Paste as a new layer (Raster 5)
Press K – Pos X : 13 – Pos Y : 17 – Press M
Adjust – Sharpness – Sharpen
23
Layers – Duplicate
Image – Flip
Layers – Merge – Merge down
24
Layers – Duplicate
Image – Mirror
Layers – Merge – Merge down (Raster 5)
Effects – 3D-effects – Drop shadow : V&H 0 – 40 – 20 – Color #000000
25
Activate and copy : KaD_Woman_236
Edit – Paste as a new layer (Raster 6)
Image – Resize : 85%, all layers NOT checked
Press K – Pos X : 337 – Pos Y : 23 – Press M
Plugins – Alien Skin – Eye Candy 5 – Impact – Perspective Shadow : Lowest
26
Change Foreground color to Color 3
Activate Raster 1
Layers – New Raster layer
Fill with foreground color
Layers – New Mask layers – From image “Narah_mask_0478” – see PS
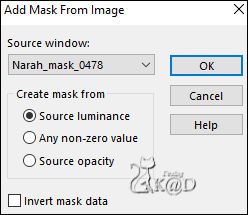
Image – Flip
Layers – Merge – Merge group (Group - Raster 7)
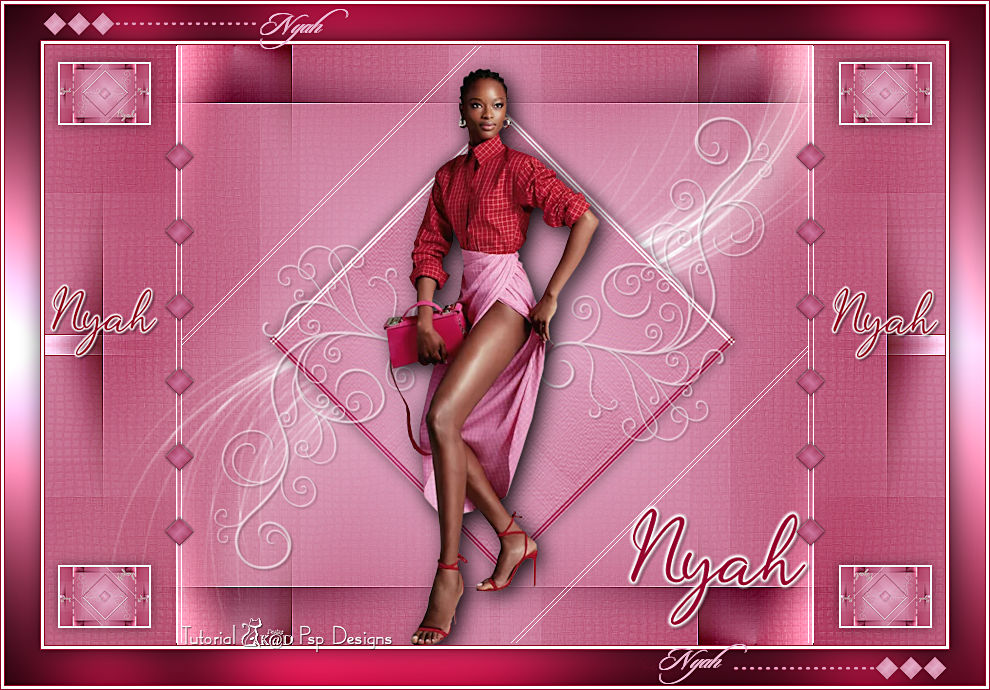
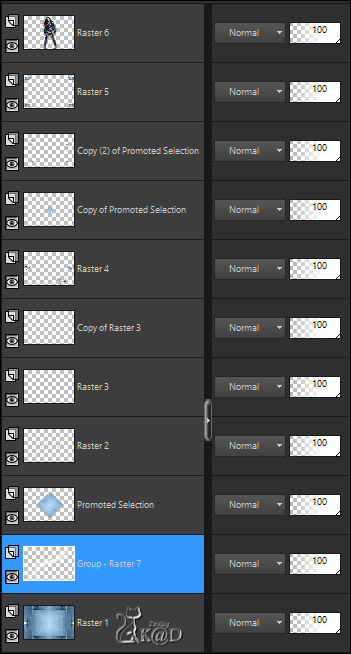
Result
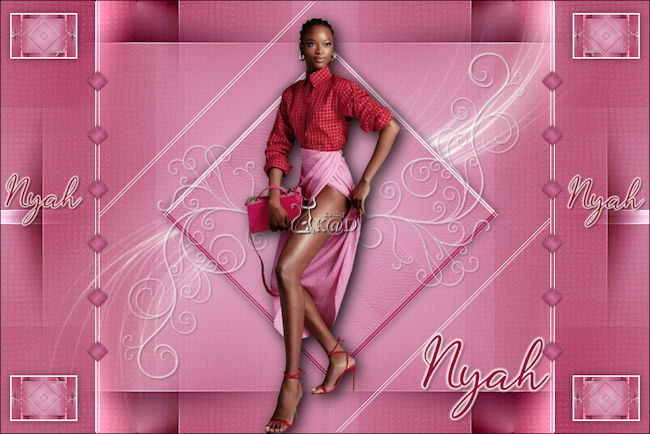
27
Image – Add Borders :
1 pix Color 1
3 pix Color 3
1 pix Color 1
Select all
28
Change Foreground color to gradient Lineair – see PS
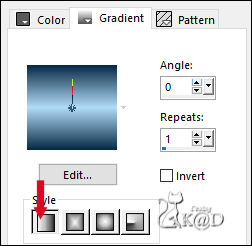
Image – Add Borders : 35 pix Color 3
Selection invert
Fill with gradient
Plugins – Tramages – Pool Shadow – DEFAULT
29
Selection invert
Effects – 3D-effects – Drop shadow : V&H 0 – 60 – 30 – Color #000000
Select none
30
Activate and copy : 515_KaD_Element4
Edit – Paste as a new layer
Colorize with your color 1 with the “Move to target” tool
Don’t move
31
Image – Add Borders :
1 pix Color 1
3 pix Color 3
1 pix Color 1
32
Add your name or watermark,
Add my watermark to your creation HERE
33
Layers – Merge – Merge all (Flatten)
Image – Resize – Width 900 Pixels – Resize all Layers checked
Adjust – Sharpness – Unsharp Mask : 2 – 30 – 2 – no check marks
Save as JPG file and you're done!
I hope you enjoyed this tutorial
Karin
06/02/2023
Mail me your version 
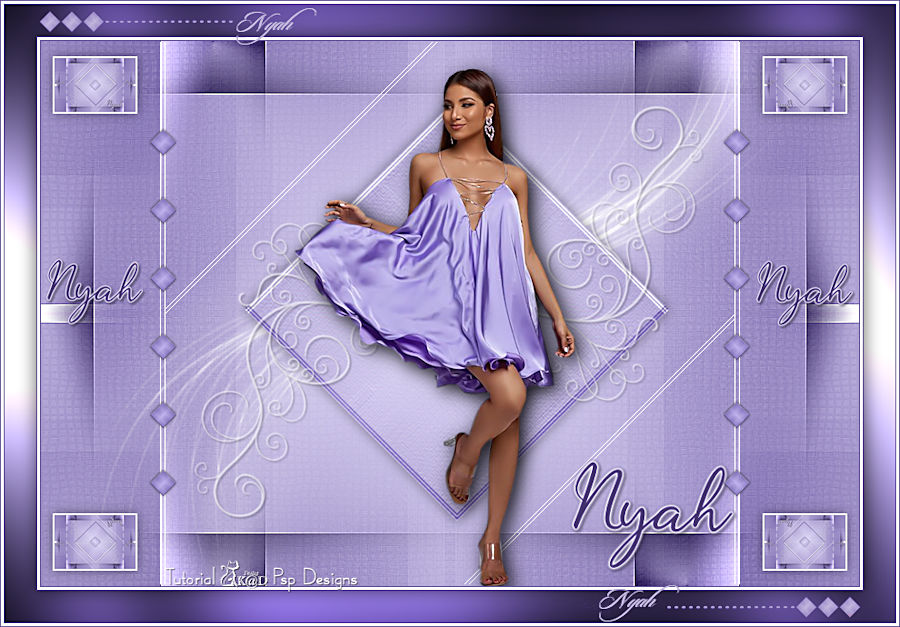
Extra Ex with tubes by LB

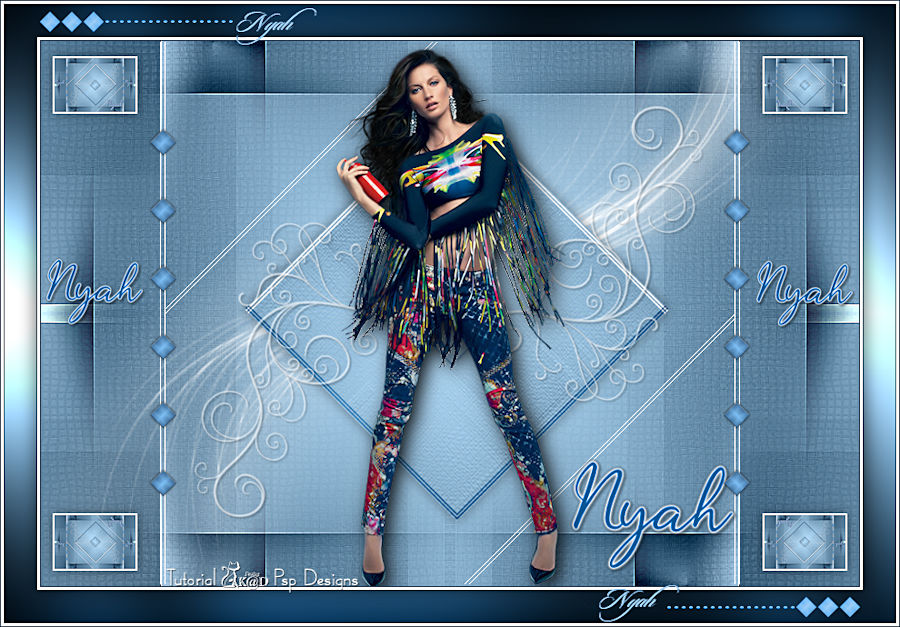
Extra Ex with tubes by Grisi


Click on banner below to go to the gallery


