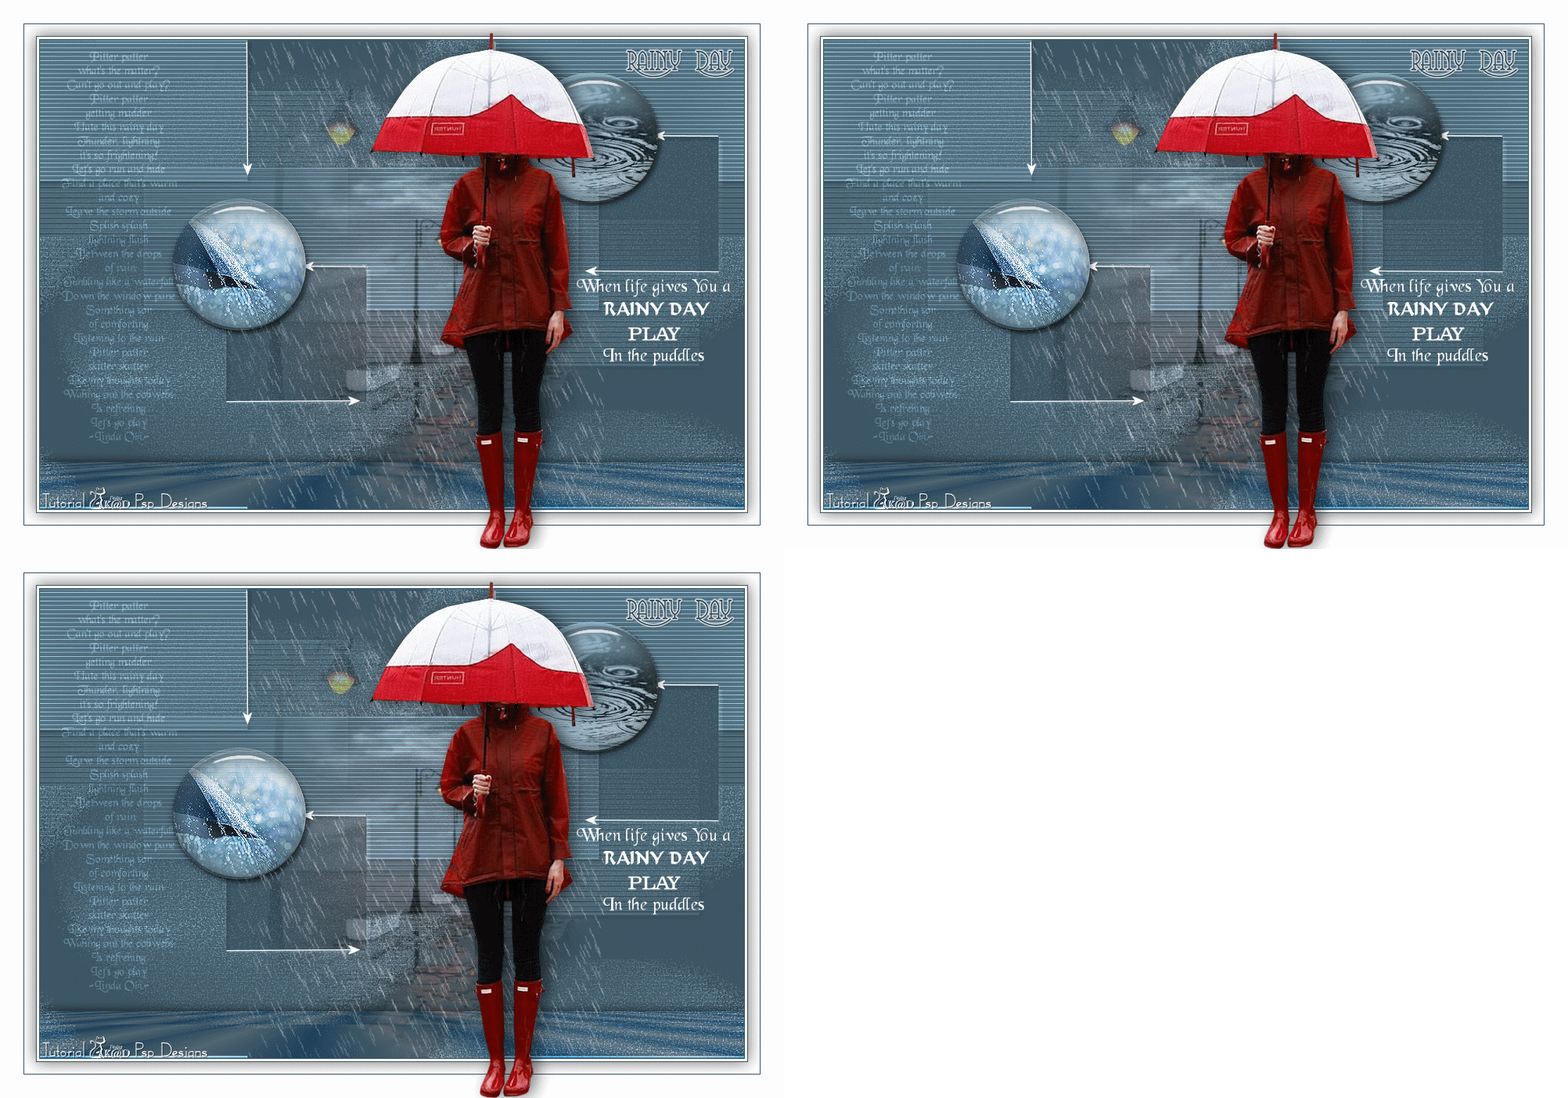
Materials for the tutorial :
Disclaimer :
Each Graphic is the property of the original artist to whom the copyright
belongs and may not be placed in a collection or offered for sale on-line or otherwise.
We are making an animation. So you also need Jacs Animation Shop!
Tubes :
(*) If you recognize them as one of your own, please let me know, so I can add your name or remove the tube.
1/ KaD_Woman_243
2/ KaD_MistedLandscape15
3/ 520_KaD_Element1 + 2 + 3 + 4
4/ 520_KaD_Lijst
5/ 520_KaD_MuRasMeisterPerspectiveTiling
6/ Regen 1 + 2 + 3 (*)
Alpha Selections : open in PSP and minimize
(this image is not empty – it contains alpha selections)
1/ 520_KaD_Alfakanaal
Selection : Save in your folder “Selections”
1/ SelectieOpSchijf
Filters & Presets : double click to install
1/ 520_KaD_Glass
2/ 520_KaD_GradientGlow
Masks : open in PSP and minimize
1/ NarahsMasks_1729
Color palette :
If you work with your own colors, make your own color palette with the alpha channel,
so you can easily switch between your colors.
There are color differences in the different versions of Psp.
Therefore, use the html codes of the color palette to be sure,
that you have the same colors. Also when merging layers, there may be color differences.

Plugins :
1/ Alien Sky Eye Candy 5 – Impact : Gradient Glow - Glass
2/ MuRa’s Meister – Perspective Tiling*
* my element is with the materials if the filter does not work
(-) Import into Filters Unlimited
------------------------------------------------
THE TUTORIAL
When working with your own colors, play with the Blend Mode and/or Opacity at your own discretion
From now on I use the terms "MIRROR" and "FLIP" again.
Mirror: Mirror horizontal - Flip: Mirror vertical
Let’s get started.
Remember to save your work often
Some print screens have other colors than the original.
Colors :
It's a gloomy day, don't make your colors too light
Foreground color : Color 2
Background color : Color 1
1
Open the alpha channel : 520_KaD_Alfakanaal
Window – Duplicate
Minimize the original – we continue on the copy
2
Fill with Foreground Color
3
Layers – New Raster layer
Fill with Background Color
Layers – New Mask layer – From image “NarahsMasks_1729” – see PS
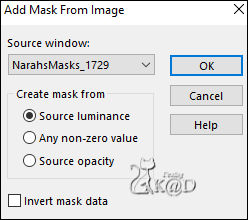
Layers – Merge – Merge group (Group Raster 2)
Effects – 3D-effects – Drop Shadow : V&H 5 – 55 – 2 – Color #000000
4
Effects – Image Effects – Seamless Tiling – see PS
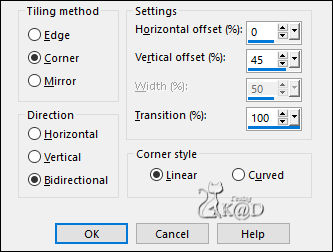
Adjust – Sharpness – Sharpen more
5
Layers – Duplicate (Copy of Group - Raster 2)
Change Blend mode to Dodge and Layer opacity to 65
6
Activate Raster 1
Layers – New Raster layer (Raster 2)
Selections – Load/Save Selection – Load Selection From Alpha Channel – Selectie 1 – see PS
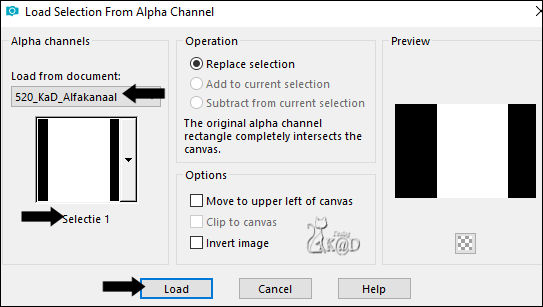
Activate and copy : KaD_MistedLandscape15
Edit – Paste into selection
Select none
7
Activate and copy : 520_KaD_Element1
Edit – Paste as a new layer (Raster 3)
Layers – Arrange – Bring to top
Press K – Pos X : 27 – Pos Y : 15 – Press M HELP
(K : activate the Pick Tool – M : deactivate the Pick Tool)
Change Blend mode to Overlay and Layer opacity to 50
8
Activate and copy : 520_KaD_Element2
Edit – Paste as a new layer (Raster 4)
Plugins – Alien Sky Eye Candy 5 – Impact – Gradient Glow
Choose on the left the preset : 520_KaD_GradientGlow or enter manually – see PS
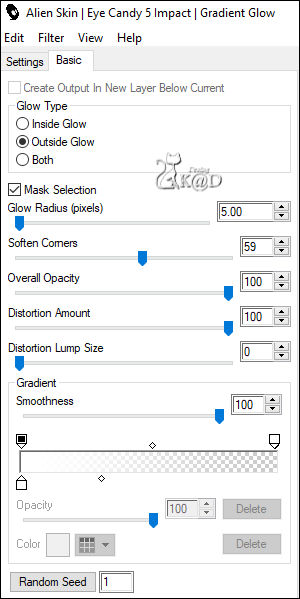
Effects – 3D-effects – Drop Shadow : V&H 2 – 35 – 2 – Color #000000
Image – Resize : 50%, all layers NOT checked
Press K – Pos X : 749 – Pos Y : 11 – Press M
Result
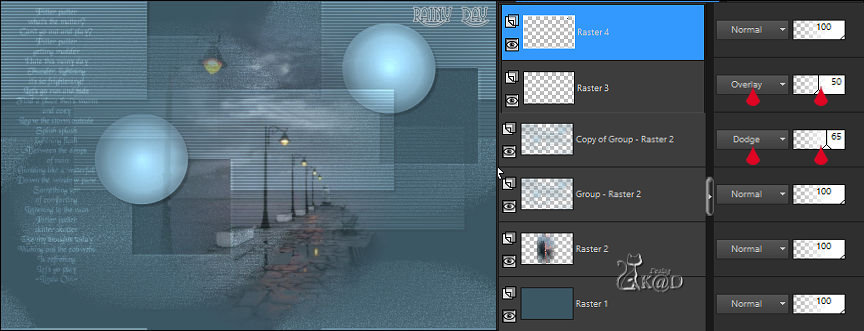
9
Change Background color to Color 3
Change Foreground tot Gradient – Linear – see PS
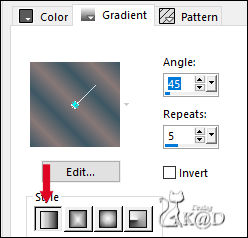
Layers – New Raster layer (Raster 5)
Selections – Load/Save Selection – Load Selection From Alpha Channel – Selectie 2 – see PS
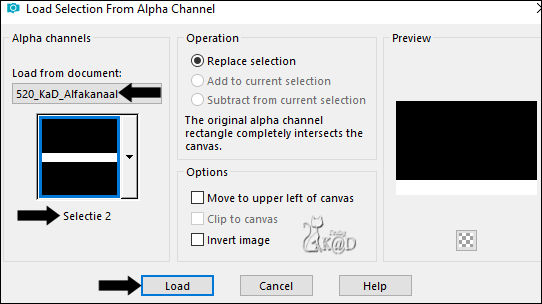
Fill selection with Gradient
Select none
Plugins – MuRa’s Meister – Perspective Tiling – Default but Height on 10*
* or use “520_KaD_MuRasMeisterPerspectiveTiling” if the filter doesn't work
(Paste on new layer in selection)
Change Blend mode to Overlay
10
Layers – Duplicate (Copy of Raster 5)
Change Blend mode to Dodge and Layer opacity to 42
Effects – 3D-effects – Drop Shadow : V&H 0 – 40 – 20 – Color #000000
11
Activate the layer just below (Raster 5)
Repeat the drop shadow
12
Activate and copy : 520_KaD_Element3
Edit – Paste as a new layer (Raster 6)
Layers – Arrange – Bring to top
Press K – Pos X : 238 – Pos Y : 2 – Press M
13
Activate and copy : 520_KaD_Element4
Edit – Paste as a new layer (Raster 7)
Press K – Pos X : 170 – Pos Y : 39 – Press M
Adjust – Sharpness – Sharpen
13-1
Layers – New Raster layer (Raster 8)
Selections – Load/Save Selection – Load Selection From Alpha Channel – Selectie 3 – see PS
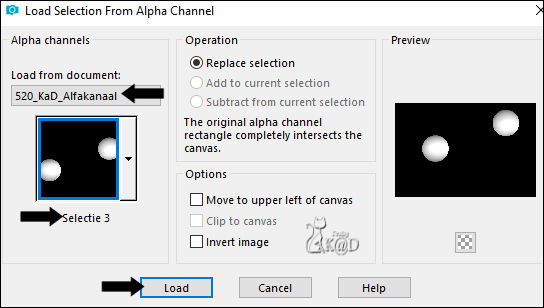
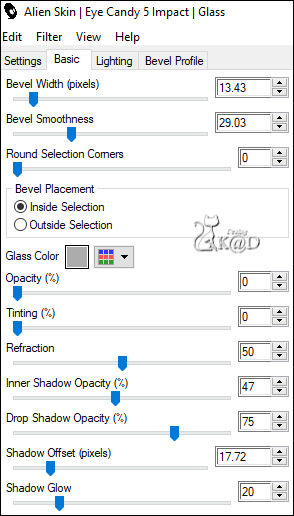
Plugins – Alien Sky Eye Candy 5 – Impact – Glass
Choose on the left thepreset : 520_KaD_Glass or enter manually – see PS
Select none
14
Add your name or watermark,
Add my watermark to your creation HERE
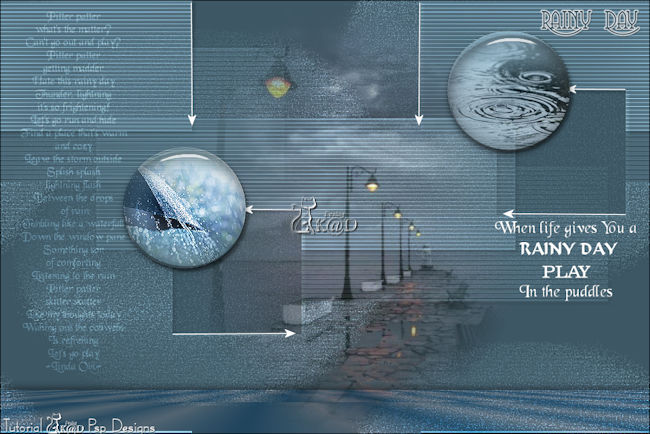
Result
Save image as a PSP Animation Shop (*psp)
15
Edit – Copy special – Copy merged
16
Activate: 520_KaD_Lijst
Window – Duplicate– we work on the copy
You can close the original file
Edit – Paste into selection
17
Select all
Selection – Modify – Contract : 46
Effects – 3D-effects – Drop Shadow : V&H : V&H 0 – 60 – 30 – Color #000000
Select none
18
Activate and copy : KaD_Woman_243
Edit – Paste as a new layer
Image – Mirror
Image – Resize : 85%, all layers NOT checked
Press K – Pos X : 471 – Pos Y : 41 – Press M
Effects – 3D-effects – Drop Shadow : V 0 – H 7 – 50 – 30 – Color #000000
Adjust – Sharpness – Sharpen
19
Activate Raster 1
Selection – Load/save selection – Load selection from disc : 520_KaD_Selectie_Regen
Now find the selection you saved on your disk
20
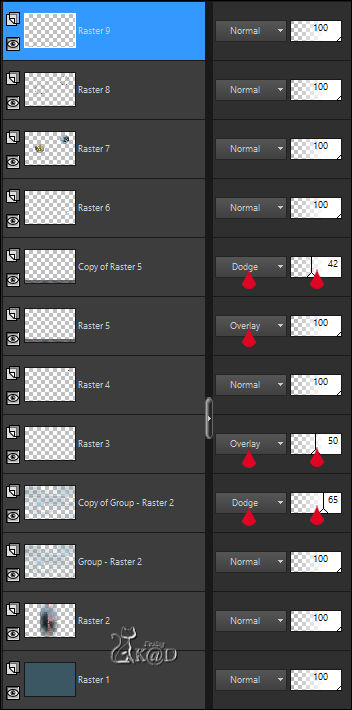
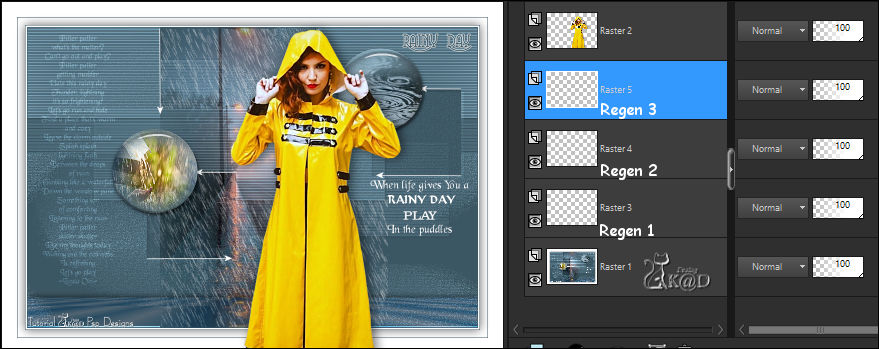
Layers – New Raster layer (Raster 3)
Activate and copy: Regen 1
Edit – Paste into selection
21
Layers – New Raster layer (Raster 4)
Activate and copy : Regen 2
Edit – Paste into selection
22
Layers – New Raster layer (Raster 5)
Activate and copy: Regen 3
Edit – Paste into selection
Select none
Result
23
Activate top layer
Close the layers Raster 4 and Raster 5 (click on the eye )
Edit – Copy special – Copy Merged
24
Open Jasc Animation Shop (JAS)
Edit – Paste as a new animation
Back to PSP
25
Close the layer Raster 3 and open de layer Raster 4
Edit – Copy special – Copy Merged
Back to JAS
Edit – Paste after current frame
Back to PSP
26
Close the layer Raster 4 and open de layer Raster 5
Edit – Copy special – Copy Merged
Back to JAS
Edit – Paste after current frame
27
Select all
Animation – Frame properties
Change Display time to 12
Click on the filmstrip to view your animation
You may adjust the time to your liking
28
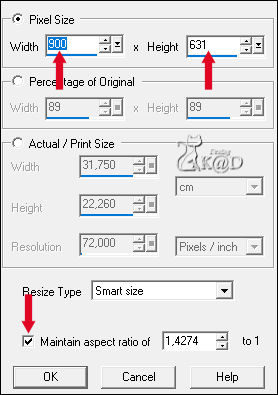
Animation– Resize animation – see PS
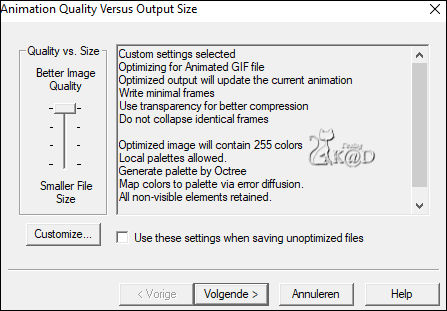
File – Save as .gif
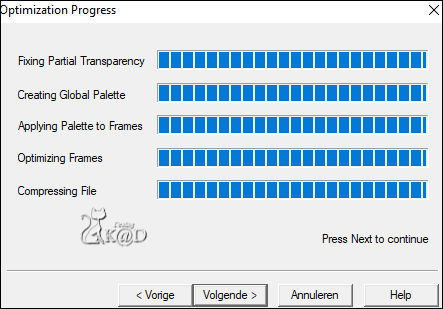
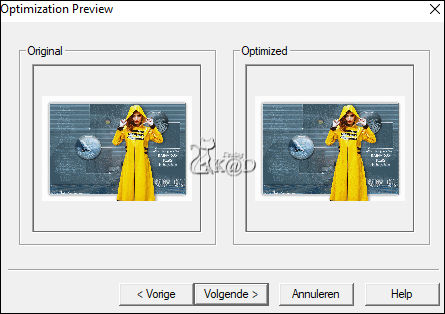
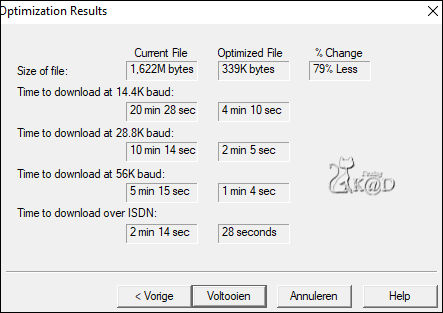
Click Volgende 3x and then Voltooien
29
I hope you enjoyed this tutorial
Karin
25.05.2023
Mail me your version 
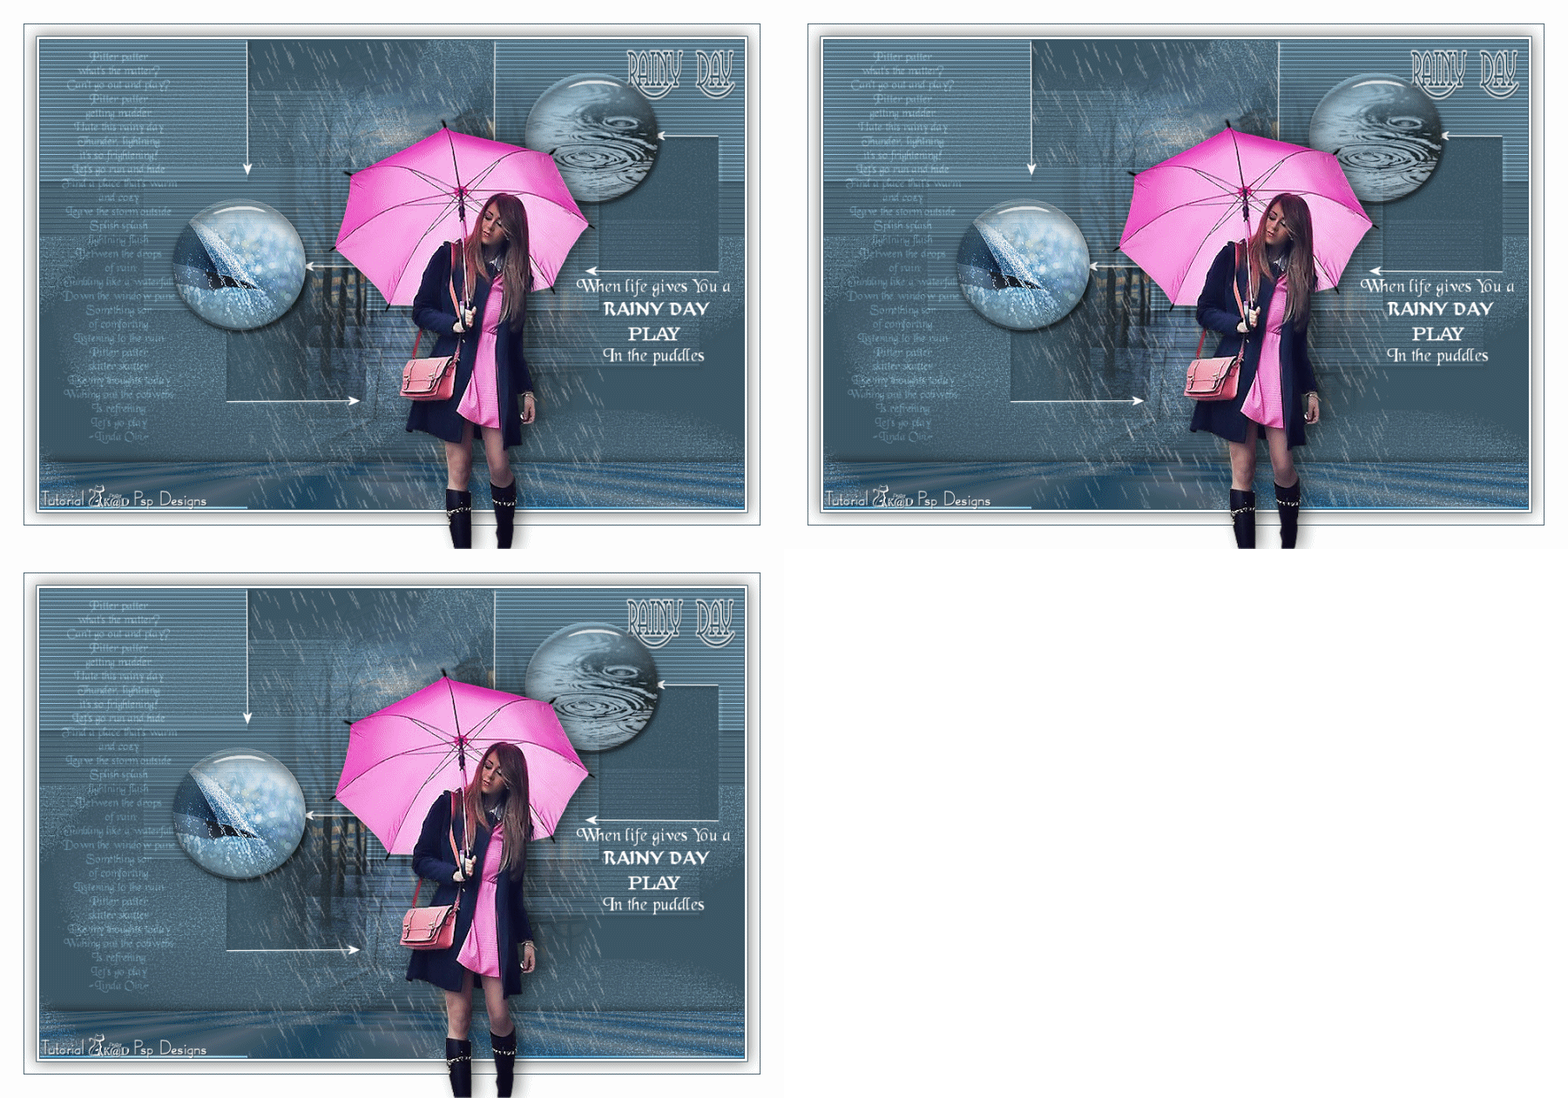
Extra Ex tube from myself
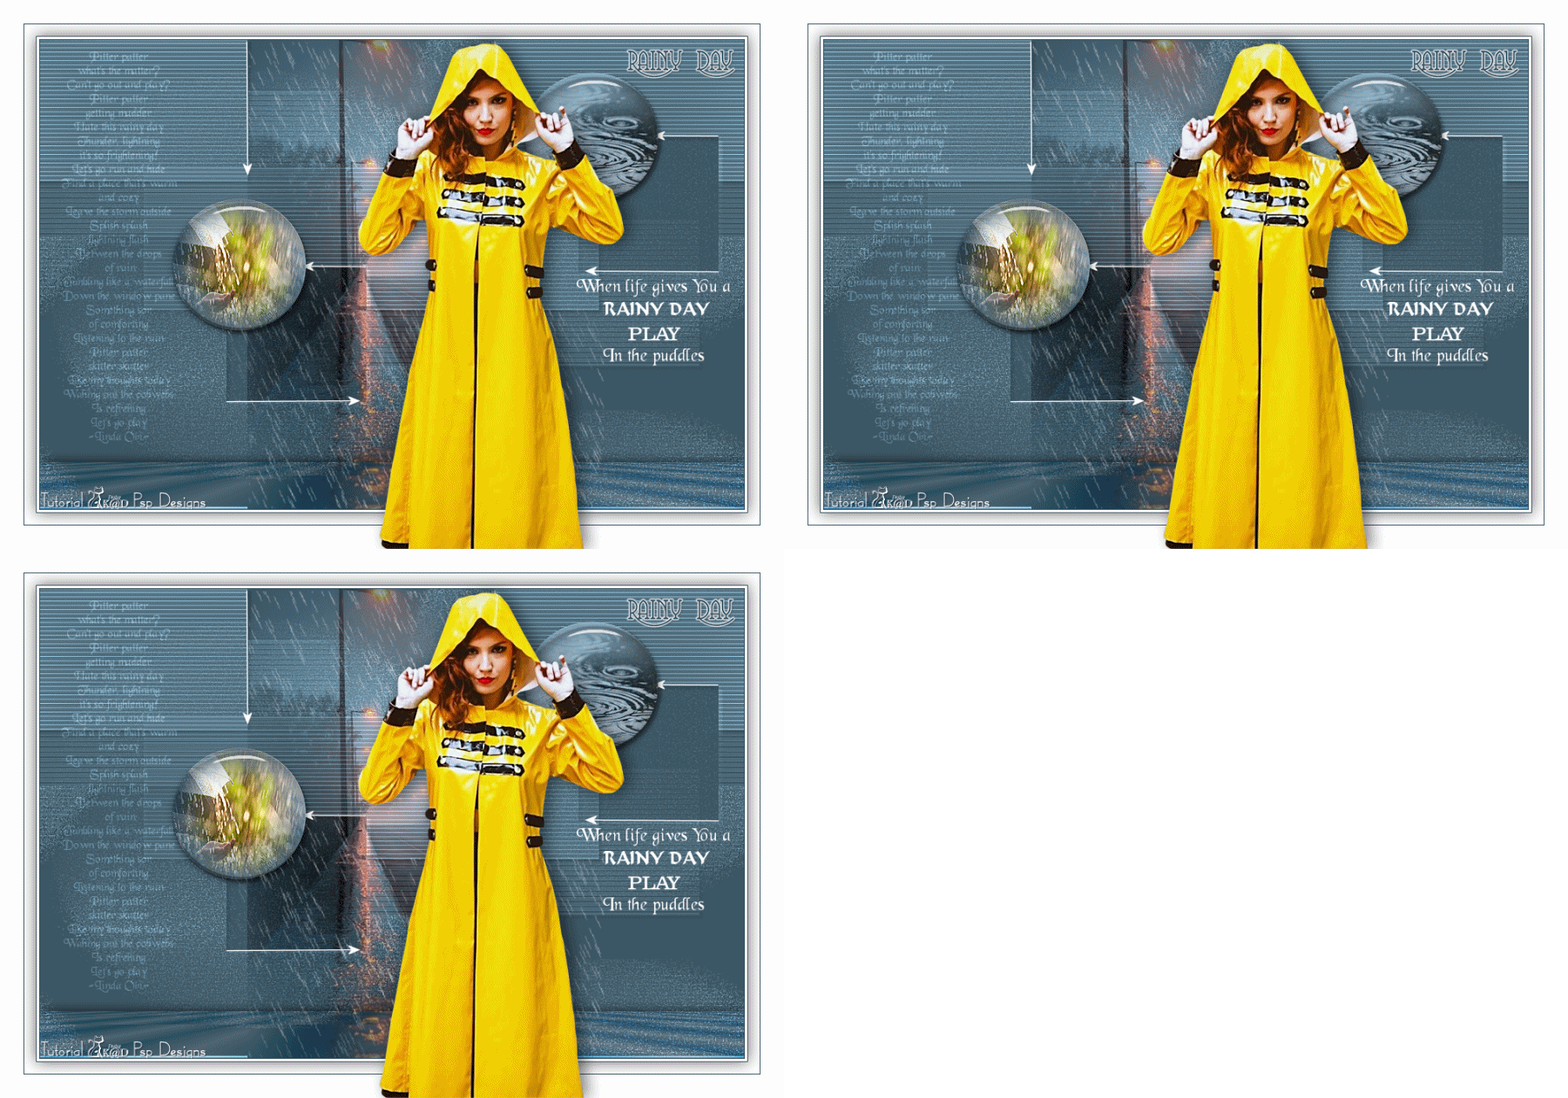
Extra Ex tube from myself

Click on banner below to go to the gallery


