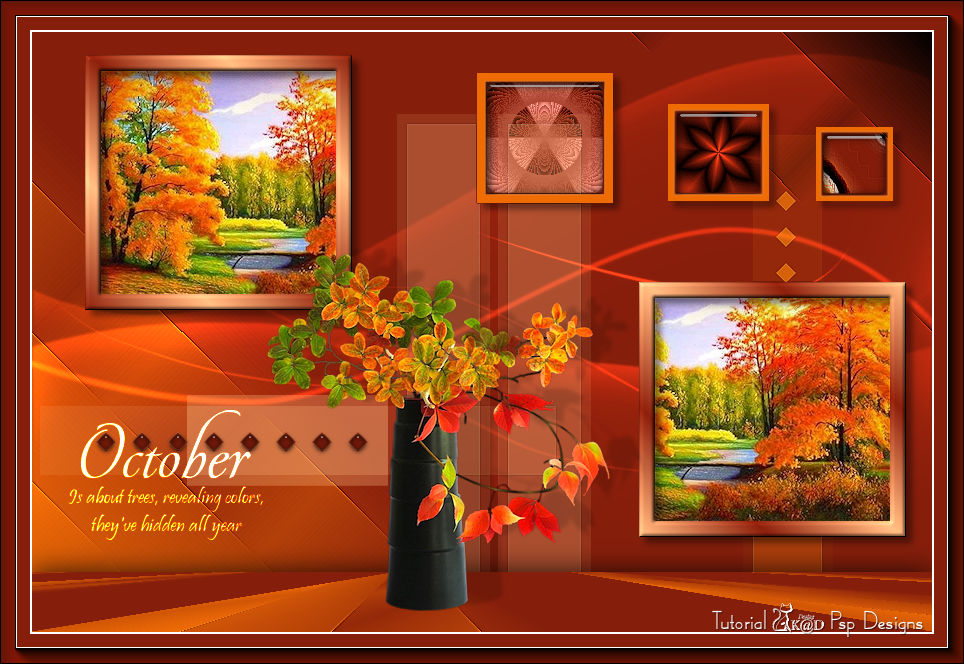
Materials for the tutorial :
Disclaimer :
Each Graphic is the property of the original artist to whom the copyright belongs and
may not be placed in a collection or offered for sale on-line or otherwise.
Tubes :
(*) If you recognize them as one of your own, please let me know, so I can add your name or remove the tube.
In October Autumn begins. We work with autumn colors.
Choose : a misted landscape tube with autumn trees and a vase with autumn flowers.
I use a tube from Mina & SVB.
1/ BL20_KaD_Text
Alpha Selections : open in PSP and minimize
1/ BL20_KaD_Alfakanaal (this image is not empty – it contains alpha selections)
Masks : open in PSP and minimize
1/ BL20_KaD_Mask
2/ Narah_mask_0511
Gradient : Put the gradient in your folder gradients
1/ Blueberries-FK
Color palette :
If you work with your own colors, make your own color palette with the alpha channel,
so you can easily switch between your colors.
There are color differences in the different versions of Psp.
Therefore, use the html codes of the color palette to be sure,
that you have the same colors. Also when merging layers, there may be color differences.
Plugins :
1/ Mehdi : Sorting Tiles
2/ Unlimited 2.0 : Paper Textures (-)
3/ Italian Editors Effect : Fiore **
4/ Italian Editors Generatore : Radiale **
5/ Alien Skin – Eye Candy 5 : Impact
6/ MuRa’s Meister : Perspective Tiling
7/ AAA Frames – Foto Frame
(-) Import into Filters Unlimited
** Can also be used in Unlimited
---------------------------------------
THE TUTORIAL
When working with your own colors, play with the Blend Mode and/or Opacity at your own discretion
From now on I use the terms "MIRROR" and "FLIP" again.
Mirror: Mirror horizontal - Flip: Mirror vertical
Let’s get started.
Remember to save your work often
Colors :
Color 1 (Foreground color) = #851e0b
Color 2 (Background color )= #ef6c05
Color 3 : see #8
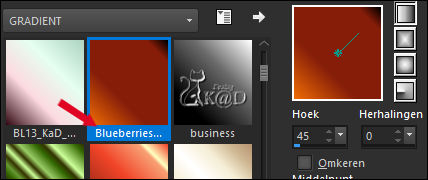
Foreground : Set to Gradient Blueberries-FK – Linear – see PS
(Angel 45 - Repeats 0)
1
Open the alpha channel : BL20_KaD_Alfakanaal
Window – Duplicate
Minimize the original – we continue on the copy
2
Fill with gradient
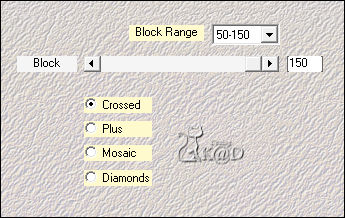
Plugins – Mehdi – Sorting Tiles – see PS
3
Effects – Edge effects – Enhance More
4
Change the foreground gradient back to color
Set background color to white (#ffffff)
Layers – New Raster layer
Fill with background color
Layers – New mask layer – from image “BL20_KaD_Mask” – see PS
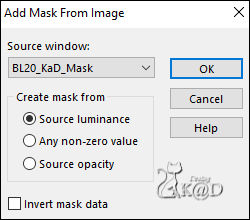
Layers – Merge – Merge Group (Group Raster 2)
5
Activate Magic wand – Set modus to add
Click with magic wand in the middle of the two big squares
Activate Raster 1
Selections – Promote selection to layer (Promoted Selection)
Layers – Move – Move to top
Plugins – Unlimited 2.0 – Paper Textures – Canvas Fine – Default
Keep selection !
6
Activate & copy : misted landscape tube
Edit – Paste as a new layer
Resize if necessary
Move a part of the tube into the selection of top square
Selection invert
Press Delete on the keyboard
Select none
Sharpen if necessary
7
Activate Group Raster 2
Activate Magic wand – Set modus to replace
Click with magic wand in the middle of the bottom big square
Edit – Paste as a new layer (tube is still in memory)
Layers – Move – Move to top
Resize if necessary
Move another part of the tube into the selection
Selection invert
Press Delete on the keyboard
Select none
Sharpen if necessary
Layers – Merge – Merge down
Repeat 1x (Promoted Selection)
8
Activate Group Raster 2
Set background color to color 2 and choose a lighter tone.
(Put this color in your color pallet as color 3)
Activate Color changer tool & right click on any white frame HELP
(Normally all the white is now changed to light orange.)
9
Activate Raster 1
Edit – copy
Activate Group Raster 2
Click with magic wand in the smallest square of the little squares (the most right)
Layers – New raster layer (Raster 2)
Edit – Past into selection
Effects – Texture effects – Polished Stone – see PS
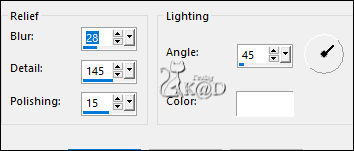
Adjust – Sharpen – Sharpen more
Select none
Layers – Move – Move down
10
Activate Group Raster 2
Click with magic wand in the middle square of the little squares
Activate Raster 1
Selections – Promote selection to layer (Promoted Selection 1)
Layers – Duplicate
Plugins – Italian Editors Effect – Fiore – see PS
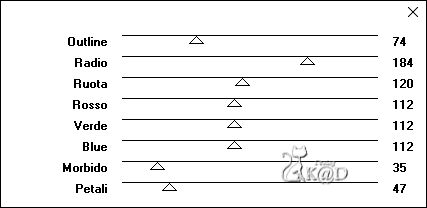
Blend mode : Overlay
Layers – Merge – Merge down
Select none
Adjust – Sharpen – Sharpen more
11
Activate Raster 1
Selections – Load/Save Selection – Load Selection From Alpha Channel – Selectie 9 – see PS
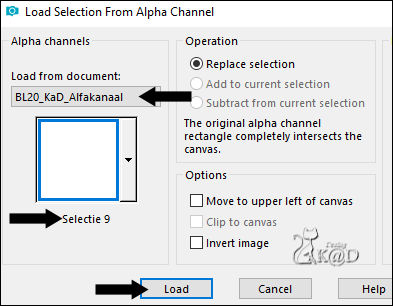
Selections – Promote selection to layer (Promoted Selection 2)
Layers – Duplicate
Plugins – Italian Editors Generatore – Radiale – see PS
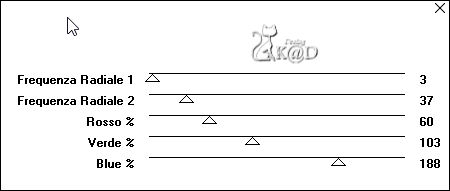
Blend mode : Luminance (Legacy)
Layers – Merge – Merge down
Select none
Activate Raster 2 – see PS
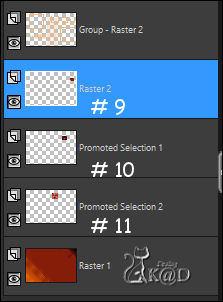
Layers – Merge – Merge down
Repeat 1x
Plugins – Alien Skin – Eye Candy 5 – Impact – Glass – CLEAR
12
Foreground : Color 1 – Background : Color 3
Foreground : Gradients fore- background: Linear – see PS
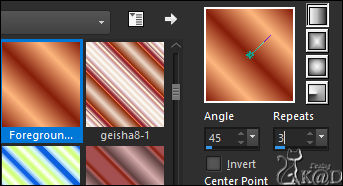
Activate top layer (Promoted Selection)
Layers – New raster layer (Raster 2)
Selections – Load/Save Selection – Load Selection From Alpha Channel – Selectie1 – see PS
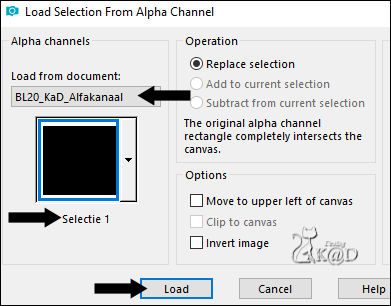
Fill selection with gradient
13
Effects – Inner bevel – see PS
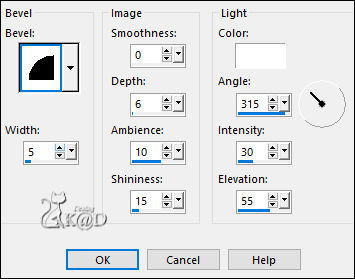
Select none
13-1
Effects – 3D-effecten – Drop shadow : V&H 6 – 45 – 10 – Color #000000
14
Change the foreground gradient by placing a check mark at the box Invert
Layers – New raster layer (Raster 3)
Selections – Load/Save Selection – Load Selection From Alpha Channel – Selectie2 – see PS
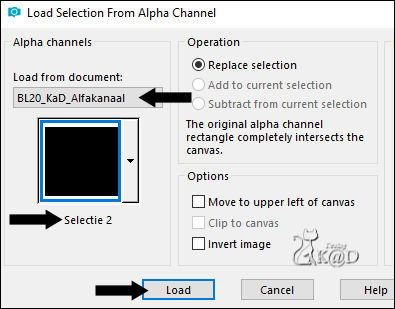
Fill selection with gradient
Repeat #13 en #13-1 (inside bevel and drop shadow)
Layers – Merge – Merge down
Repeat 1x (Promoted Selection)
15
Activate group Raster 2
Selections – Load/Save Selection – Load Selection From Alpha Channel – Selectie8 – see PS
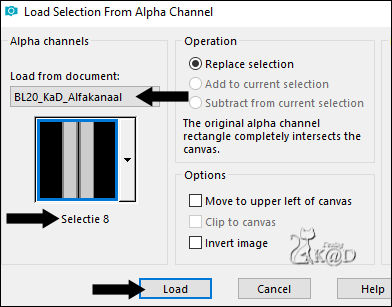
Effects – Edge effects – Enhance
16
Selections – Load/Save Selection – Load Selection From Alpha Channel – Selectie6 – see PS

Selections – Promote selection to layer (Promoted Selection 1)
Select none
Image – FRee Rotate : Right – 90 – no check marks
Press K – Pos X : 710 – Pos Y : 103 – Press M HELP
(K : activate the Move Tool – M : deactivate the Move Tool)
Layers – Move – Move down
Repeat 1x
Blend mode : Hard Light
Adjust – Sharpen – Sharpen
17
Set foreground to Color 1
Layers – New raster layer (Raster 2)
Layers – Move – Move to top
Selections – Load/Save Selection – Load Selection From Alpha Channel – Selectie7 – see PS
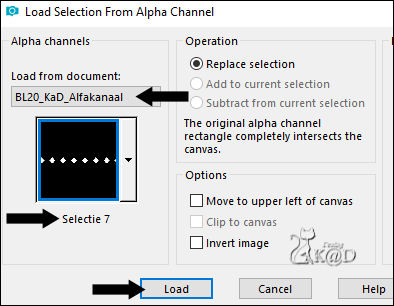
Fill selection with foreground color
Plugins – Alien Skin – Eye Candy 5 – Impact – Glass – CLEAR
Select none
18
Set foreground to Color 2
Layers – New raster layer (Raster 3)
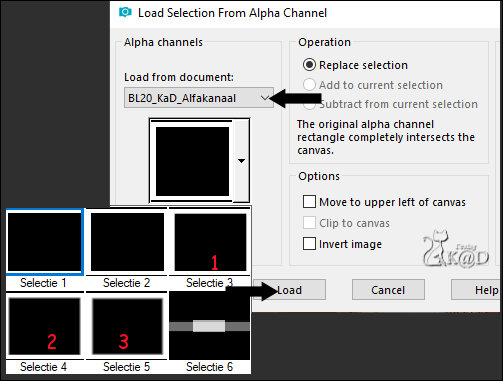
Selections – Load/Save Selection – Load Selection From Alpha Channel – Selectie3
Fill with Foreground color (1)
Selections – Load/Save Selection – Load Selection From Alpha Channel – Selectie4
Fill with Foreground color (2)
Selections – Load/Save Selection – Load Selection From Alpha Channel – Selectie5
Fill with Foreground color (3) – see PS
Do this all on the same layer !
Select none
Effects – 3D-effecten – Drop shadow : V&H 6 – 45 – 10 – Color #000000
19
Activate Raster 1
Layers – Duplicate (Copy of Raster 1)
Layers – Move – Move to top
Plugins – MuRa’s Meister – Perspective Tiling – Default but set Height to 10
Effects – 3D-effecten – Drop shadow : V&H 0 – 80 – 40 – Color #000000
20
Activate & copy : tube vase with autumn flowers
Edit – Paste as a new layer (Raster 4)
Resize – Sharpen – mirror etc. if necessary
Put it a bit out of center, in the middle of the floor
Effects – 3D-effecten – Drop shadow : V -6 – H 35 – 15 – 5 – Color #000000
21
Activate & copy : BL20_KaD_Text
Edit – Paste as a new layer (Raster 5)
Image – Resize: 80%, No check mark all layers
Press K – Pos X : 36 – Pos Y : 378 – Press M
Blend mode : Dodge
22
Set Background to color white
Activate Raster 1
Layers – New raster layer
Fill with background color
Layers – New mask layer – from image “Narah_mask_0511” – see PS
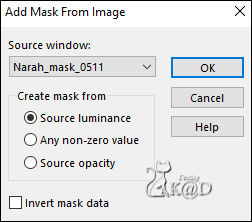
Layers – Duplicate (Mask is now 2x in layers pallet) – see PS
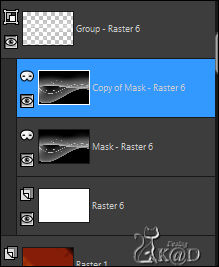
Layers – Merge – Merge group (Group – Raster 6)
Image – Mirror and flip
Blend mode : Dodge & layers opacity : 75
Result
Check your blend mode and layer opacities carefully
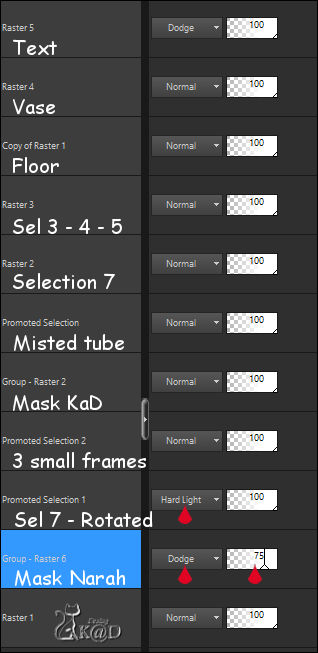
Layers – Merge all
23
Image – Add borders :
2 pix white
Select all
30 pix Color 1
Selection invert
Plugins – AAA Frames – Foto Frame – see PS
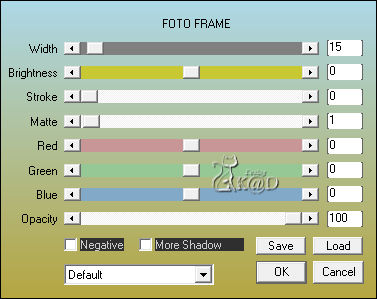
Select none
24
Add your name or watermark,
Add my watermark to your creation HERE
25
Layers – Merge all
Image – Resize – Width 900 Pixels – Resize all Layers checked
Adjust – Sharpen – Unsharp Mask : 2 – 30 – 2 – no check marks
Save as JPG file and you're done!
I hope you enjoyed this tutorial
Karin
24/05/2019
Email me your result 


