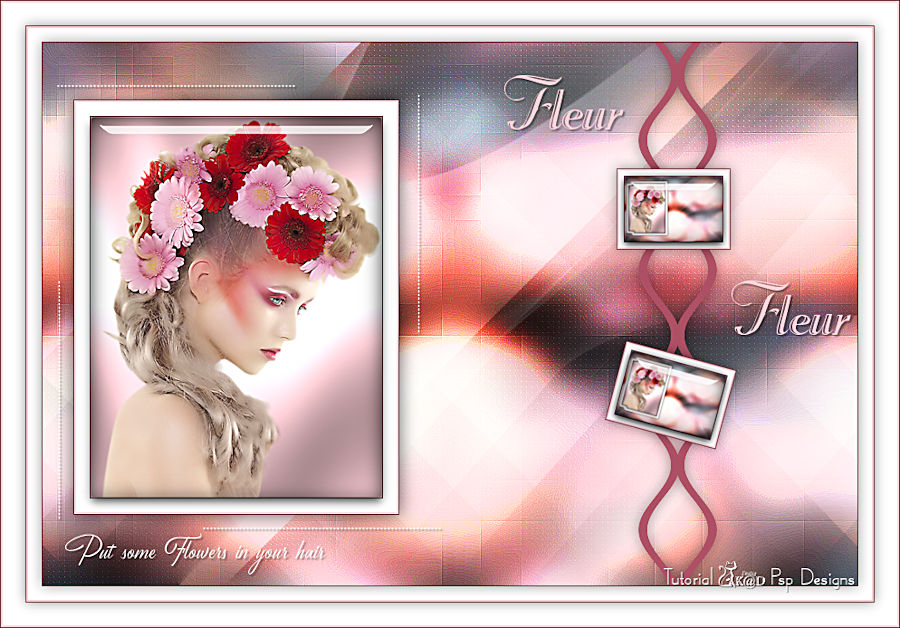
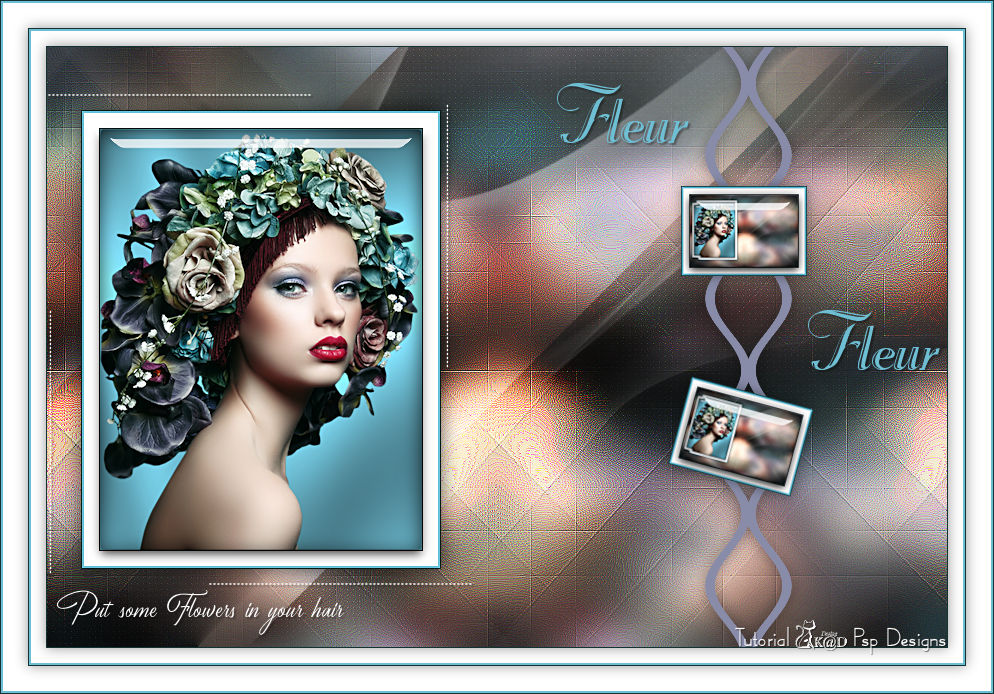
In order not to ruin the surprise for others PLEASE do not post your version in puclic
before the end of the challenge.
In this case it’s 28/06/2019.
Submit your work no later than 27/06/2024.
Thanks !
Materials for the tutorial :
Disclaimer :
Each Graphic is the property of the original artist to whom the copyright belongs and
may not be placed in a collection or offered for sale on-line or otherwise.
Tubes :
(*) If you recognize them as one of your own, please let me know, so I can add your name or remove the tube.
THEME
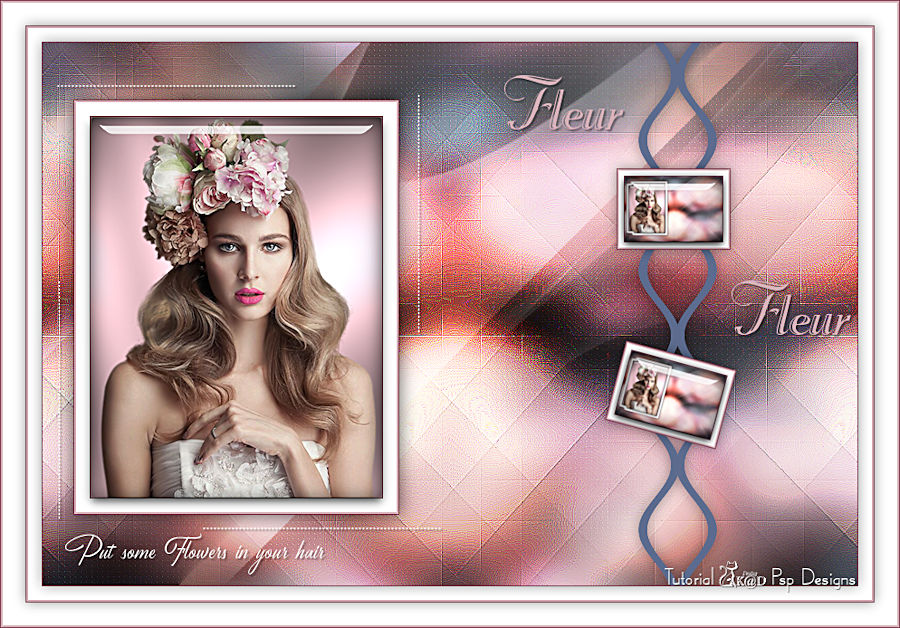
Flowers in your hair
Tubes : (*)
Do you recognize a tube of yourself, please contact me so that I can mention your name or – if you wish – the tube can be removed.
Choose a tube of a woman's face with flowers in her hair.
It may be below the shoulders.
I use a tube of Karine Dreams
1/ BL62_Element1 + 3 + 4
Alpha Selections : open in PSP and minimize
1/ BL62_KaD_Alfakanaal
(this image is not empty – it contains alpha selections)
Masks : open in PSP and minimize
1/ Narah_mask_0628
2/ Narah_Mask_1140
Color palette :
If you work with your own colors, make your own color palette with the alpha channel,
so you can easily switch between your colors.
There are color differences in the different versions of Psp.
Therefore, use the html codes of the color palette to be sure,
that you have the same colors. Also when merging layers, there may be color differences.
Plugins :
1/ Unlimited 2.0 – Filter Factory Gallery V – Picture Chopper (-)
2/ Graphics Plus – Cross Shadow
3/ Alien Skin – Eye Candy 5 – Impact
4/ Carolaine and Sesibility – CS-LDots
(-) Import into Filters Unlimited
---------------------------------------
THE TUTORIAL
When working with your own colors, play with the Blend Mode and/or Opacity at your own discretion
From now on I use the terms "MIRROR" and "FLIP" again.
Mirror: Mirror horizontal - Flip: Mirror vertical
Let’s get started.
Remember to save your work often.
Some print screens have other colors than the original.
Colors :
First create your own color palette, so that you can easily switch between your colors.
Use the Alfa_Kleurenpallet-6 in the materials for this.
Color 1: Dark color from your tube
Color 2: Light color from your tube (lighter version color 1)
Color 3: Contrasting color, not too dark
Color 4: Contrasting color, not too dark
Color 5: white #ffffff
Color 6: black #000000
Foreground: Color 5
Background : Color 2
1
Open the alpha channel : BL62_KaD_Alfakanaal
Window – Duplicate
Minimize the original – we continue on the copy
2
Select all
Activate and copy : BL62_Element1
Edit – Paste into selection
Select none
* Would you like to adjust your Color:
New raster layer
Fill with your Color 2
Layers – Arrange – Down
Top Layer –Blend Mode Hard Light (or whatever suits you)
Layers – merge – merge down
Rename the layer Raster 1
3
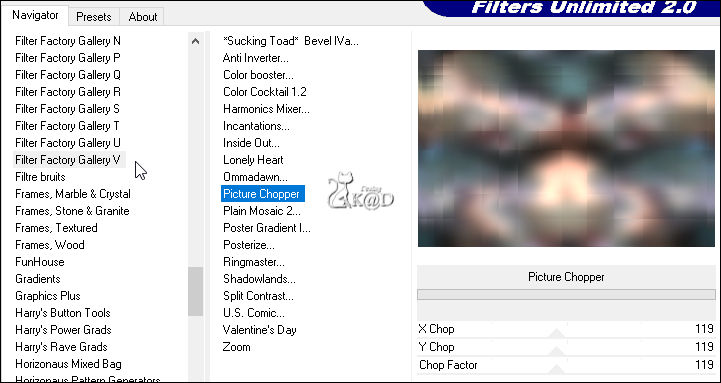
Plugings –Filters Unlimited 2.0 – FFGV – Picture Chopper – see PS
4
Effects – Edge effects – Enhance more
5
Layers – Duplicate
Layers – New Mask layer – From image “Narah_mask_0628” – see PS
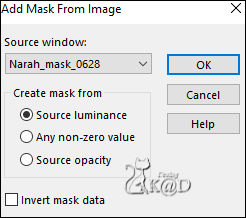
Layers – Merge – Merge group (Group - Copy of Raster 1)
Effects – Edge effects – Enhance
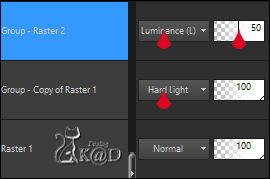
Change Blend mode to Hard Light
6
Effects – Image effects – Seamless Tiling – Side by Side
7
Layers – New Raster layer
Fill with foreground color
Layers – New Mask layer – From image “Narah_Mask_1140” – see PS
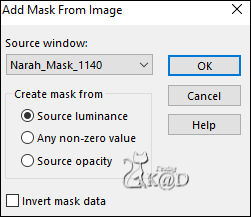
Layers – Duplicate (You now have 2x the mask in your layers)
Layers – Merge – Merge group (Groep - Raster 2)
Change Blend mode to Luminance (Legacy) and Layer opacity to 50
Result
8
Change foreground Color to Color 1
Layers – New Raster layer (Raster 2)
Selections – Load/Save Selection – Load Selection From Alpha Channel – Selectie 1- see PS
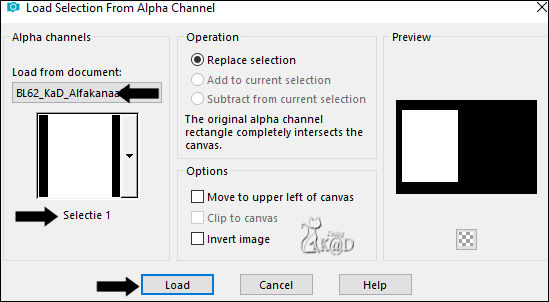
Fill selection with foreground Color
Selection – Modify – Contract : 1
Press Delete on the keyboard
9
Fill selection with background Color
Selection – Modify – Contract : 2
Press Delete on the keyboard
10
Change foreground Color to Color 5
Fill selection with foreground Color
Selection – Modify – Contract : 15
Press Delete on the keyboard
11
Change foreground Color to Color 1
Fill selection with foreground Color
Selection – Modify – Contract : 1
Press Delete on the keyboard
12
Fill selection with background Color
Effects – Graphics Plus – Cross Shadow – Default but Intensity on 52
13
Activate and copy : Your tube
Edit – Paste as a new layer (Raster 3)
Reduce the size so that the tube fits into the selection (The bottom does not have to fit completely)
Selection – Invert
Press Delete on the keyboard
14
Selection – Invert
Layers – New Raster layer (Raster 4)
Plugins – Alien Skin – Eye Candy 5 – Impact – Glass – CLEAR
Select none
Layers – merge – merge down
Repeat 1x (Raster 2)
Effects – 3D-effects – Drop Shadow : V&H 0 – 60 – 30 – Color #000000
Adjust – Sharpen – Unsharp Mask : 2 – 30 – 2 – no check marks
15
Edit – Copy – Copy merged
Edit – Paste as a new image
Image – Resize : 15%, all layers
Select all
16
Image – Add borders :
1 pix Color 1
7 pix Color 5
2 pix Color 2
1 pix Color 1
Effects – 3D-effects – Drop Shadow : V&H – 40 – 20 – Color #000000
17
Plugins – Alien Skin – Eye Candy 5 – Impact – Glass – CLEAR
Select none
Edit – Copy
Back to your work
18
Change foreground Color to Color 4
Layers – New Raster layer (Raster 3)
Selections – Load/Save Selection – Load Selection From Alpha Channel – Selectie 2 – see PS
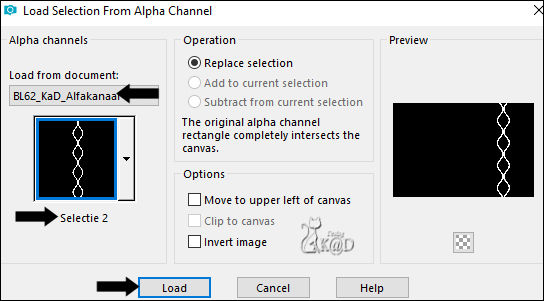
Fill selection with foreground Color
Select none
Effects – 3D-effects – Drop Shadow : V&H 0 – 40 – 20 – Color #000000
19
Edit – Paste as a new layer – image is still in memory (Raster 4)
Image – Resize : 80%, all layers NOT checked Adjust – Sharpen – Unsharp Mask : 2 – 30 – 2 – no check marks
Press K – Pos X : 634 – Pos Y : 139 – Press M HELP
Effects – 3D-effects – Drop Shadow : V&H 0 – 40 – 20 – Color #000000
20
Layers – Duplicate (Copy of Raster 4)
Image – Free Rotate: Right – 15 – nothing checked
Press K – Pos X : 608 – Pos Y : 316 – Press M
21
Activate and copy : BL62_Element3
Edit – paste as a new layer (Raster 5)
Press K – Pos X : 510 – Pos Y : 36 – Press M
Activate the 'Color Changer' tool and right-click (background) in the text.
This text should now have your Color 2
Effects – 3D-effects – Drop Shadow : V&H 2 – 35 – 2 – Color #000000
22
Activate and copy : BL62_Element4
Edit – paste as a new layer (Raster 6)
Press K – Pos X : 16 – Pos Y : 47 – Press M
Effects – 3D-effects – Drop Shadow : V&H 2 – 35 – 2 – Color #000000
24
Activate Raster 1
Selections – Load/Save Selection – Load Selection From Alpha Channel – Selectie 3 – see PS
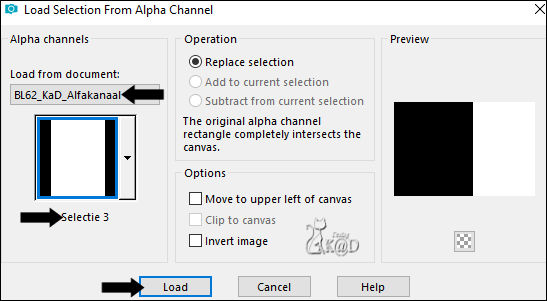
Selections – Promote selection to Layer (Promoted selection)
Select none
Effects – Image effects – Seamless Tiling – Default but Transition on 100
25
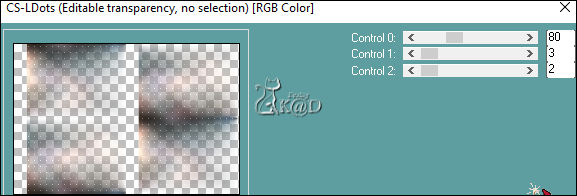
Plugins – Carolaine and Sensibility – CS-LDots – see PS
Adjust – Sharpen – Sharpen
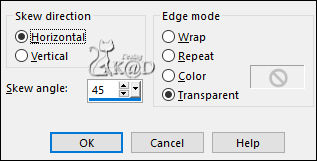
Effects – Geometric effects – Skew – see PS
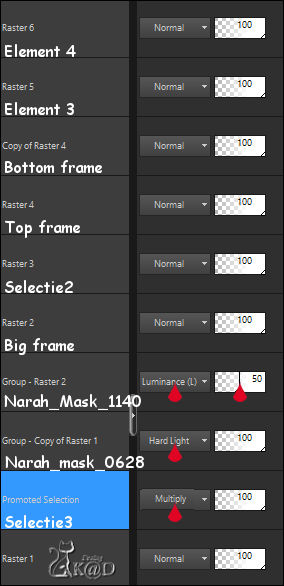
Change Blend mode to Multiply
Result
26
Image – Add borders :
1 pix Color 1
Select all
15 pix Color 5
2 pix Color 2
1 pix Color 1
Effects – 3D-effects – Drop Shadow : V&H 0 – 40 – 20 – Color #000000
27
Select all
Image – Add borders : 25 pix Color 5
Effects – 3D-effects – Drop Shadow : V&H 0 – 40 – 20 – Color #000000
Select none
28
Image – Add borders :
2 pix Color 2
1 pix Color 1
29
Add your name or watermark,
Add my watermark to your creation HERE
30
Layers – Merge – Merge all (Flatten)
Image – Resize – Width 900 Pixels - Resize all Layers checked
Adjust – Sharpen – Unsharp Mask : 2 – 30 – 2 – no check marks
Save as JPG file and you're done!
I hope you enjoyed this tutorial
Karin
09/04/2024
Extra ex tube by LB
Extra ex tube by Thafs
