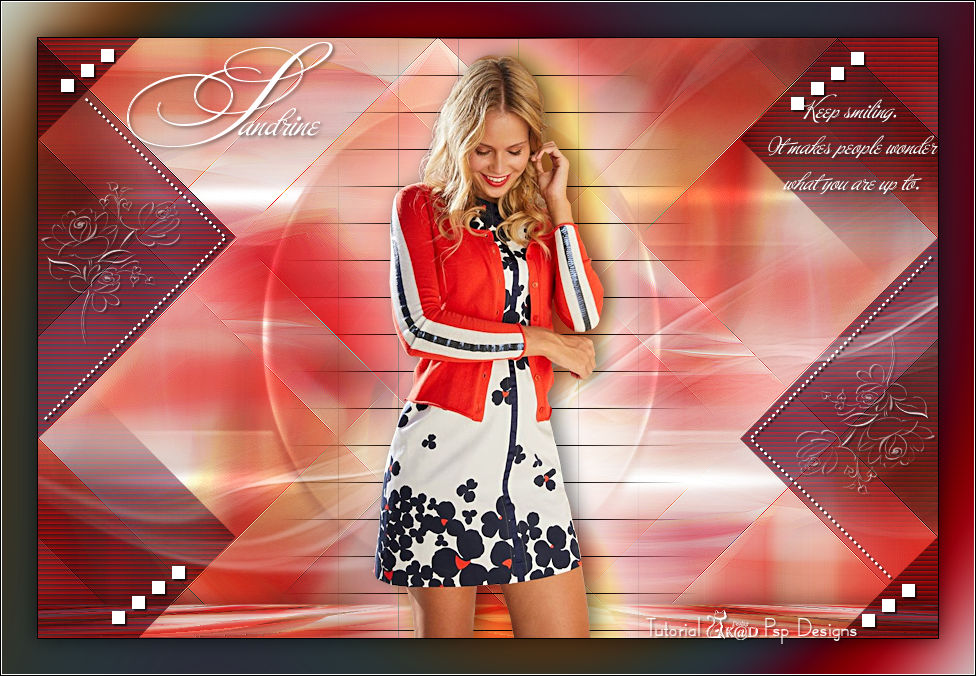
Materials for the tutorial :
Disclaimer :
Each Graphic is the property of the original artist to whom the copyright
belongs and may not be placed in a collection or offered for sale on-line or otherwise.
Tubes :
(*) If you recognize them as one of your own, please let me know, so I can add your name or remove the tube.
Open your tubes, duplicate, remove watermarks, close original tubes.
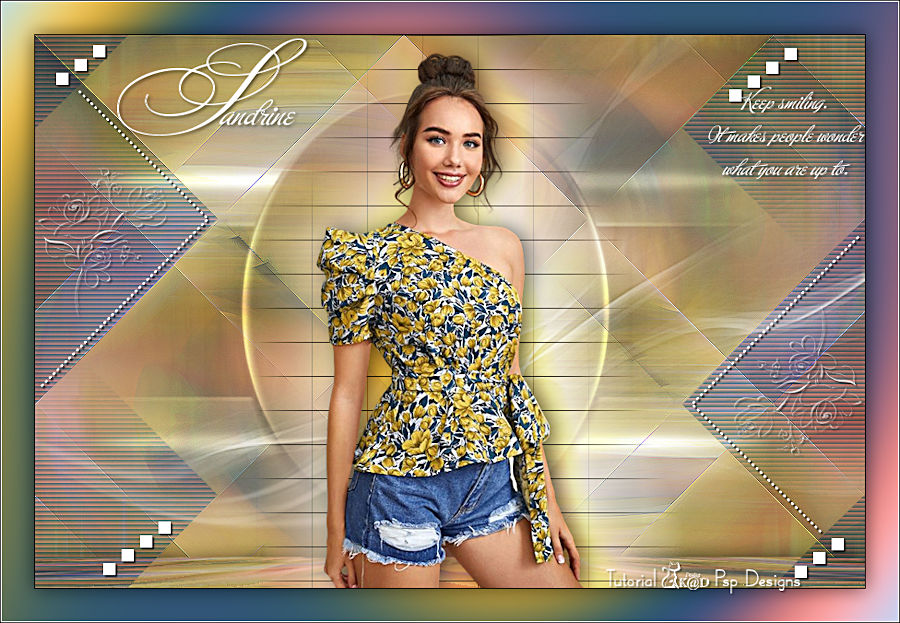
1/ KaD_Woman_244
2/ 524_KaD_Element_Vloer_Punt19
3/ 524_KaD_Element1
Alpha Selections : open in PSP and minimize
(this image is not empty – it contains alpha selections)
1/ 524_KaD_Alfakanaal
Masks : open in PSP and minimize
1/ Narah_Mask_1412
2/ Narah_Mask_1437
Color palette :
If you work with your own colors, make your own color palette with the alpha channel,
so you can easily switch between your colors.
There are color differences in the different versions of Psp.
Therefore, use the html codes of the color palette to be sure,
that you have the same colors. Also when merging layers, there may be color differences.

Plugins :
1/ Mehdi : Wavy Lab 1.1 – Sorting Tiles
2/ Toadies : Ommadown
3/ MuRa’s Meister : Perspective Tiling (element is in the materials)
(-) Import into Filters Unlimited
------------------------------------------------
THE TUTORIAL
When working with your own colors, play with the Blend Mode and/or Opacity at your own discretion
From now on I use the terms "MIRROR" and "FLIP" again.
Mirror: Mirror horizontal - Flip: Mirror vertical
Let’s get started.
Remember to save your work often
Some print screens have other colors than the original.
Colors :
Foreground color : Color 1
Background color : Color 2
1
Open the alpha channel : 524_KaD_Alfakanaal
Window – Duplicate
Minimize the original – we continue on the copy
2
Plugins – Mehdi – Wavy Lab 1.1 – see PS
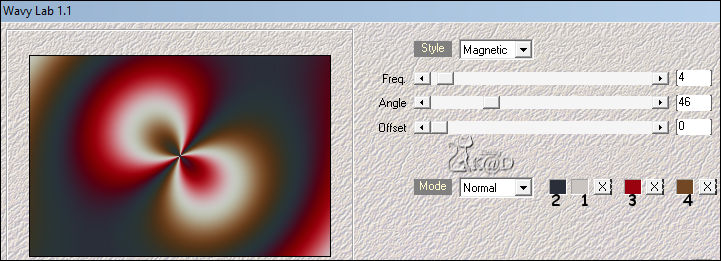
3
Effects – Image effects – Seamless Tiling – DEFAULT
Adjust – Blur – Gaussian blur : 40
Select all
4
Activate and copy : KaD_Woman_244
Return to your work
Edit – Paste into selection
Select none
Effects – Image effects – Seamless Tiling – DEFAULT
Adjust – Blur – Radial blur– see PS
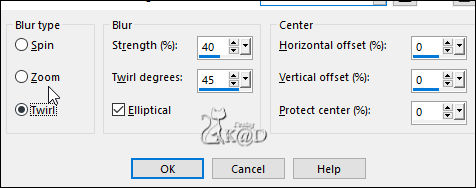
5
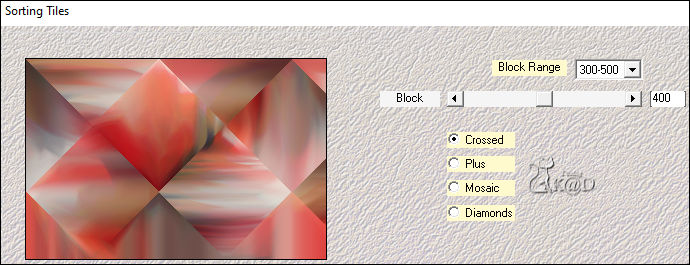
Plugins – Mehdi – Sorting Tiles – see PS
6
Effects – Edge effects – Enhance
7
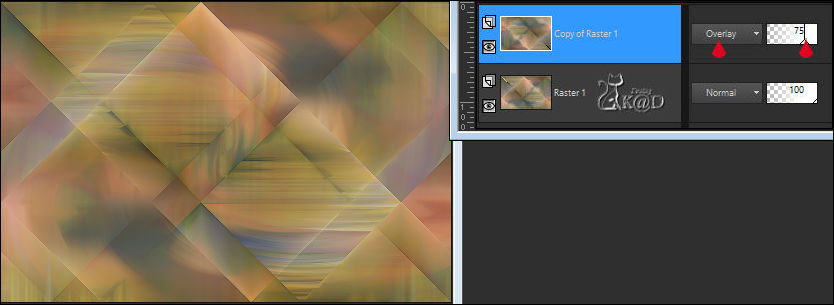
Layers – Duplicate
Image – Mirror and Flip
Change Blend mode to Overlay and Layer opacity to 75
Result
8
Layers – Merge – Merge visible (Merged)
Adjust – Sharpness – Sharpen
9
Change Foreground color to Color 5
Layers – New Raster layer
Fill with foreground color
Layers – New Mask layer – From image “Narah_Mask_1437” – see PS
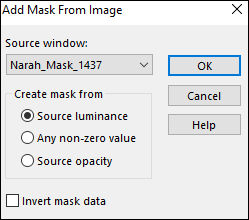
Layers – Merge – Merge group (Group – Raster 1)
Change Blend mode to Overlay
10
Layers – New Raster layer (Raster 1)
Selections – Load/Save Selection – Load Selection From Alpha Channel – Selectie 1 – see PS
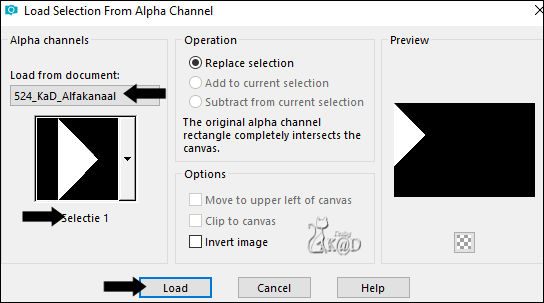
Fill selection with background color (Color2)
Effects – Texture effects – Blinds – Color 3 – see PS
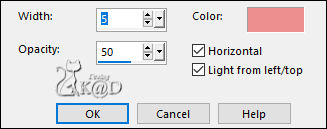
Select none
11
Effects – Image effects – Seamless Tiling – see PS
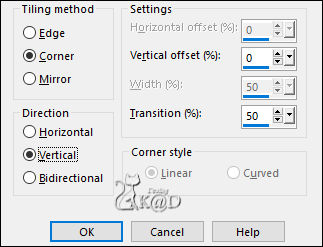
Layers – Duplicate
Image – Mirror and Flip
Layers – Merge – Merge down
Change Blend mode to Hard Light
12
Layers – New Raster layer
Fill with foreground color
Layers – New Mask layer – From image “Narah_Mask_1412” – see PS
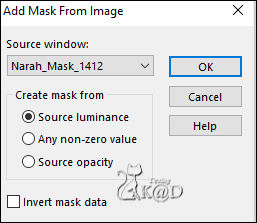
Layers – Merge – Merge group (Group – Raster 2)
Adjust – Sharpness – Sharpen more
13
Layers – New Raster layer (Raster 2)
Selections – Load/Save Selection – Load Selection From Alpha Channel – Selectie 2 – see PS
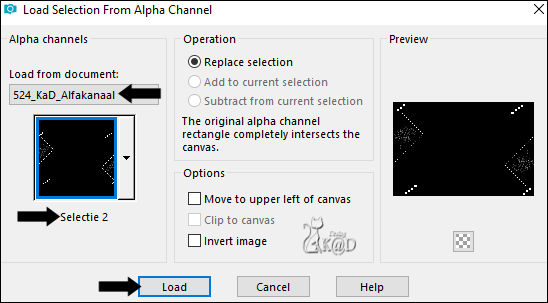
Fill selection with Foreground color (click 3x)
Select none
Effects – 3D- Effects – Drop Shadow : V&H 2 – 75 – 2 – Color #000000
14
Activate and copy : 524_KaD_Element1
Edit – Paste as a new layer (Raster 3)
Press K – Pos X : 89 – Pos Y : 4 – Press M UITLEG
Effects – 3D- Effects – Drop Shadow : V&H 2 – 50 – 5 – Color #000000
15
Activate and copy : KaD_Woman_244
Edit – Paste as a new layer (Raster 4)
Image – Resize : 56%, all layers NOT checked
Objects – Align – Bottom
16
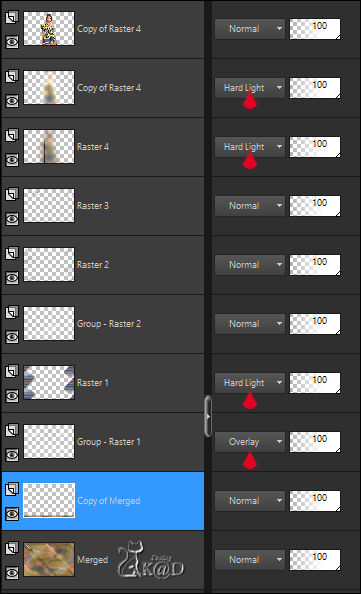
Layers – Duplicate (Copy of Raster 4)
Activate the layer just below (Raster 4)
Adjust – Blur – Gaussian blur – same values
Plugins – Toadies – Ommadown – DEFAULT
Change Blend mode to Hard Light
17
Layers – Duplicate (Copy of Raster 4)
Effects – Distortion effects – Wind : From Left – 100
Blend mode still on Hard Light
18
Activate top layer
Effects – 3D- Effects – Drop Shadow : V 0 – 7 – 50 – 30 – Color #000000
Adjust – Sharpness – Unsharp Mask : 2 – 30 – 2 – no check marks
19
Activate bottom layer (Merged)
Layers – Duplicate
Plugins – MuRa’s Meister – Perspective Tiling – see PS *
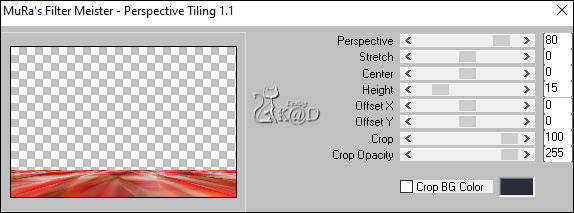
* Or use my element “524_KaD_Element_Vloer_Punt19”
Paste as new layer and Align – Bottom
Go to Point 20-1
20
Effects – Geometric effects – Cylinder Horizontal – : Strength op 50
20-1
Effects – 3D- Effects – Drop Shadow : V&H 0 – 60 – 30 – Color #000000
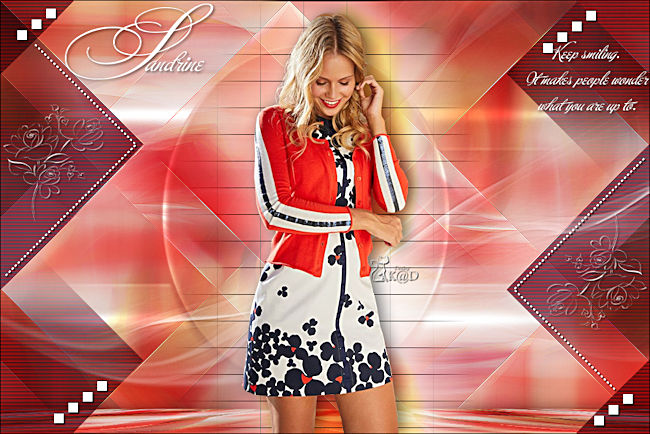
Result
21
Image – Add Borders : 1 pix Color 6
Select all
22
Change Foreground color to color 1
Image – Add Borders : 35 pix Color 5
Selection Invert
Plugins – Mehdi – Wavy Lab 1.1 – see #1
Selection Invert
23
Effects – 3D- Effects – Drop Shadow : V&H 0 – 60 – 30 – Color #000000
Select none
24
Image – Add Borders :
1 pix Color 5
1 pix Color 6
25
Add your name or watermark,
Add my watermark to your creation HERE
26
Layers – Merge – Merge all (Flatten)
Image – Resize – Width 900 Pixels - Resize all Layers checked
Adjust – Sharpness – Unsharp Mask : 2 – 30 – 2 – no check marks
Save as JPG file and you're done!
I hope you enjoyed this tutorial
Karin
05/10/2023
Mail me your version 
Extra Ex tube from Renée
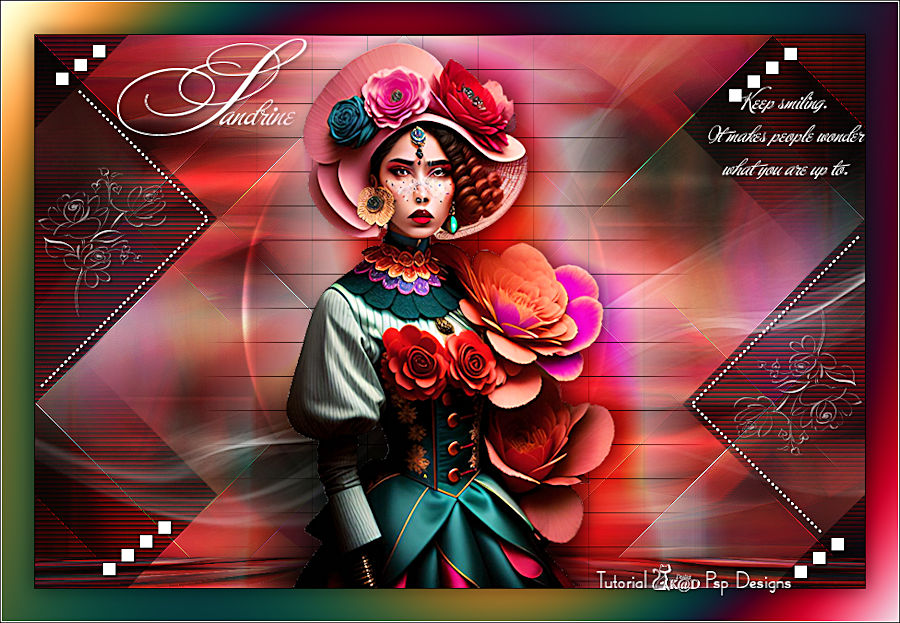
Extra Ex tube from Jeanne (JvdE)

Click on banner below to go to the gallery


