Materials for the tutorial :
Disclaimer :
Each Graphic is the property of the original artist to whom the copyright
belongs and may not be placed in a collection or offered for sale on-line or otherwise.
1/ KamilTube-2846-BG
2/ KaD_Woman_AIGenerated_265
Alpha Selections : open in PSP and minimize
(this image is not empty – it contains alpha selections)
1/ 538_KaD_Alfakanaal
Masks : open in PSP and minimize
1/ Narah_mask_0866
Filter Preset : double click to install
1/ KaD_538_Glow
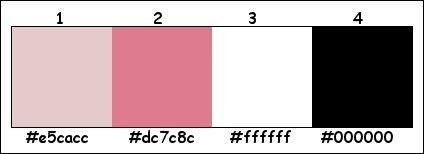
Color palette :
If you work with your own colors, make your own color palette with the alpha channel,
so you can easily switch between your colors.
There are color differences in the different versions of Psp.
Therefore, use the html codes of the color palette to be sure,
that you have the same colors. Also when merging layers, there may be color differences.
Plugins :
1/ Unlimited 2.0 – VM Distortion – Sausage (-)
2/ Unlimited 2.0 – VM Distortion – Tiles a GoGo (-)
3/ Carolaine & Sensibility – CS-LDots
4/ Alien Skin – Eye Candy 5 – Impact : Gradient glow – Glass
5/ Toadies – Ommadown
(-) Import into Filters Unlimited
------------------------------------------------
THE TUTORIAL
When working with your own colors, play with the Blend Mode and/or Opacity at your own discretion
From now on I use the terms "MIRROR" and "FLIP" again.
Mirror: Mirror horizontal - Flip: Mirror vertical
Let’s get started.
Remember to save your work often
Some print screens have other colors than the original.
Colors :
Foreground color : Color 1
Background color : Color 2
1
Open the alpha channel : 538_KaD_Alfakanaal
Window – Duplicate
Minimize the original – we continue on the copy
2
Select all
Activate and copy : KamilTube-2846-BG
Edit – Paste into selection
Select none
3
Effects – Image effects – Seamless Tiling – Default but Transition to 100
Adjust – Blur – Gaussian blur : 20
4
Layers – Duplicate (Copy of Raster 1)
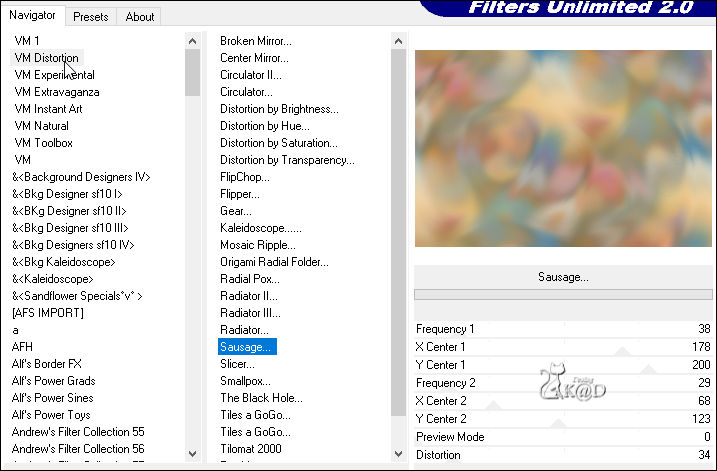
Plugins – Unlimited 2.0 – VM Distortion – Sausage – Default – see PS
5
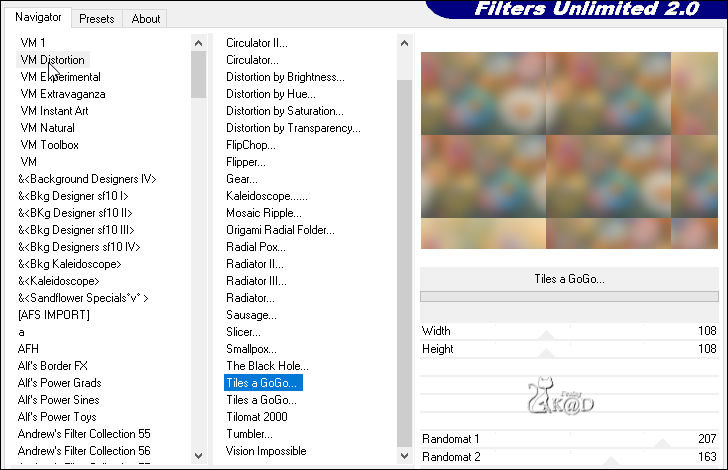
Effecten – Unlimited 2.0 – VM Distortion – Tiles a GoGo – see PS
6
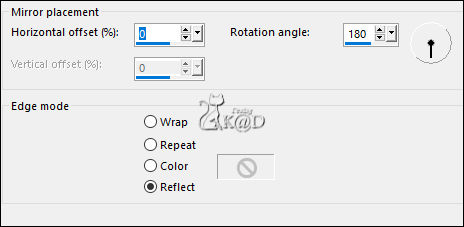
Effects – Reflection effects – Rotating Mirror – see PS
7
Select all
Selection – Modify – Contract : 30
Selection invert
Press Delete on the Keyboard
Select none
8
Layers – Duplicate (Copy (2) of Raster 1)
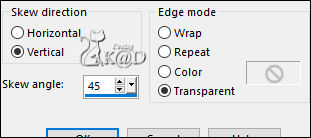
Effects – Geometric effects – Skew – see PS
9
Plugins – Carolaine & Sensibility – CS-LDots – Default
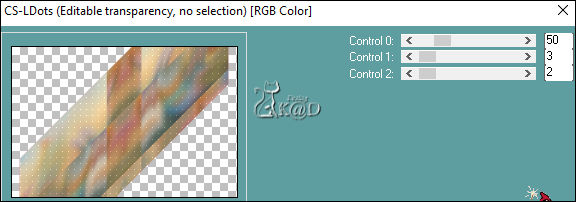
Effects – Edge Effects – Enhance
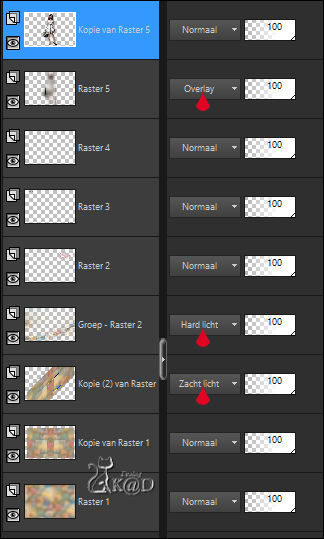
Change Blend mode to Soft Light
10
Activate Copy of Raster 1
Effects – 3D-effects – Drop shadow : VH 0 – 60 – 25 – Color #000000
11
Activate top layer (Kopie (2) van Raster 1)
Repeat drop shadow
12
Layers – New Raster layer (Raster 2)
Select all
Activate and copy : KamilTube-4324-BG
Edit – Paste into selection
Select none
13
Layers – New Mask layer – From Image “Narah_mask_0866” – see PS
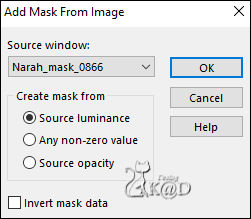
Layers – Merge – Merge group (Group - Raster 2)
Change Blend mode to Hard Light
14
Layers – New Raster layer (Raster 2)
Selections – Load/Save Selection – Load Selection From Alpha Channel – Selectie 1 – see PS
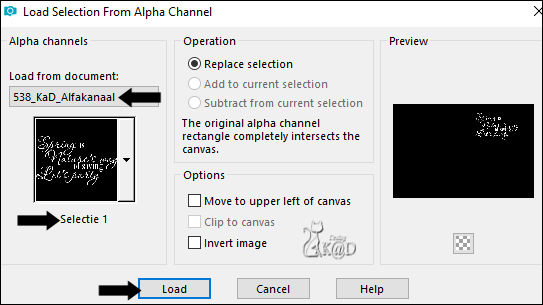
Fill selection with Background color
Select none
15
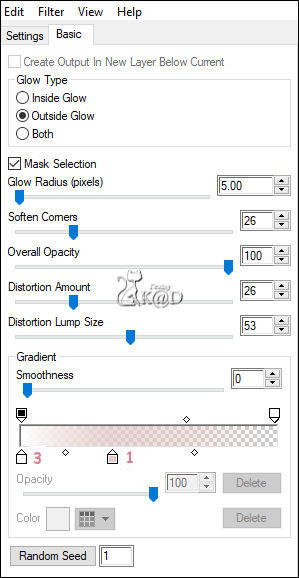
Effecten – Alien Skin – Eye Candy 5 – Impact – Gradient glow :
Choose the preset on the left : KaD_538_Glow or enter manually – see PS
16
Effects – 3D-effects – Drop shadow : V&H 2 – 35 – 2 – Color #000000
17
Image – Resize: 80%, all layers unchecked
Press K – Pos X : 588 – Pos Y : 44 – Press M UITLEG
18
Activate Raster 1
Select all
Selection – Modify – Contract : 30
Selection invert
Selections – Promote selection to layer
Select none
Image – Flip
Change Layer opacity to 50
Layers – Merge – Merge down
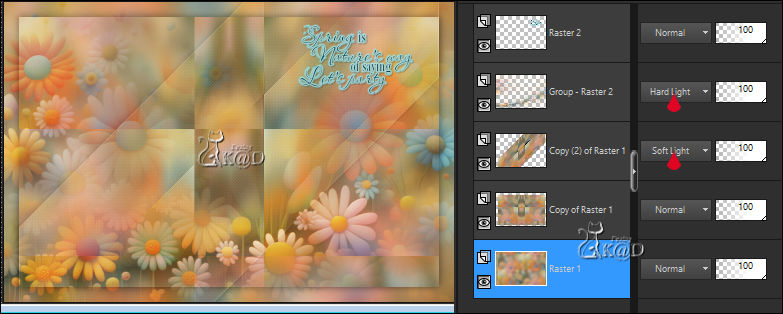
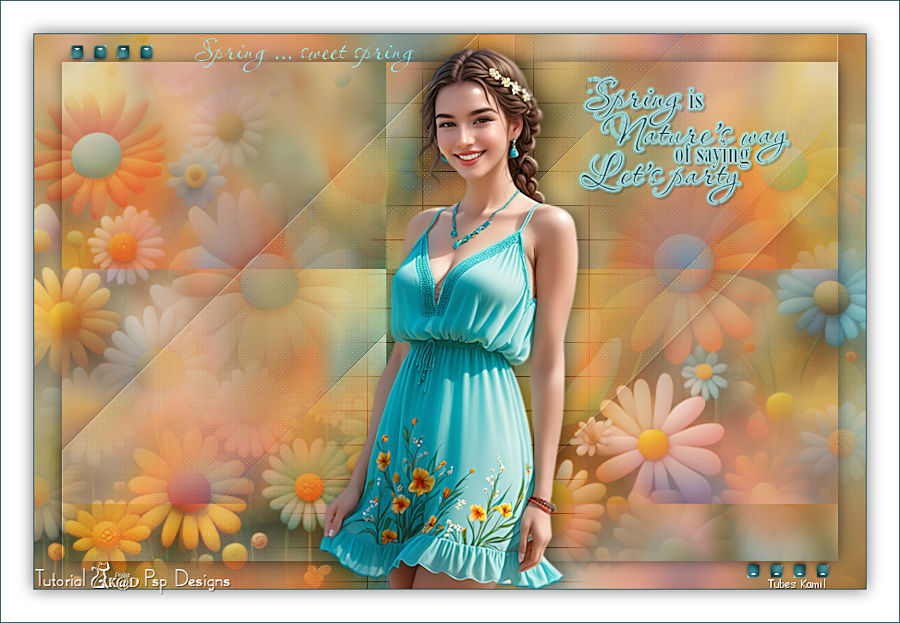
Result
19
Activate top layer
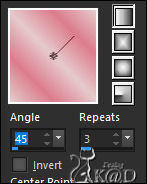
Change Foreground color to Gradient – see PS
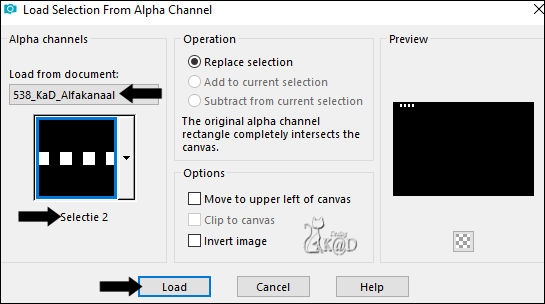
Selections – Load/Save Selection – Load Selection From Alpha Channel – Selectie 2 – see PS
Layers – New Raster layer (Raster 3)
Fill selection with Gradient
Effecten – Alien Skin – Eye Candy 5 – Impact – Glass : Clear
Select none
20
Layers – Duplicate
Image – Mirror – Flip
Layers – Merge – Merge down
21
Change foreground gradient back to Color 1
Layers – New Raster layer (Raster 4)
Selections – Load/Save Selection – Load Selection From Alpha Channel – Selectie 3 – see PS
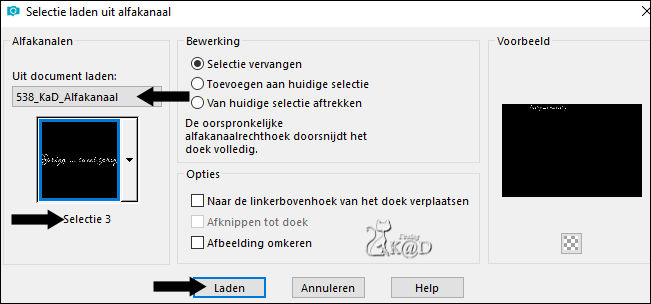
Fill selection with foreground color
Select none
22
Activate and copy : KaD_Woman_AIGenerated_265
Edit – Past as a new layer (Raster 5)
Image – Resize: 85%, all layers unchecked
Move a little bit up
23
Layers – Duplicate (Copy of Raster 5)
Activate the layer just below (Raster 5)
Adjust – Blur – Gaussian blur : 20
Effecten – Toadies – Ommadown – Default
Change Blend mode to Overlay
24
Activate top layer (Copy of Raster 5)
Effects – 3D-effects – Drop shadow : V 0 – H 7 – 50 – 30 – Color #000000
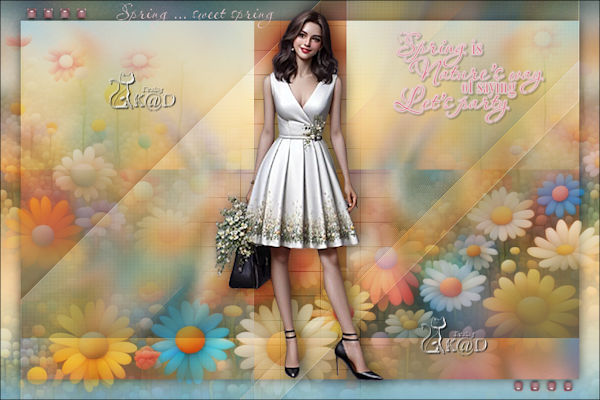
Result
25
Image – Add Borders :
1 pix Color 2
Select all
35 pix Color 3
Effects – 3D-effects – Drop shadow : VH 0 – 60 – 25 – Color #000000
Select none
26
Add your name or watermark,
Add my watermark to your creation HERE
If you use my AI-made tubes, please also add this watermark from me: “AIGeneratedAndTubedByKaD”
Thanks !
27
Image – Add Borders : 1 pix color 2
Image – Resize – Width 900 Pixels – Resize all Layers checked
Adjust – Sharpness – Unsharp Mask : 2 – 30 – 2 – no check marks
Save as JPG file and you're done!
I hope you enjoyed this tutorial
Karin
27/01/2025
Mail me your version 
Extra ex tubes by KaD & Kamil

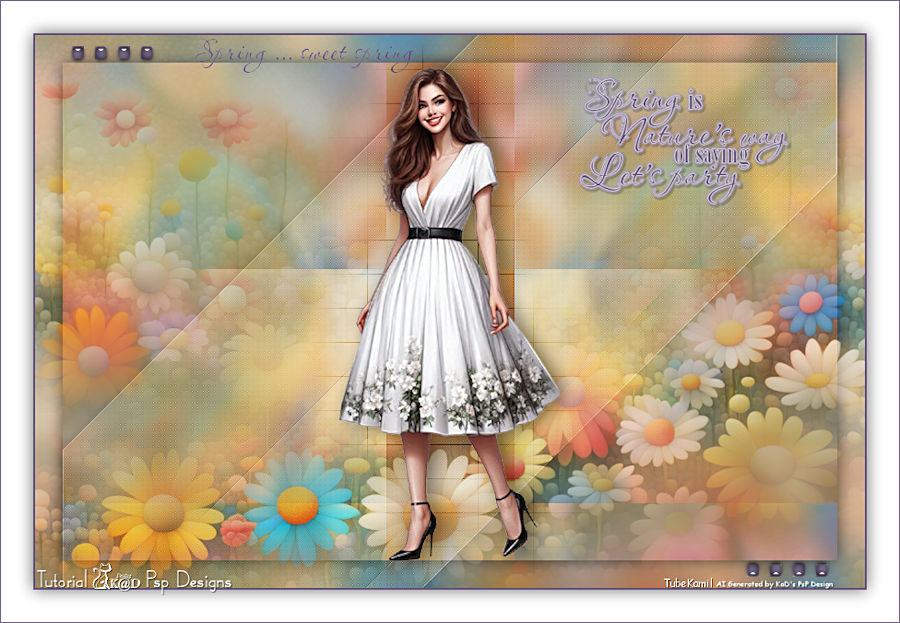
Extra ex tubes by Kamil


Click on banner below to go to the gallery


